How to Upload Documents
Documents can be added to Trial Interactive in a multitude of ways. When it comes
to Collaborate/eISF rooms, we recommend using the following method:
- Start by navigating to the Document Library
Index view, then select the desired upload location (folder) and
right-click on it to start adding documents. Refer to the screenshot
below.
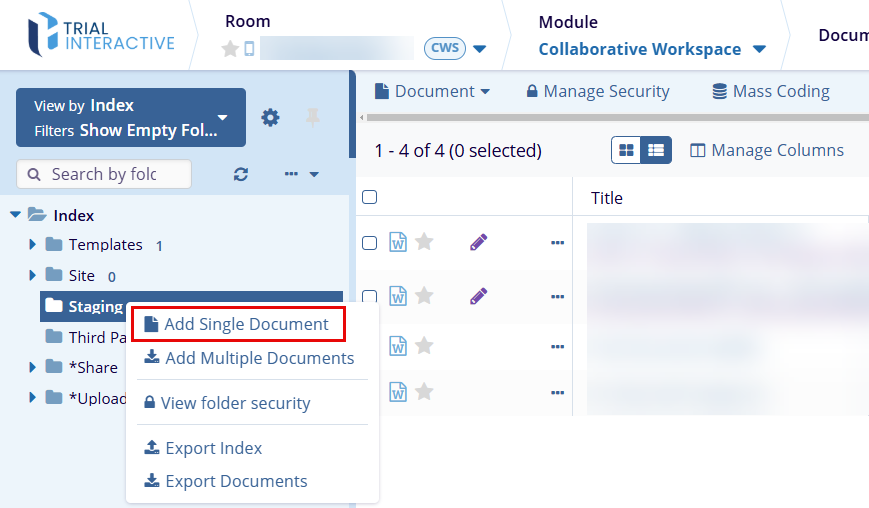
- Click the Add single document to open the 'New Document' pop-up window.
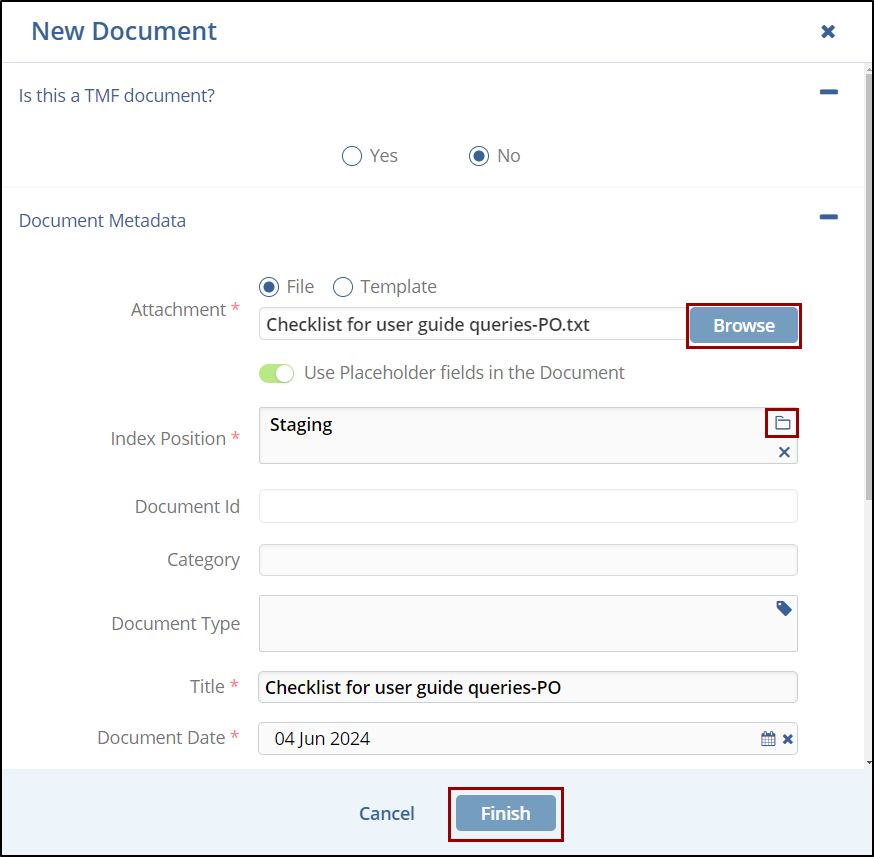
- Select the appropriate radio button for the question - 'Is this a TMF
document?' Note: Selecting the Yes or No button changes the options displayed below in the popup window.
- Select the appropriate radio button for the 'Document Metadata' field.
- Click the Browse button and select the required document to be uploaded.
- If required, click the toggle button for using the placeholder fields in the document.
- Select the Index position by clicking on the Folder icon.
- Enter the Title and the Document Date and click Finish to complete
the process.
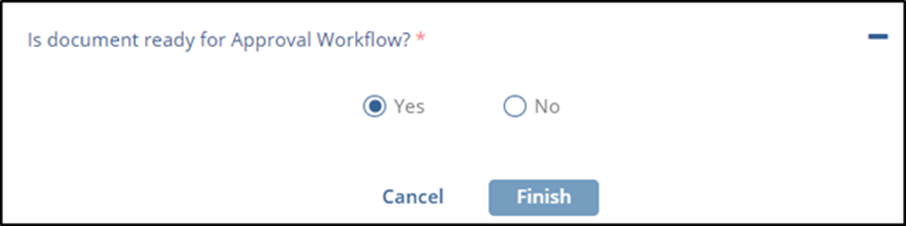
- Additionally, when adding a single document, it is possible to define
whether the document is ready for a Workflow - that is, we don't expect
changes to be made to the content prior to review and approval. Selecting
‘Yes’ as shown in the screenshot below will allow the document to be
assigned to review and signature workflows immediately after
upload.
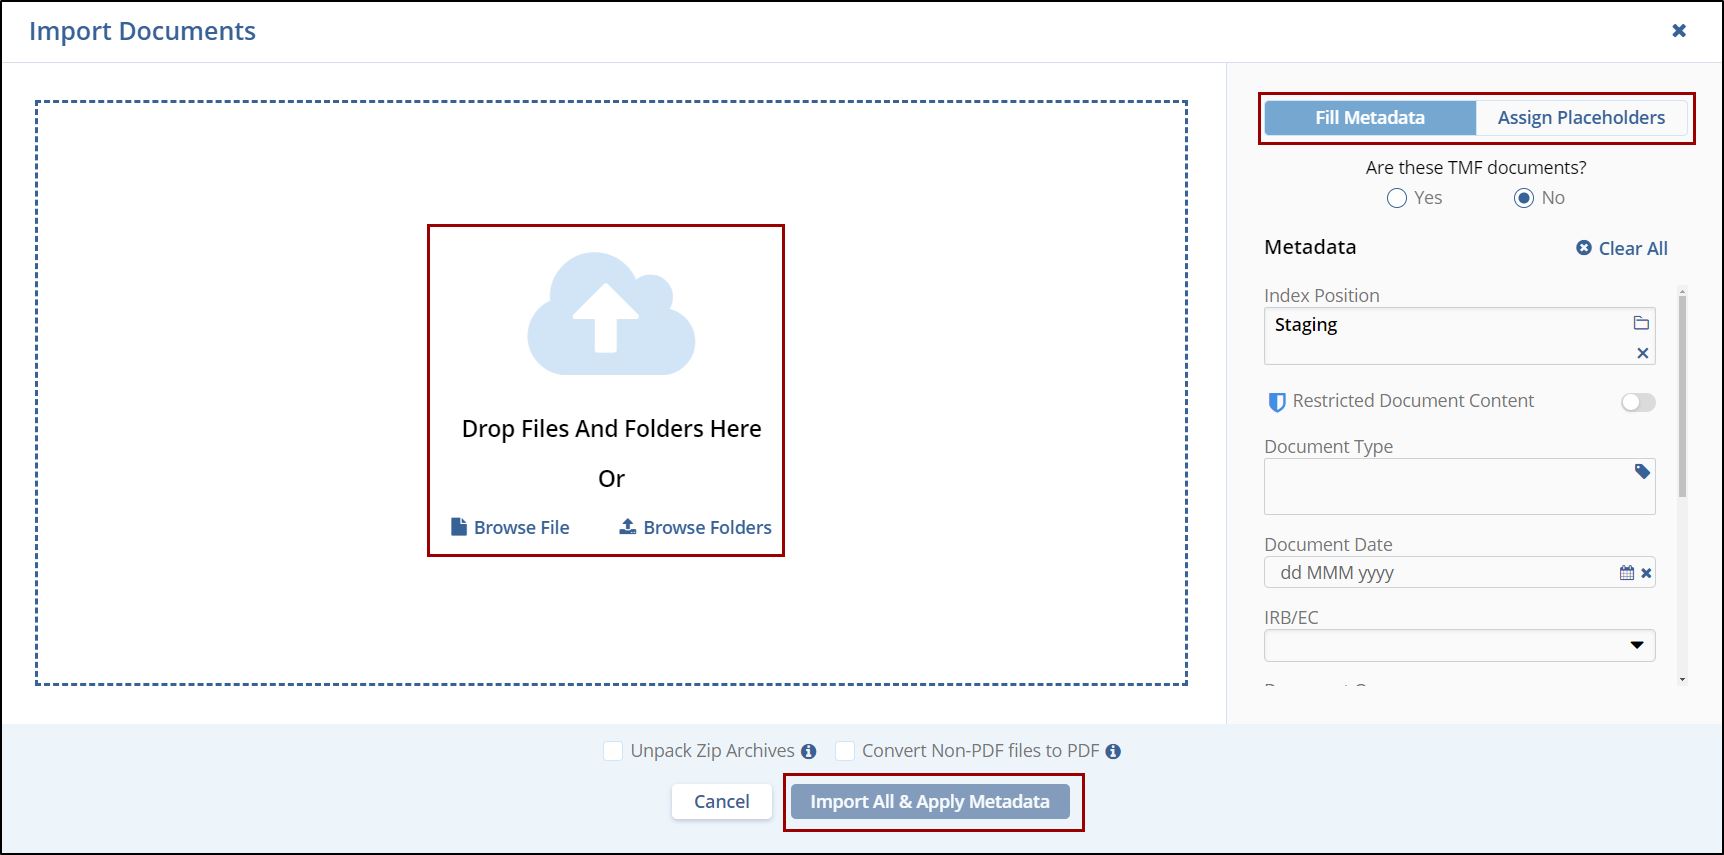
In case multiple documents are needed at once for upload,
- Choose the Add Multiple Documents option.
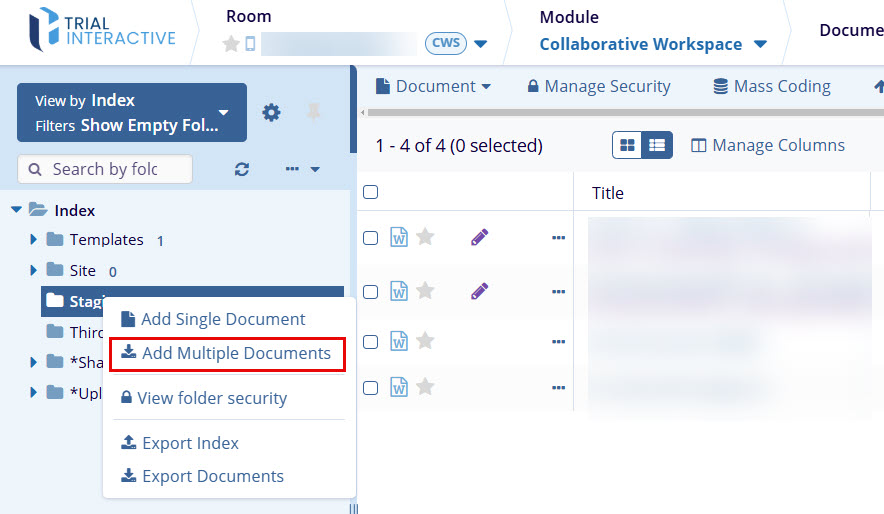
- A different upload window opens. (Notice the ability shown in step #3. To define documents as ready for workflow is lost using this method).
- Drag documents into the white space on the left (or Browse your device contents).
- Use the Documents Metadata interface on the right to configure metadata for your documents if desired. Uncheck the Documents Metadata box to deactivate the fields.
- Click on Import or Import and Apply Metadata when ready to begin
the file upload.
TransPerfect’s Trial Interactive is an industry leader in practical, global eClinical innovation
PRODUCTS
 Linkedin
 X
X
Didn’t find what you need?
Our dedicated Project Management and Client Services team will be available to meet your needs
24 hours a day, 7 days a week.
Toll Free:
(888) 391-5111
help@trialinteractive.com
© 2025 Trial Interactive. All Rights Reserved
