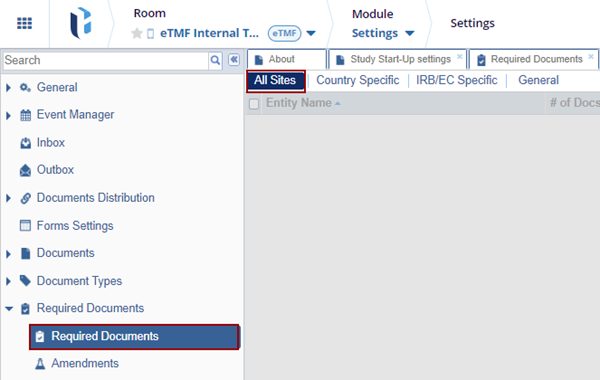
Setting Up Required Documents for All Sites
To allow users to add essential documents for sites, the document types must be configured by the administrator. Additionally, the required documents for sites can be set up through the Settings module.
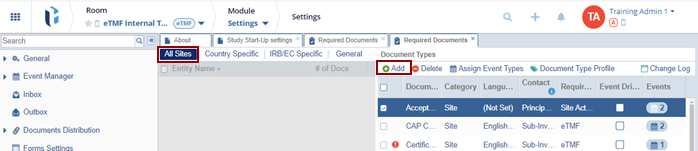
To add the required documents for All Sites, follow the steps below.
- From the left section of the panel, the user can select the category (Sites, Country, IRB/EC, and General) of the Required Documents. By default, the All-Sites category is selected.
- Click on the All-Sites tab.
- From the right section of the panel, named as Document Types,
the user can:
- Add or Delete a Required Document to the category selected from the left pane.
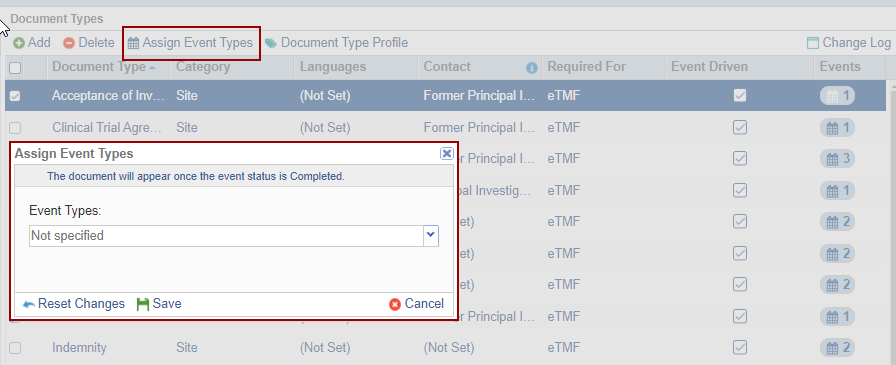
- Locate the document type and click Assign Event types which will help the users to enable Event Types.
-
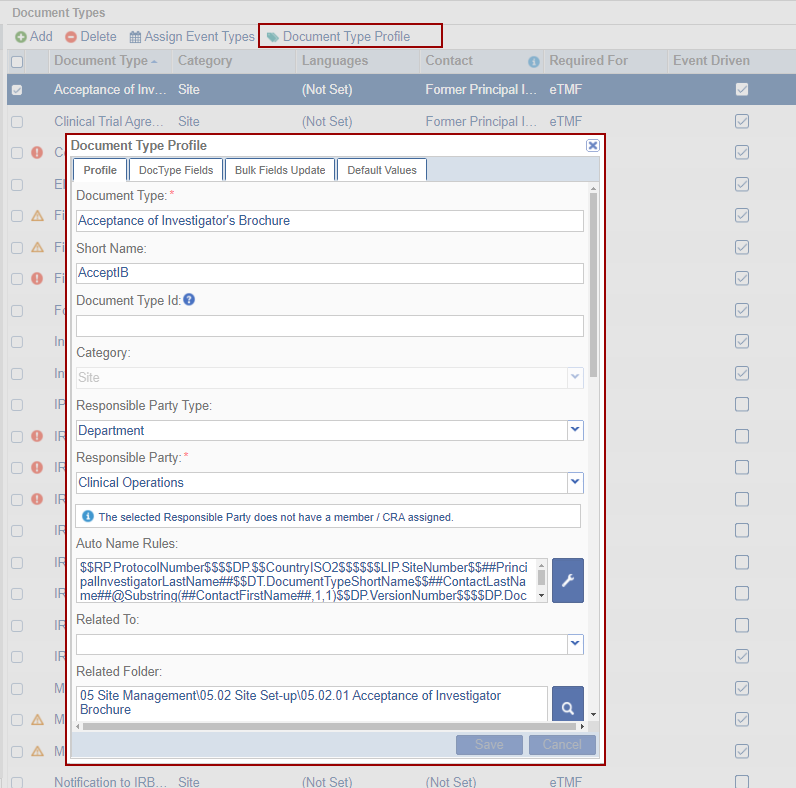
- Document Type Profile display All fields shown in the screenshot below.
-
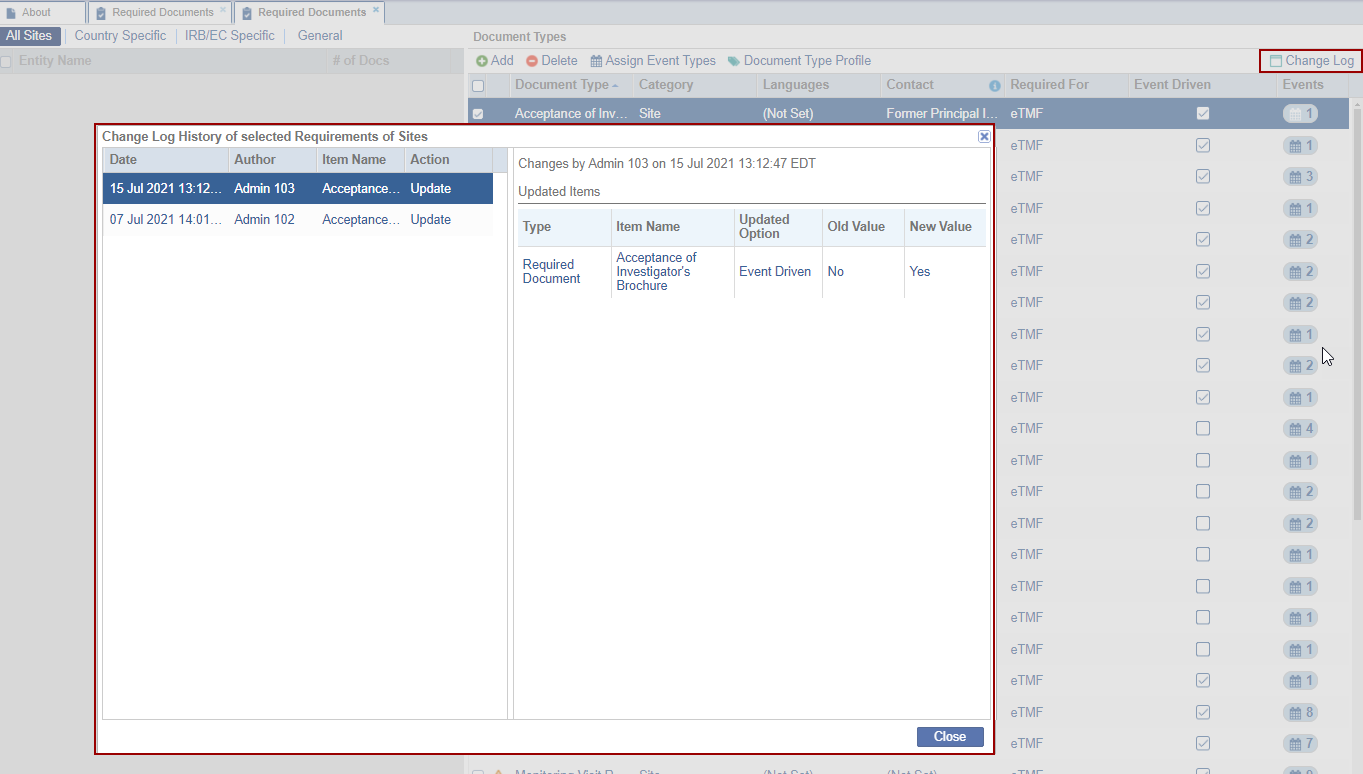
- View the activity log of the selected category from the Change Log.
- Adding Documents to the List of Documents
- Click the relevant tab from the left panel of the
Required Documents menu.
-
- For Country and IRB/EC documents, pick the relevant country or IRB/EC.
-
- Click Add from the top ribbon bar of the
Document Types window on the right.
- The Required Documents window is displayed to add Required Documents for All Sites under specific categories.
- Click the folder from which you need to select the
Required Documents and click the
checkbox next to one or all of the documents to be required.
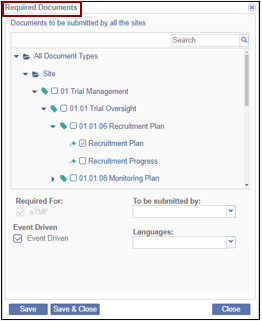
- Select whether the document(s) will be required for Site Activation or eTMF by clicking the checkbox.
- From the dropdown menus to the right, if necessary, select:
-
- Required For: This is the Study Contact who is responsible for providing the selected required documents
- Languages: Select the language from the list to be applicable to the Required Documents.
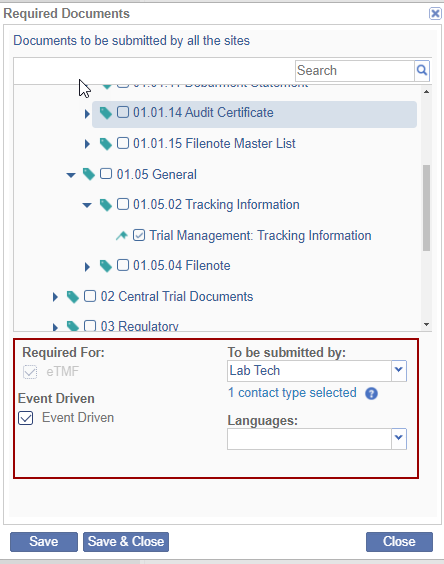
Note: Document types that need to be submitted by different contact types need to be set up separately.
-
- Click Save & Close if you have documents from only one category folder to add or click Save if you need to add more required documents.
Note: If documents are to be provided by different study contacts, click Save, then return to the documents list. Select the next set of documents, specify whether they are required for Site Activation or eTMF, choose the contact type from the dropdown, and click Save. Repeat this process until all required document types for all contacts have been added, then click Save & Close.
Deleting Documents from the List of Required Documents
To delete a Required Document:
- Click the All Sites tab from the left panel of the Required Documents Panel.
- From the list of Required Document Types in the grid, tick the checkboxes to select the Required Document Types to be deleted.
- Click Delete from the top ribbon bar of the
Document Types window on the right.
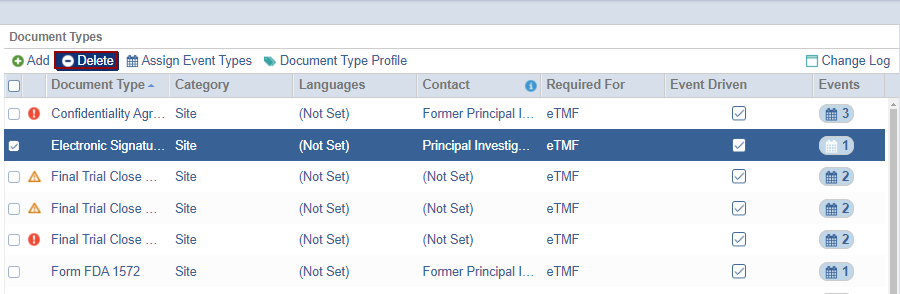
- The Required Document Types are removed from the list.
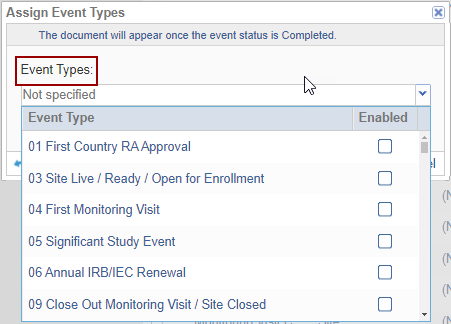
Assign Event types
- The Assign Event Types will help to enable Event Types.
- Click Assign Event Types the Assign Event Types window is displayed.
- The user needs to select the Event Types as per the requirement.
- Either the user can Reset Changes or Save the changes.
Document Type Profile
-
- The Document Type Profile displays All fields available in the Required Documents.
- Click Document Type Profile the Document Type
Profile window is displayed.
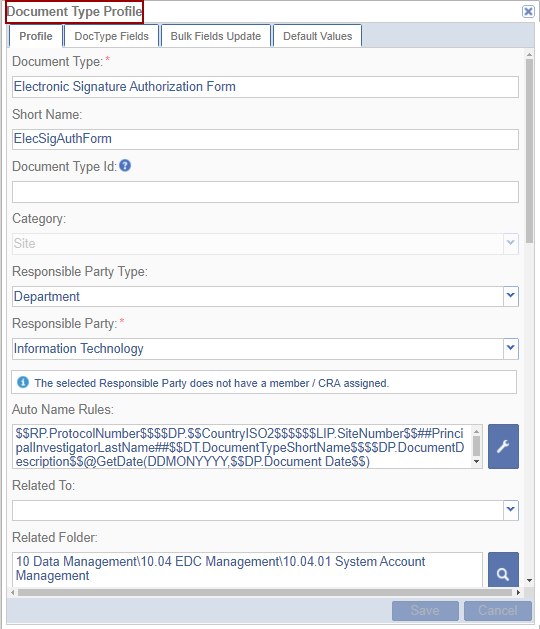
- The Document Type Profile displays the following sections:
- Profile
- Doc Type Fields
- Bulk Fields Update
- Default Values
Note: To configure the Country Specific and IRB/EC Specific settings, refer to the standard steps of All Site settings detailed in the.
 Linkedin
 X
X
