Accessing myTI in offline mode
To access myTI in offline mode, follow the steps below:
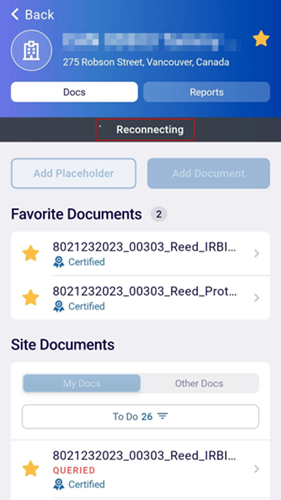
- Without an active internet or wireless connection, the myTI user interface displays
the Reconnecting.
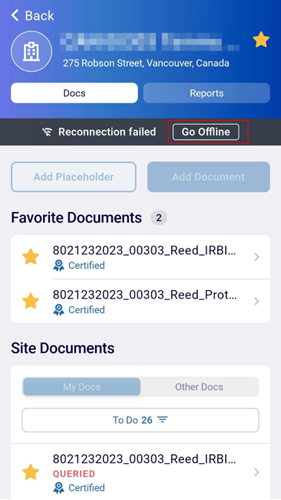
- Click on the Go Offline.
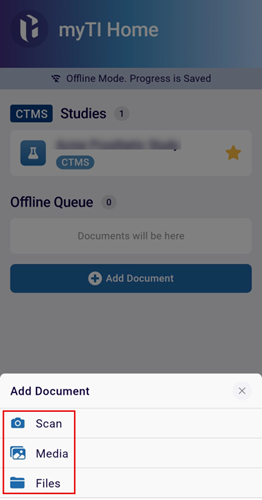
- Click on the +Add Document button.

- Select an option to add a document from the available list. i.e., Scan,
Media or Files.
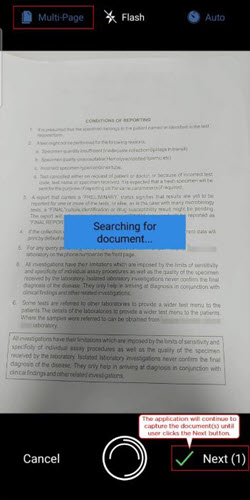
- Select the Scan option and scan the required documents. Once all the required
documents are scanned, click on the Next button.
- On the Document Preview page, perform the following actions, if required, or
else click on the Next button to proceed further.
.png)
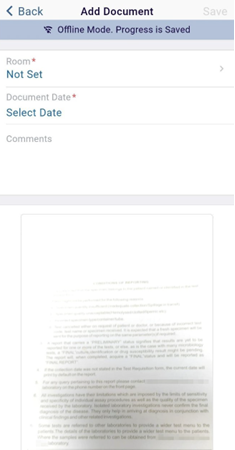
Note: Refer to Step 4 from the Scan section for the standard actions to be performed on the Document Preview page. - On the Add Document screen, add the following mandatory details and click on
the Save button.
-
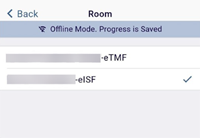
Room*: Click on the field, select the required room, and click on the <Back
button. The field will display Not Set unless a room is selected.
-
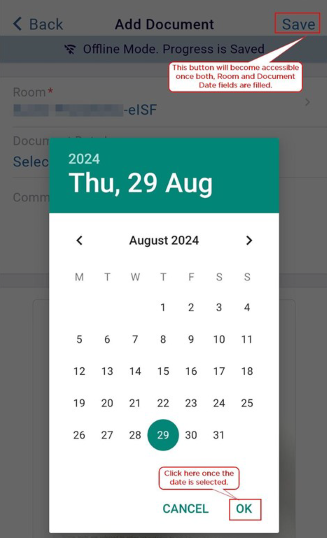
Document Date*: Click on the field and select the appropriate date from the date
selection tool.
-
Room*: Click on the field, select the required room, and click on the <Back
button. The field will display Not Set unless a room is selected.
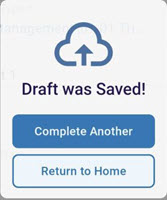
- Once the document is successfully added, the application
displays the success message with the following two options.
- Complete Another: Add another document by following the similar steps of accessing myTI offline mode.
-
Return to Home: Navigate back to myTI Home page.
- Click on the Go Online button once myTI displays a ‘You are Connected’
message when an active internet or wireless connection gets reestablished.
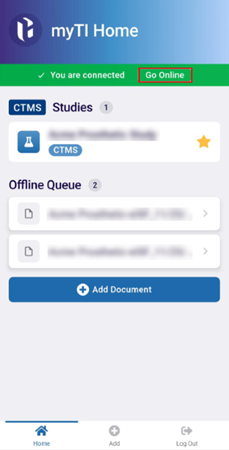
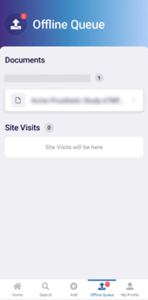
- Click on the Offline Queue tab to view the pending documents.
- Click on the Submit All button (in case of Light Submission)
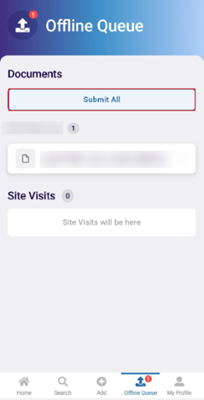
Note: If the company code is configured with Full Submission, the Offline Queue screen will not show the Submit All button. Additional Steps for company code with Full Submission configured.
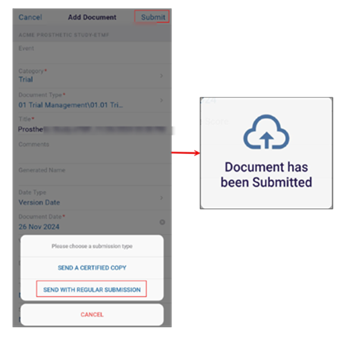
- Click on the document to open the metadata panel.
- Enter the mandatory metadata details into the respective fields and click on the
Submit button.
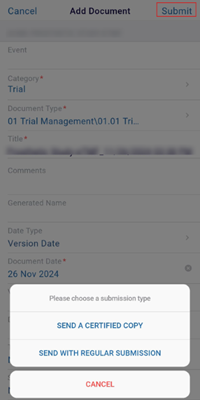
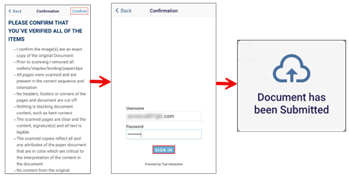
- Select a submission type from the available options.
- Send a Certified Copy
- If this option is selected, click on the Confirm button on the Confirmation screen.
- Enter the Username and Password and click on the SIGN IN button.
- Once the document is submitted, the application displays the corresponding
success message.
- Send with Regular Submission
- If this option is selected, the document is submitted without
certifying, and the application displays the corresponding success
message.
- If this option is selected, the document is submitted without
certifying, and the application displays the corresponding success
message.
- Send a Certified Copy
TransPerfect’s Trial Interactive is an industry leader in practical, global eClinical innovation
PRODUCTS
 Linkedin
 X
X
Didn’t find what you need?
Our dedicated Project Management and Client Services team will be available to meet your needs
24 hours a day, 7 days a week.
Toll Free:
(888) 391-5111
help@trialinteractive.com
© 2025 Trial Interactive. All Rights Reserved
