Docs
The Docs page helps the user add a document and also displays the Favorite Documents, Room Documents – Browse Document Index, Workflow Documents – Claimed and Unclaimed, and Need E-Signature documents.
Add Document
To add a document, click on the Add Document button and follow the standard steps detailed in the +Add section.
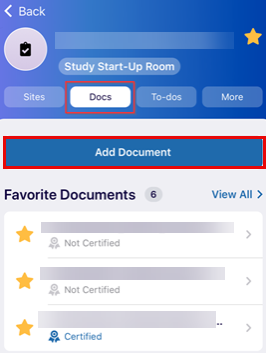
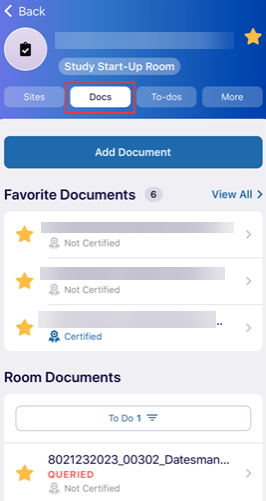
Favorite Documents
Click the grey star next to the document, site, or room name to mark it as a favorite. The star will turn yellow to indicate it is marked as a favorite. Click the yellow star again to remove it from the favorites.
Room Documents
This displays the documents that are available in the room. The user can filter the documents with the below-displayed options. Select a document from the available list to make any changes in the document, mainly to update the document image, create a general query, or make any other changes in the fields mentioned.
Add Response and Update Document image.
To add a response and update the document image, follow the steps below.
- Click the document that needs to be added with a response. This opens the Document View page.
- Click the Add Response button. The user is redirected to the ‘Activity Log’ on the same page.
- Enter the required response in the ‘Add Comments’ section and click the Submit
button displayed at the top right corner.
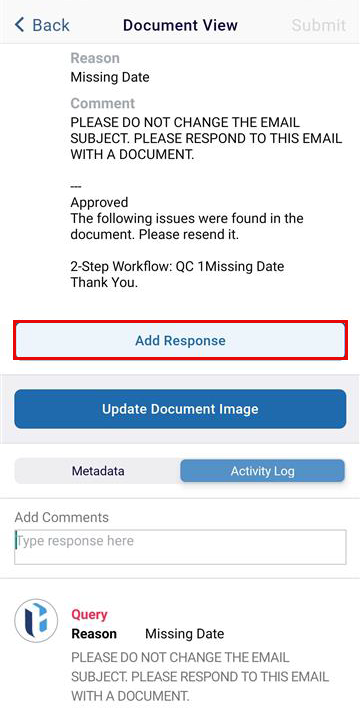
- Click on the Update Document Image button and follow the steps to make the required modifications detailed in the +Add section.
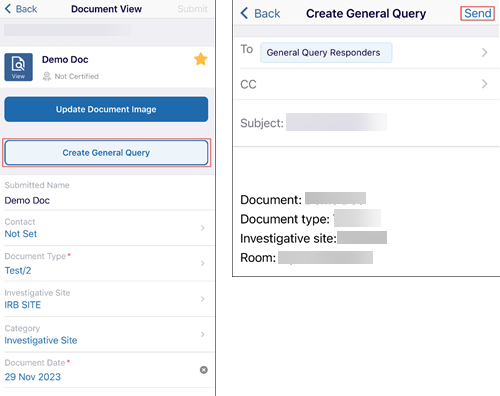
Create General Query
To create a general query, follow the steps below.
- Click the Create General Query button displayed on the mobile screen.
- This opens the email window. Click the Send button displayed in the top right
corner.
Restricted Documents
The Restricted Documents section displays the Waiting for Redaction and Redacted tab.
Workflow
The Workflow section displays Unclaimed and Claimed documents that are currently in the workflow.
| Note: To view the documents in this section, the user requires appropriate access permissions granted by the Super Administrator. |
An Unclaimed document, once Claimed, is reflected under the Claimed tab.
Follow the steps below to Claim a document.
- Click the View All button in the top-right corner to view and claim the required documents.
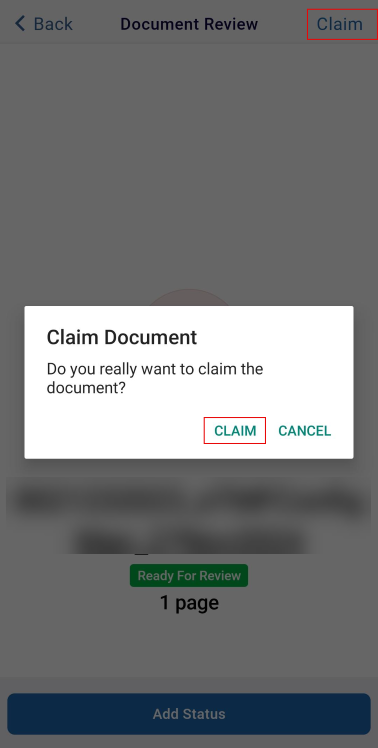
- Select a document to open it on the Document Review page.
- Click the Claim button in the top-right corner, then confirm by clicking the Claim button
in the confirmation window. A 'Document Claimed' notification will appear on the
screen.
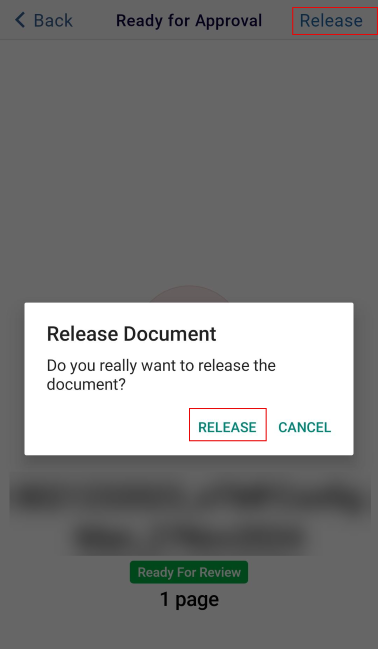
- Click on the Release button on the top right of the screen. Select the RELEASE option of
the confirmation popup.
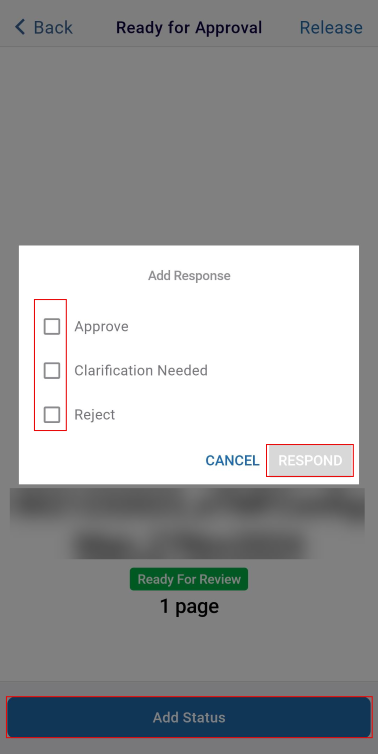
- Click the Add Status button displayed at the bottom of the screen. This displays the Workflow Approval options at the bottom of the screen.
- Select a response and click on the RESPOND button.
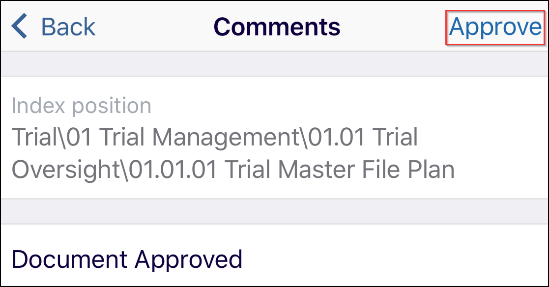
- If approve is selected, enter the comments in the empty field if required. Click the
Approve button displayed in the top right corner.
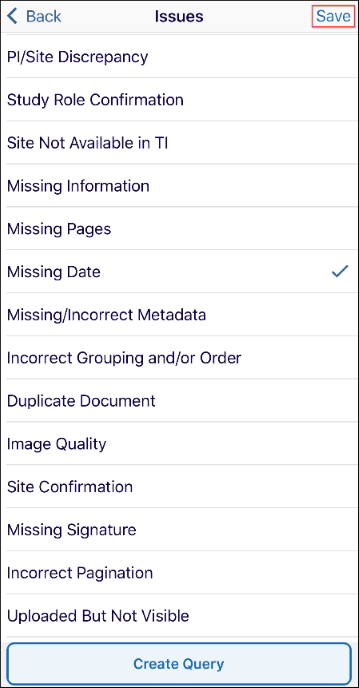
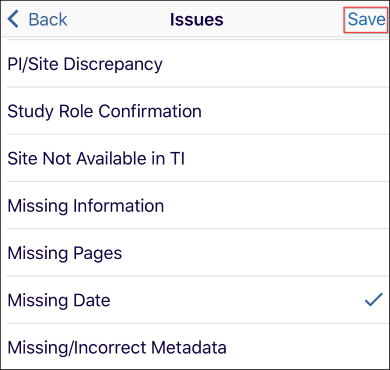
- If the Clarification Needed button is selected, select the appropriate issue from
the list available. Click the Save button displayed in the top right corner.
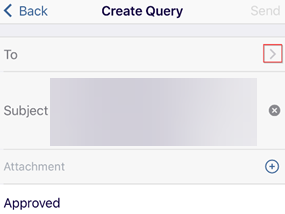
- Additionally, click on the Create Query button. This opens the Create Query page. Click
the ‘>’ arrow for the ‘To’ field. Select the recipient to whom the query needs to
be mailed.
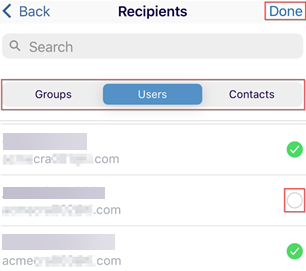
- The ‘Users’ tab is displayed by default. Select the required tab – Group, Users, or Contacts as per requirement.
- Click the Done button displayed in the top right corner.
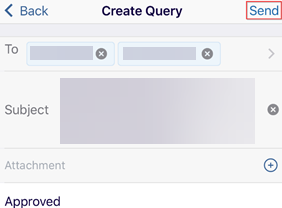
- On the Create Query screen, enter attachments or comments if required and click on the
Send button.
- If the Reject is selected, select the issue from the list available and click the
Save button. The ‘Document Rejected’ notification is displayed on the screen. The
user is redirected to the Workflow page.
Important
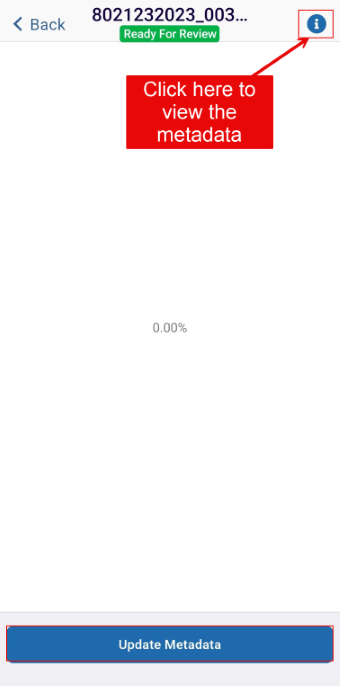
- To change the metadata of the selected document, click anywhere on the screen OR the Ready for Review button displayed in the center of the mobile screen.
- Click the Update Metadata button displayed at the bottom of the screen. This opens the metadata of the document. Make the required changes and click the Save button displayed in the top right corner.
- The ‘i’ icon is displayed in the top right corner; by clicking this button, the user can
only view the metadata of the document and cannot edit any fields.
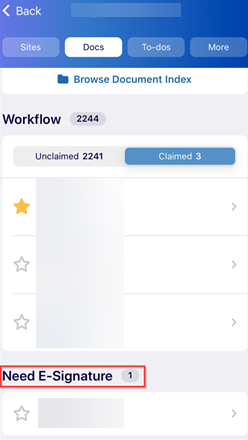
Need E-Signature – Sign
This tab displays all the documents that require an e-signature of the user. Click on the document that is to be signed electronically.
| Note: To view the documents in this section, the user requires appropriate access permissions granted by the Super Administrator. |
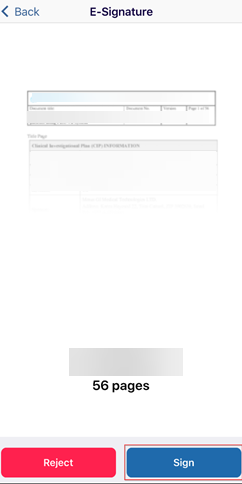
Follow the steps below to e-sign a document.
- Click on the document that requires e-signature from the Need E-Signature
section.
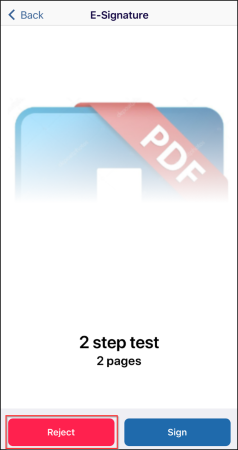
- The E-Signature page opens with the Reject and Sign button at the bottom of the window.
- Click the Sign option.
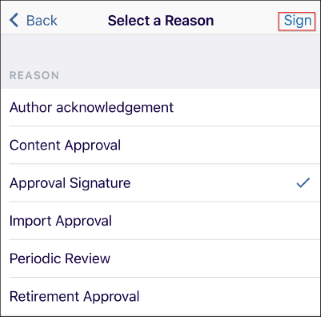
- The Select a Reason window is displayed. Select the appropriate reason to e-sign the document. The selected reason displays a blue tick mark.
- Again, click the Sign button displayed in the top right corner.
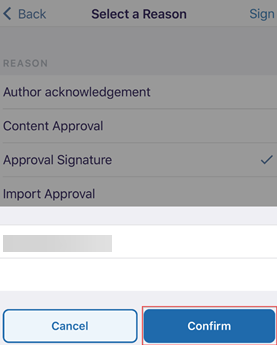
- The application asks the user to verify themselves by entering the username and password.
- Click the Confirm button.
- The ‘Document was signed’ is displayed on the screen.
Need E-Signature – Reject
Follow the steps below to reject a document for E-Signature –
- Click on the document that requires e-signature from the Need E-Signature
section.
.png)
- The E-Signature page opens with the Reject and Sign button at the bottom of the window.
- Click the Reject option.
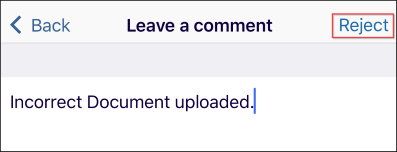
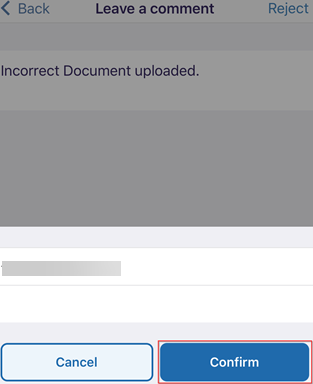
- This opens the ‘Leave a Comment’ page. Enter a comment in the field displayed to enable
the Reject option.
-
The application asks the user to verify themselves by entering the username and password.
- Click the Confirm button.
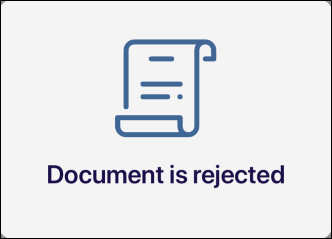
- A notification ‘Document is rejected’ is displayed on the screen.
TransPerfect’s Trial Interactive is an industry leader in practical, global eClinical innovation
PRODUCTS
 Linkedin
 X
X
Didn’t find what you need?
Our dedicated Project Management and Client Services team will be available to meet your needs
24 hours a day, 7 days a week.
Toll Free:
(888) 391-5111
help@trialinteractive.com
© 2025 Trial Interactive. All Rights Reserved
