Edit Dashboard
The Edit Dashboard allows users to customize the dashboard by adding or removing tabs, reorganizing layout options, and customizing the dashboard to show the information that is most important to the user.
To Edit the Dashboard, follow the steps below:
- Click on the Dashboard button located at the top left of the toolbar.
- Click on the Edit Dashboard button the Set Up Your Dashboard window will appear.
- The Set Up Your Dashboard includes following options:
- Set Up Dashboards: For selecting or adding widgets.
- Set Up KPI Dashboard: For managing key performance indicators.
-
Set Up Layout: For customizing the layout.
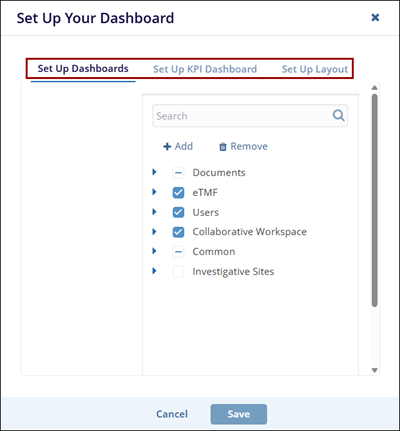
Set Up Dashboards
The Set-Up Dashboards tab allows users to customize their dashboards by adding, removing, or managing dashlets. Dashlets are individual components that display specific types of data or functionality on the dashboard, helping users personalize their view to highlight the most relevant information.
Follow the steps below to set up the dashboard:
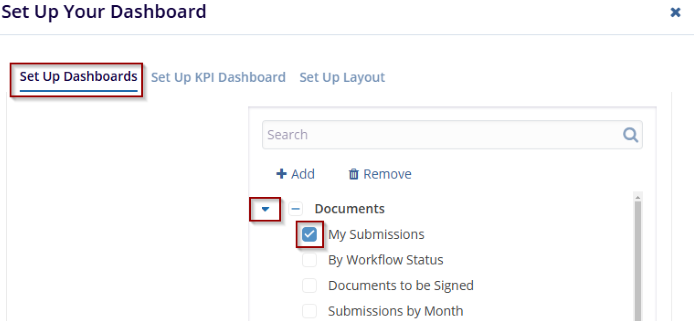
- Click on the Set-Up Dashboard tab.
- The Set Up Dashboard window will appear, expand the fields using the arrow, and select the
required checkbox.
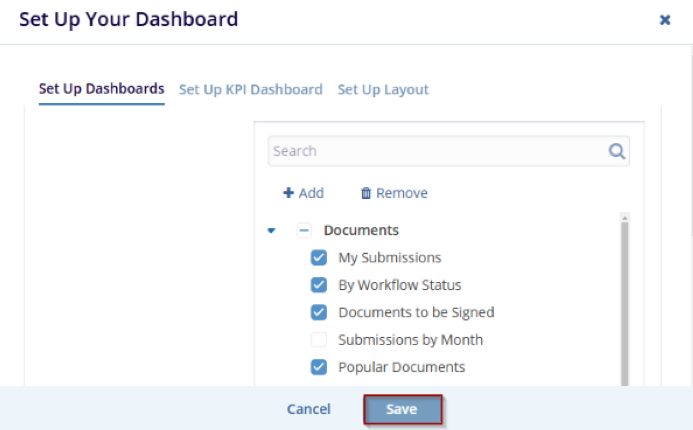
- Click on the Add button, and a new entry will appear under the list of available
dashlets as (collection Name). While adding a new dashlet, mention the Title and Description
in the left-side fields.

- Once all necessary changes are completed, click the Save button to apply the
changes.
 Note:
Note:The checkbox(s) selected for each dashlet from the set up your dashboard window will only display those tabs in the Dashboard.
- Click the Remove button to initiate the removal process. A confirmation window will appear with the message: ‘Are you sure that you want to remove the collection?’. Also, the user can only remove the newly added fields and not the pre-defined fields.
- Click Yes to confirm and remove the collection or click No to cancel the
action.

Set Up KPI Dashboard
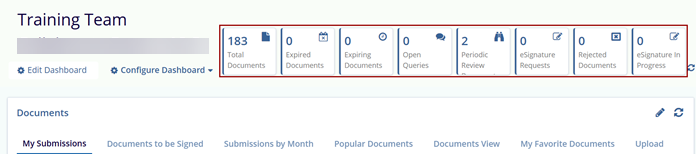
The Set Up KPI Dashboard allows users to configure key performance indicator (KPI) metrics on the user’s dashboard. The selected dashlets are displayed on the top right corner of the screen.
Follow the steps below to set up the KPI dashboard:
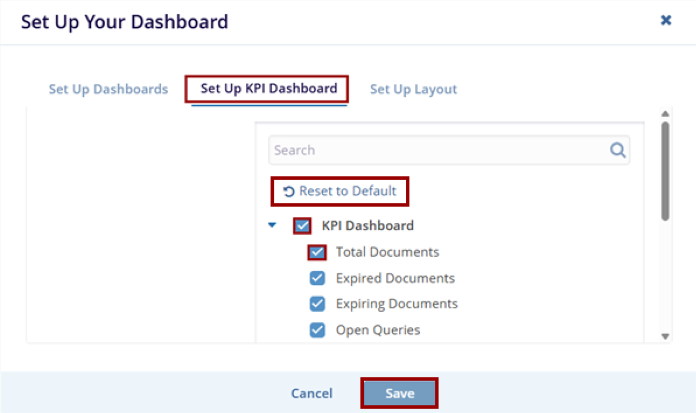
- Click on the Set Up KPI Dashboard tab on the Set Up Your Dashboard window.
- Expand the KPI Dashboard fields using the arrow and select the required checkbox.
- Click on Reset to Default to revert all KPI configurations to the original system-defined settings
- Once all necessary changes are completed. Click the Save button to apply the
changes or click the Cancel button to discard changes.
- The selected tabs are displayed on the top right of the screen.
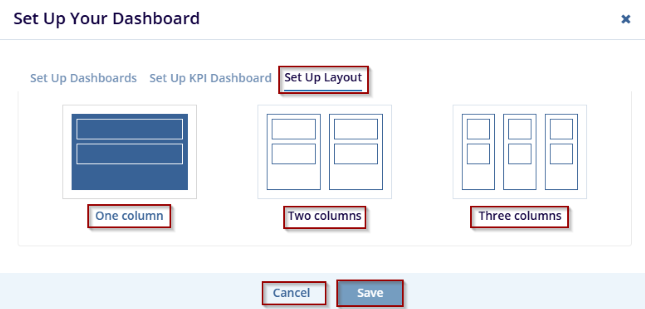
Set Up Layout
The Set-Up Layout allows users to customize the visual structure of the dashboard by choosing a column-based layout. This ensures that the dashboard is organized according to user preferences. The user has the option to select from – One, Two, or Three Columns.
Follow the steps below to set up Layout:
- From the Set Up Your Dashboard window, click on the Set-Up Layout tab.
- Select one of the available options for Layout:
- One Column: Arrange all dashlets in a single vertical column.
- Two Columns: Splits dashlets into two evenly spaced columns.
- Three Columns: Divides dashlets across three narrower columns.
- Click the Save button to confirm and apply the selected layout or the
Cancel button to discard the changes.
© 2025 Trial Interactive. All Rights Reserved
