Reject CAPA
Authorities within the workflow stages can reject a CAPA record based on the stage-specific configuration. Rejections typically occur during the Approval stage by the designated Approver. When a CAPA record is rejected, it is sent back to the previous stage. For instance, if a record is rejected at the Implementation Approval stage, it will return to the Implementation stage.
To reject a CAPA record, follow the steps below.
- Create a CAPA record as an originator user and send it to the first stage of the approval workflow by following the steps detailed in the Create CAPA section.
- As the authority in the first stage, complete the record and transition it to the next stage by following ‘STEP 1 to STEP 6’ detailed in the Approve CAPA section.
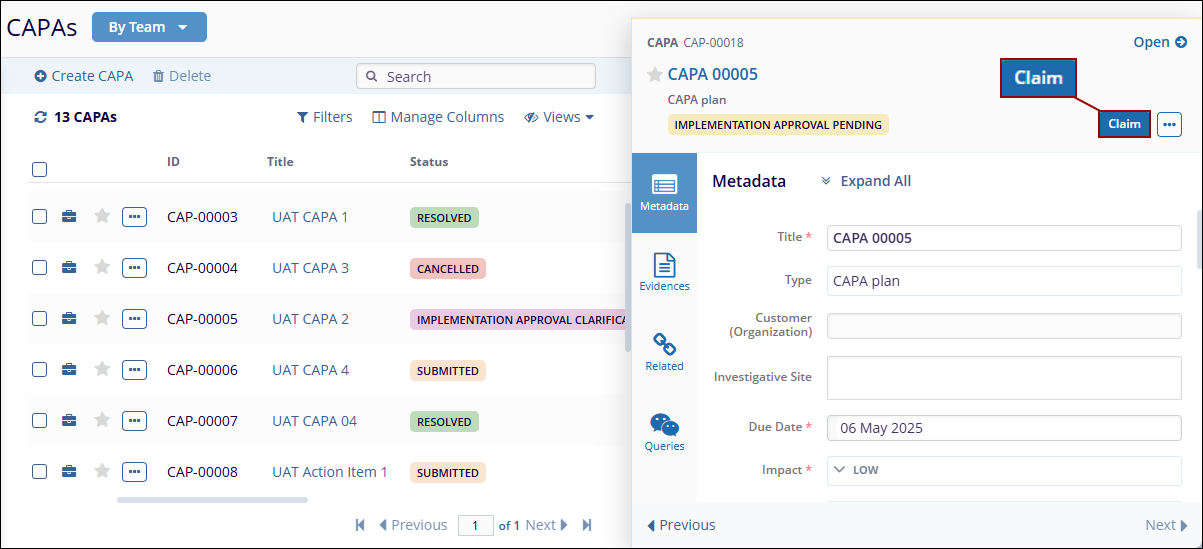
- As the assigned authority in the ‘Implementation
Approval’ stage, open the CAPA record and click on the Claim
button.
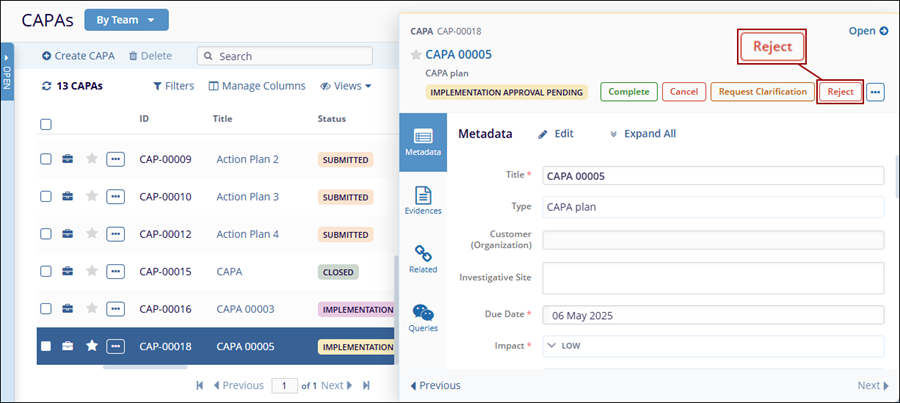
- Click on the ‘Reject’ button situated above the
quick view panel.
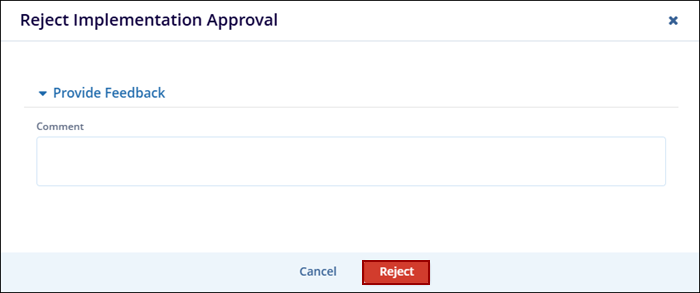
- On the ‘Reject Implementation Approval’ dialog box,
enter the necessary comments and click on the ‘Reject’
button.
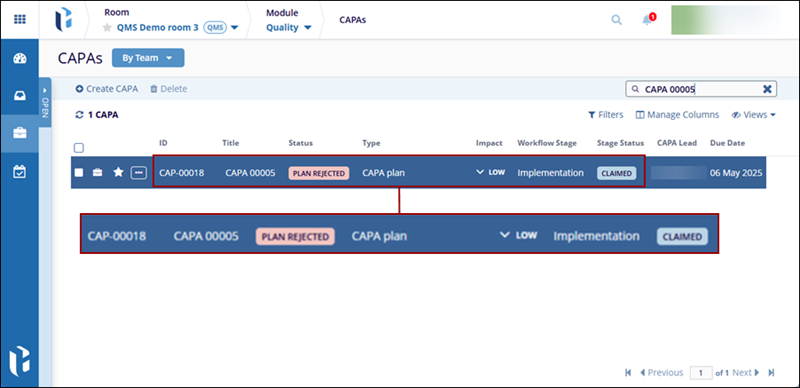
- Once the record is successfully rejected, it is transitioned
back to the previous stage and displays the statuses as configured
in the workflow.
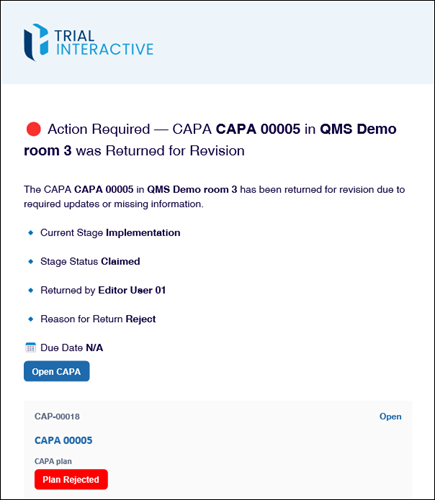
- Additionally, the authority in the previous stage of the
workflow receives an email notification stating the record is
returned for revision, depending on the notification’s
configuration in the workflow.
- As the authority in the previous workflow stage, make the necessary revisions and transition the record to the next stage.
- Approve the record in the last stage by following the steps detailed in the Approve CAPA section.
Important
- The display of forms, workflow status, record status, and available action buttons are determined by the configurations set in the QMS Workflow settings.
- If a stage has multiple assigned authorities, the record must be manually claimed by one of them to proceed.
TransPerfect’s Trial Interactive is an industry leader in practical, global eClinical innovation
PRODUCTS
 Linkedin
 X
X
Didn’t find what you need?
Our dedicated Project Management and Client Services team will be available to meet your needs
24 hours a day, 7 days a week.
Toll Free:
(888) 391-5111
help@trialinteractive.com
© 2025 Trial Interactive. All Rights Reserved
