Record Statuses
The Record Statuses tab allows Admin users to manage a list of statuses used in QMS workflows by adding, editing, or deleting the record statuses as needed. After configuring the record statuses in this section, the Record Status dropdown in the Workflow Creation wizard will display the available options.
Add Record Statuses
To add record statuses, follow the steps below:
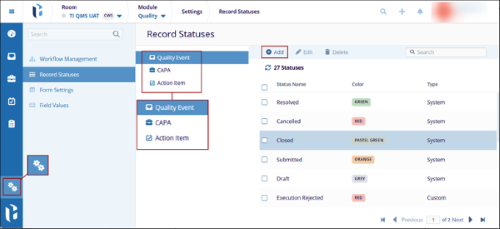
- From the Quality module, click on the Settings menu > Record Statuses.
- Select either Quality Event, CAPA, or Action Item to add record statuses to the respective forms.
- On the selected form, click on the +Add button.
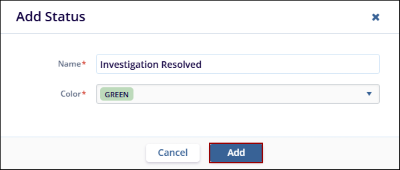
- On the Add Status dialog box, fill in the following fields and click on the Add
button.
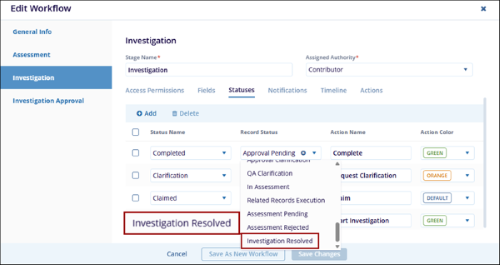
- After adding the required record statuses, users can assign a status within the workflow
stage using the Record Status dropdown.
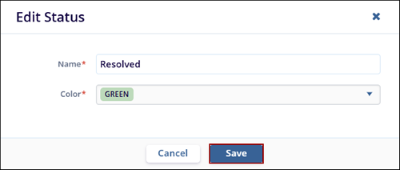
Edit Record Status
To edit a record status, follow the steps below:
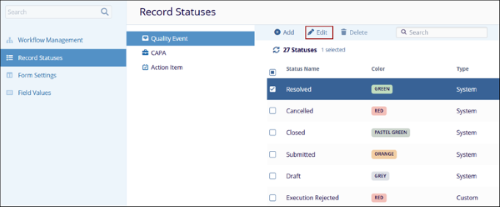
- Select a status from the Record Statuses screen and click on the Edit button.
- On the Edit Status dialog box, make the required changes to the Name* and Color* fields
and click on the Save button.
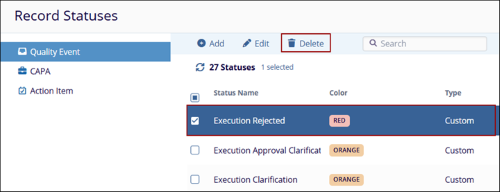
Delete Record Status
To delete record statuses, follow the steps below:
- Select a custom record status from the Record Statuses screen and click on the
Delete button.
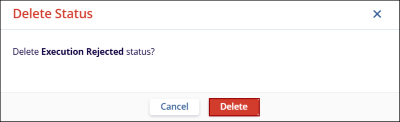
- Click on the Delete button on the confirmation popup.
Note: Users are not allowed to edit System Statuses. When a system
record status is selected, the Delete button is disabled.
© 2025 Trial Interactive. All Rights Reserved
