Create Incident
This section explains how to create an Incident in the Quality Module. To create an Incident, the ‘Create Incident’ Action should be added to the user in the User Management Module.
Steps to Create an Incident in the Quality Module:
- From the Home Page, navigate to the room where to perform this activity.
- Click the Waffle Menu located at the top-left
corner of the screen, then select Quality Module.
The user will be redirected to the Quality Module’s
Dashboard screen.
.png)
- In the left navigation panel, click the Incidents icon, which will open the Incident screen.
- On the Incidents screen, click the + Create
Incident button.

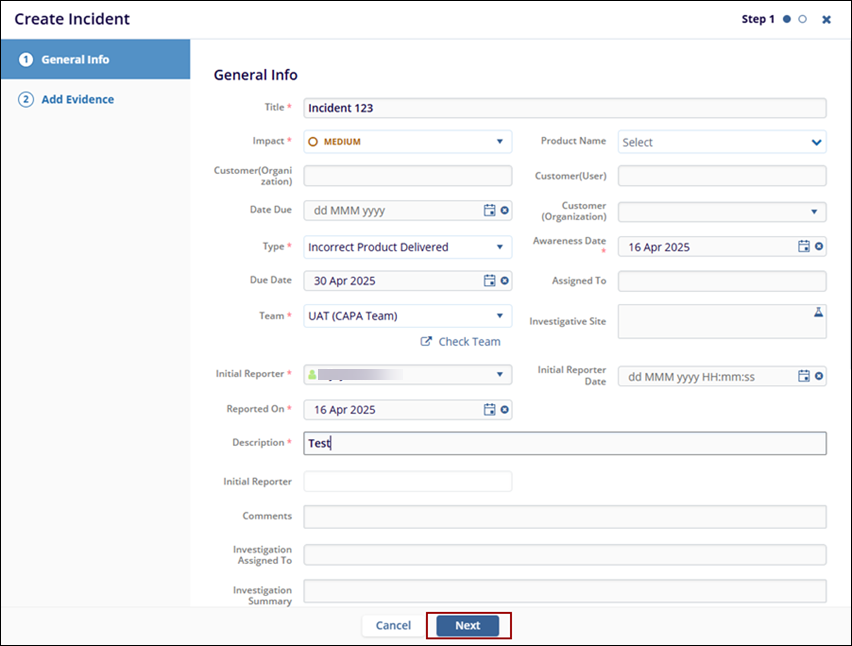
- Fill in the mandatory fields such as Title, Impact, Type, Due
Date, Team, Initial Reporter, Reported Date, Description and
Awareness Date as shown in the screenshot below. After completing
all required fields, click Next.
Note: Users can make the changes in the metadata and Evidence until it is submitted.
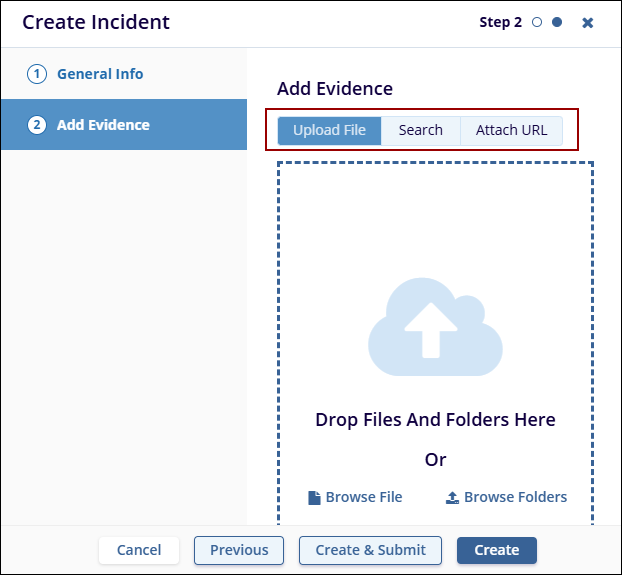
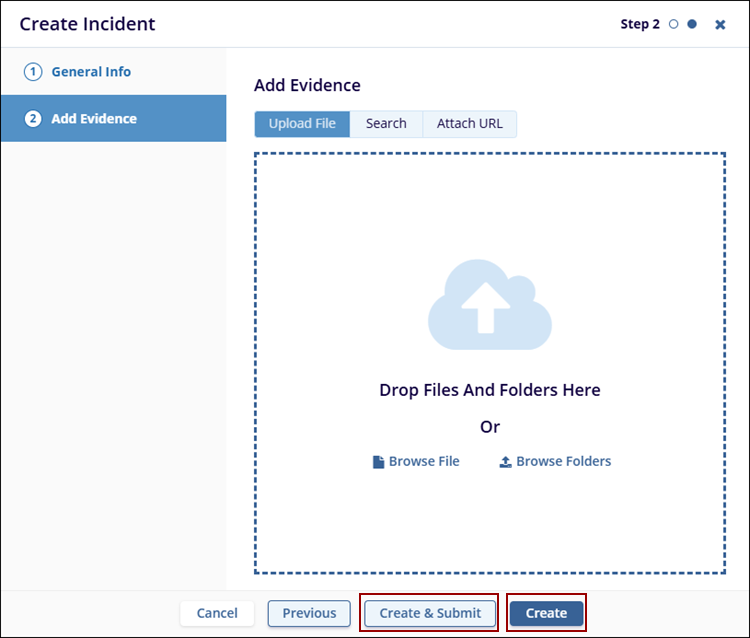
- In the Add Evidence screen, users have three options to Add Evidence.
- The First Option is Upload File. To use this option, click
‘Upload File’ and drag and drop files or browse
the folders to select the documents.
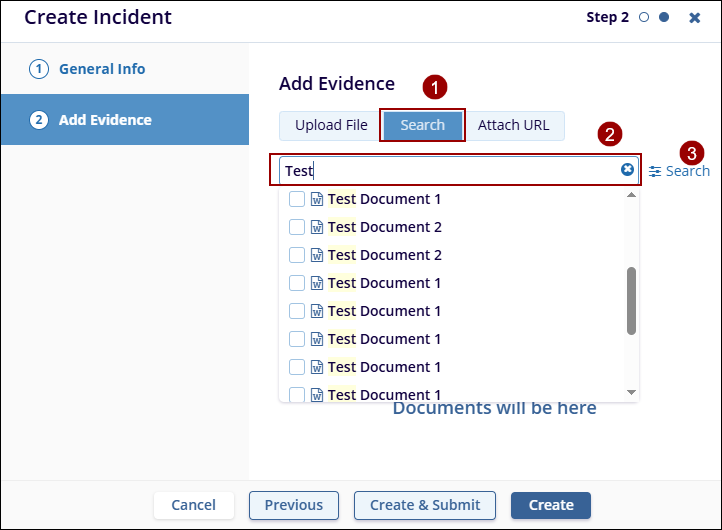
- The second option is search. To use this option, click the Search tab.
- Enter a minimum of 3 characters in the search bar (e.g.,
‘Test’) and select the document(s) from the list of
search results.
.
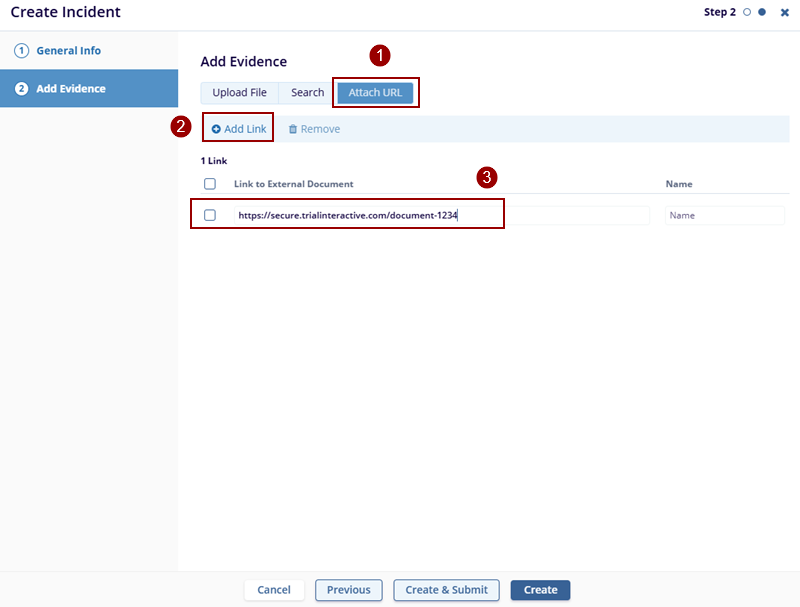
- The third option is to ‘Add a URL’
to this Incident. Click the Attach URL tab, click
Add Link, paste the desired URL, and provide a
name or description for the link.
- Once evidence is added, click Create to save the incident. The user will receive the successfully created pop-up at the top right side of the screen, and the Incident will be saved in ‘Draft’ status in the grid.
Note: To directly submit the Incident after
creation, click Create & Submit. This will
bypass the intermediate steps. To continue from the submission
step, click here to navigate to the
Incident Submission section.
TransPerfect’s Trial Interactive is an industry leader in practical, global eClinical innovation
PRODUCTS
 Linkedin
 X
X
Didn’t find what you need?
Our dedicated Project Management and Client Services team will be available to meet your needs
24 hours a day, 7 days a week.
Toll Free:
(888) 391-5111
help@trialinteractive.com
© 2025 Trial Interactive. All Rights Reserved
