Submit Incident
Once the Incident is created, it will appear under the assigned Team in Draft status within the grid.
To submit the Incident for review (Draft to Submitted), follow the steps below.
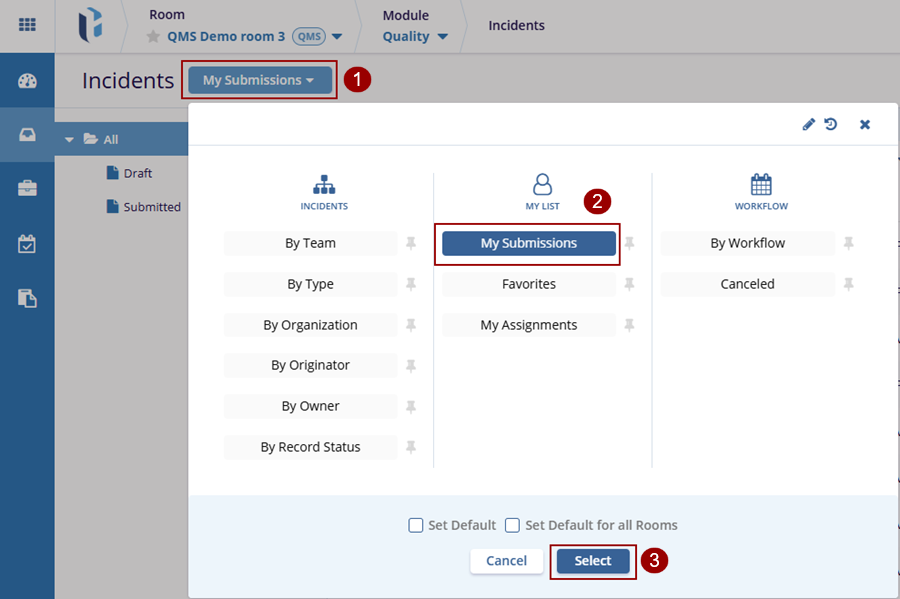
- On the Incidents screen, click the dropdown next to the current view (e.g., My Submissions) to open the view selection panel.
- In the view selection panel, go to the My List
section and click on My Submissions to filter
incidents created by the particular user.
Note: This process can also be performed using the Team View. Here we are using the ‘My Submission’ view to cover the ‘View by’ Functionality.
- Click the Select button at the bottom to apply
the chosen view.
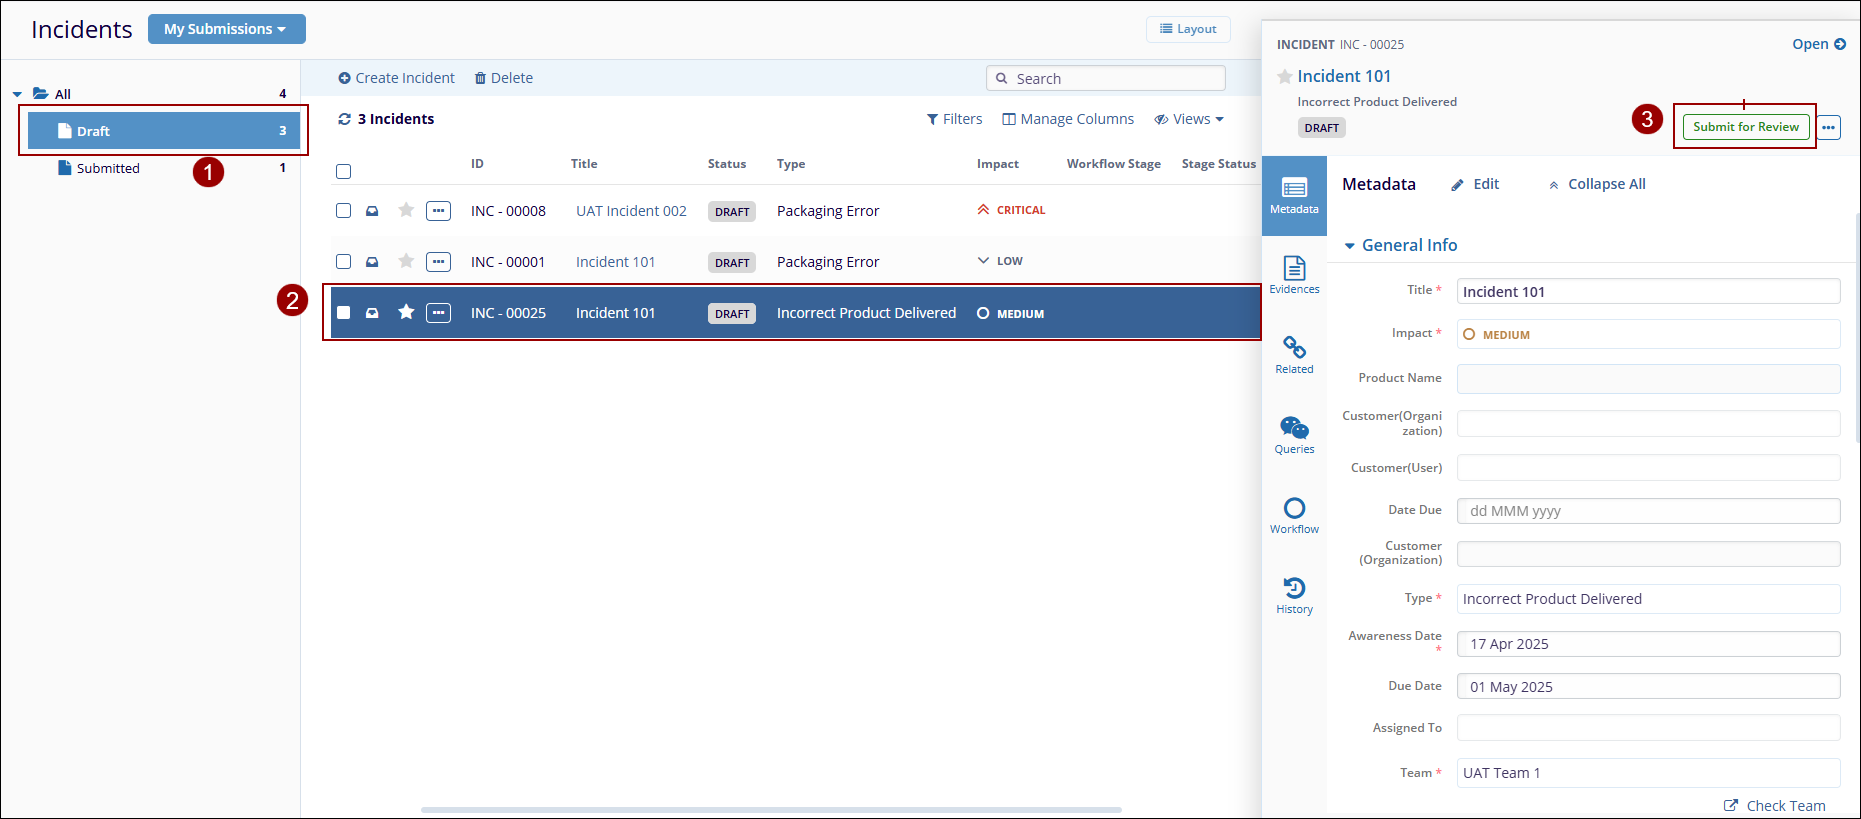
- From the left sidebar, click Draft to display all incidents currently in draft status.
- In the grid, locate and click on the specific draft incident to submit for review.
- The incident details will open on the right panel. Click the
Submit for Review button.
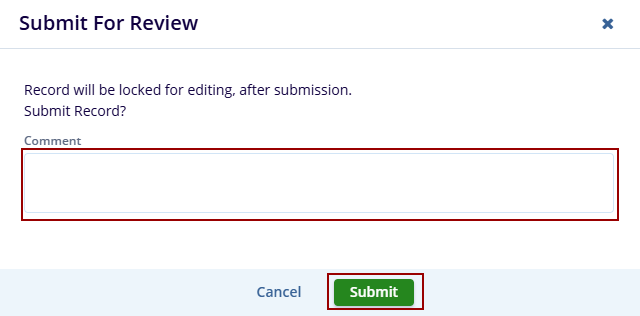
- In the pop-up that appears, optionally add a comment to provide context or additional information.
- Click the Submit button to confirm, after
which the record will be locked for editing and sent for review.
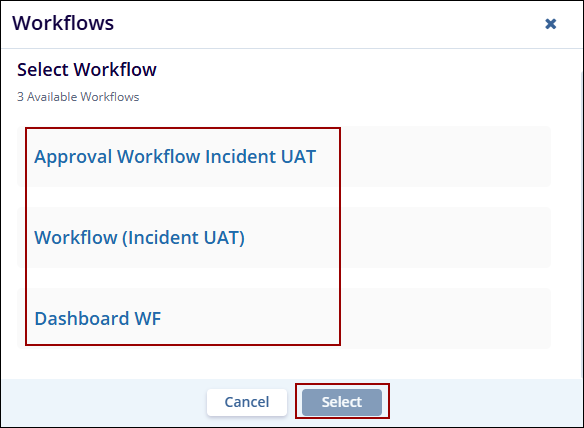
- After clicking the Submit button, a pop-up window will appear asking the user to select a workflow for the incident.
- Choose the appropriate workflow from the list and click the
Select button to proceed.
- A success message will appear at the top-right corner of the screen confirming the incident has been submitted.
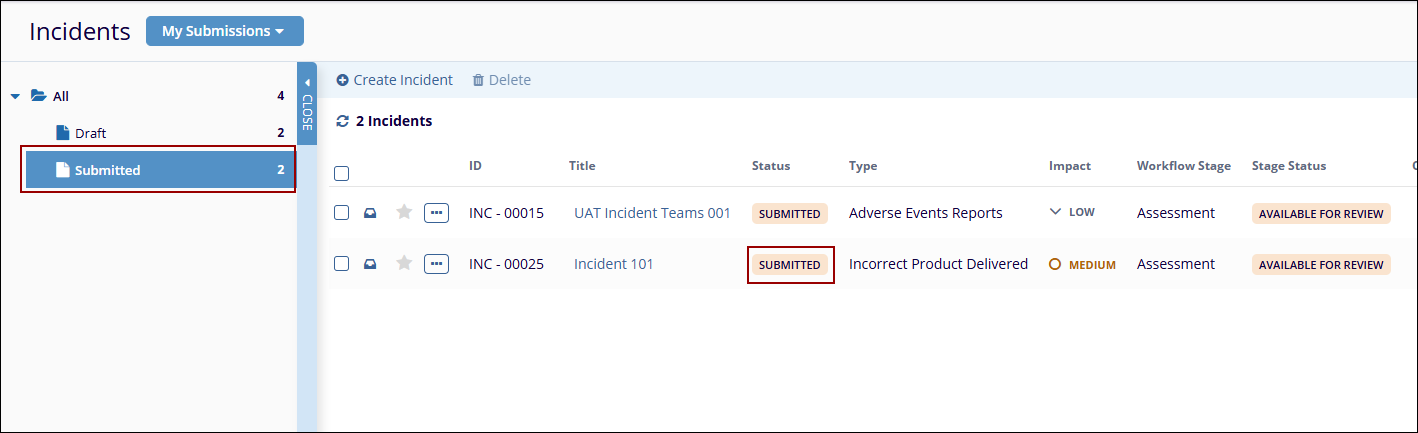
- To verify submission, go to the Submitted folder from the left panel under the selected view.
- The incident will now appear in the list with the
Status marked as
‘Submitted’ and a corresponding
workflow stage (e.g., Assessment).
TransPerfect’s Trial Interactive is an industry leader in practical, global eClinical innovation
PRODUCTS
 Linkedin
 X
X
Didn’t find what you need?
Our dedicated Project Management and Client Services team will be available to meet your needs
24 hours a day, 7 days a week.
Toll Free:
(888) 391-5111
help@trialinteractive.com
© 2025 Trial Interactive. All Rights Reserved
