Search Types
Users can search for specific records or entries across multiple rooms, within a single room, or by applying advanced search criteria.
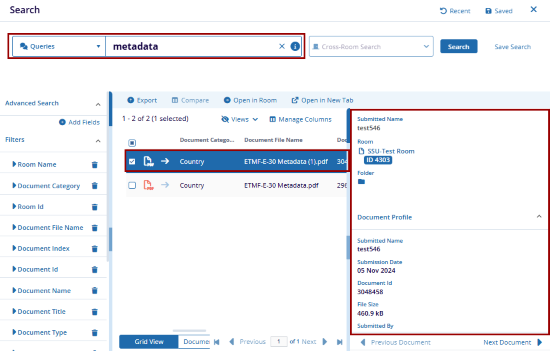
Cross Room Search
The Cross-Room Search feature allows users to search for records or entries across multiple rooms at the same time.
To perform cross room search, follow the steps below:
- On the Trial Interactive homepage, click the Search icon.
- The tab next to the search bar displays Cross-Room Search, indicating that the system searches for the specified record across all rooms accessible to the user.
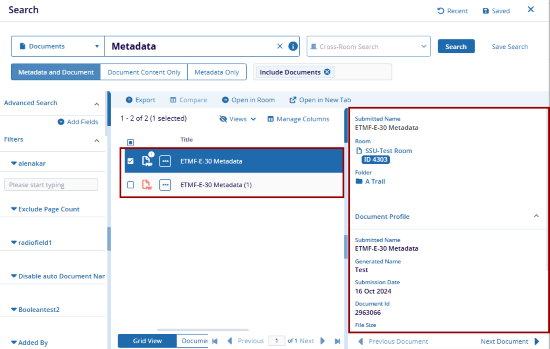
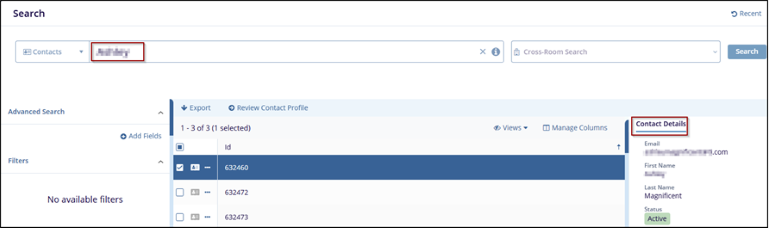
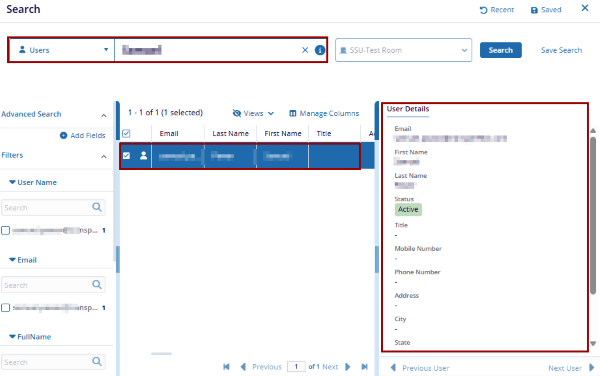
- Click the dropdown beside the search bar and select the required category.
- Enter keywords from the record name and click Search.
- The system displays results if the record is available in any of the rooms the user
has access to.
Search Within a Room
Users can also perform searches within a specific room by selecting from two available tabs
- Favorites: Provides quick access to rooms marked as favorites.
- All Rooms: Displays a list of all rooms accessible to the logged-in user.
To search for a record within a specific room, follow the steps below:
- On the Trial Interactive homepage, click the Search icon.
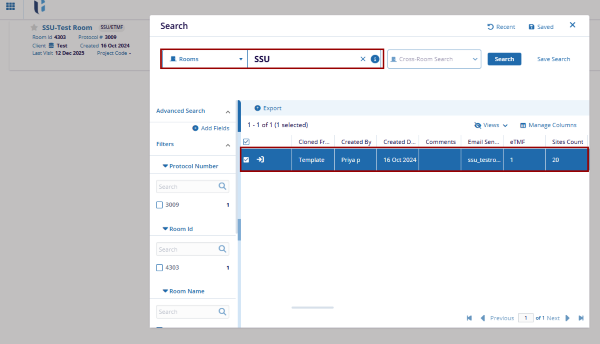
- Click on the Cross-Room Search option in the search interface.
- Select a room from either the Favorites or All Rooms tab.
- Click Apply.

- The room name is displayed within the Cross-Room Search tab.
- Click the dropdown next to the search bar and select the desired category.
- Enter keywords from the record name and click Search.
- The system displays results if the record is available in that particular
room.
Note: Users can also navigate to a specific room and perform a search
for a particular record within that room.
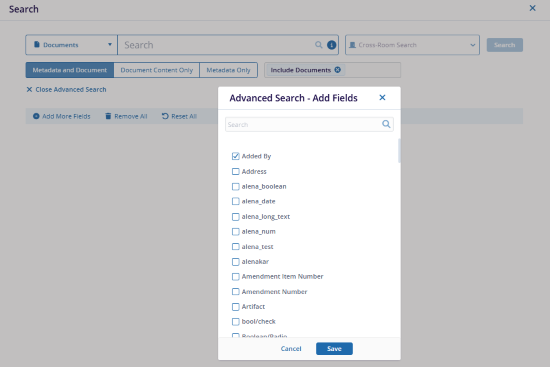
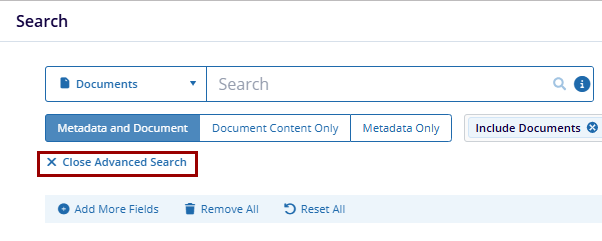
Advanced Search
Advanced Search enables users to narrow down results by applying specific criteria, ensuring more accurate and relevant outcomes. This option is accessible via Search Bar > Advanced Search > Add Fields, where users can select additional fields to define search parameters based on specific data attributes.
To perform an advanced search, follow the steps below:
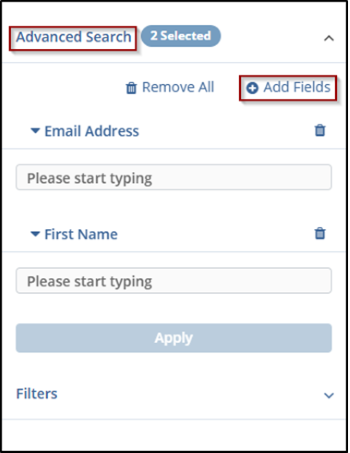
- Click the Advanced Search button on the search interface.
- Select the + Add More Fields option.
- In the Advanced Search – Add Fields pop-up window, choose the required fields
and click Save.

- Enter the necessary details in the added fields.
- Click Remove All to clear all added fields, or Reset All to restore default values without removing the fields.
- Once the criteria are defined, click Close Advanced Search and proceed with the
search.
- After the results are displayed, the selected fields appear under the Advanced Search section.
- Users can add or remove fields from this section as needed.
Note: The Advanced Search – Add Fields pop-up displays different field
options based on the selected category (e.g., Documents, Queries, Room, Contact, Sites,
or Users).
Save and Manage Searches
To save and manage searches, follow the steps below:
- Click on the Save Search button on the search interface after search results are
returned.
- On the Save Search window, add a search name and select the Add to Favorites checkbox.
- Click the Save button.

- To manage the saved searches, click the Saved button on the search window and select
the Manage option.
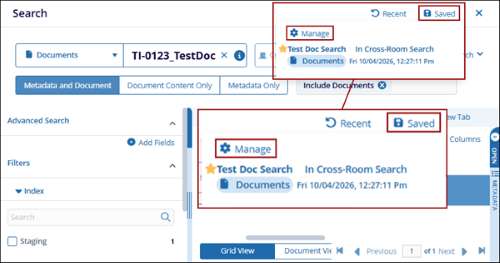
- On the Manage Saved Searches window, select the saved search and select either Delete or Edit to perform the corresponding actions.
- Click the Apply to the page button.

© 2025 Trial Interactive. All Rights Reserved
