File
To add a file, follow the steps below:
- Click on the Resources tab and select File.
- On the Editing File screen, configure the following settings.
General Name Description. Name* Add a suitable name for the file Description Add a brief description of the file Upload Drag and drop or manually upload the file into the designated area in the prescribed file formats only. 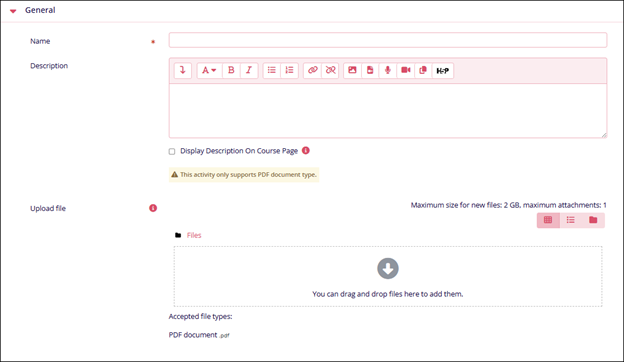
Appearance Name Description. Show Size Check the setting to display the file size. Show Type Check the setting to display the file type. Show Upload/Modified Date Check the setting to display the uploaded or modified date Display Resource Description Check the settings to enable the display of resource descriptions. 
Common Module Settings Name Description. Availability Select either of the following
- Show on Course Page
- Hide on Course Page
ID Number Enter an ID number as a unique identifier for an activity for grade calculation purposes. 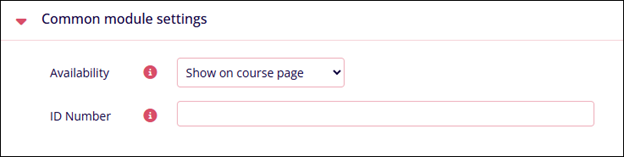
Restrict Access Name Description. Add Restrictions Refer to the Restrict Access section. 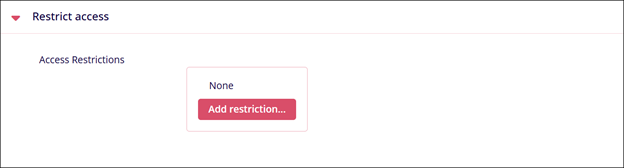
Activity Completion Name Description. Completion Tracking Select either of the following
- Do not indicate activity completion
- Students can manually mark the activity as completed
- Show activity as complete when conditions are met
Require View
Enable or disable the following
- Student must view this activity to complete it
- Show as complete when the user makes a choice
Note: Visible only if ‘Show activity as complete when conditions are met’ is enabled in Completion Tracking.Expect completed on
Click the ‘Enable’ checkbox and enter the date, month, and time. A specific timeline to complete an activity can be set by enabling this setting.
Note: Visible only if Students can manually mark the activity as completed is selected in ‘Completion Tracking’.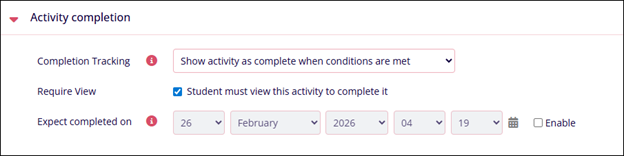
TransPerfect’s Trial Interactive is an industry leader in practical, global eClinical innovation
PRODUCTS
 Linkedin
 X
X
Didn’t find what you need?
Our dedicated Project Management and Client Services team will be available to meet your needs
24 hours a day, 7 days a week.
Toll Free:
(888) 391-5111
help@trialinteractive.com
© 2025 Trial Interactive. All Rights Reserved
