Contacts Views
Create Contact View
To create a Contact View, follow the steps below:
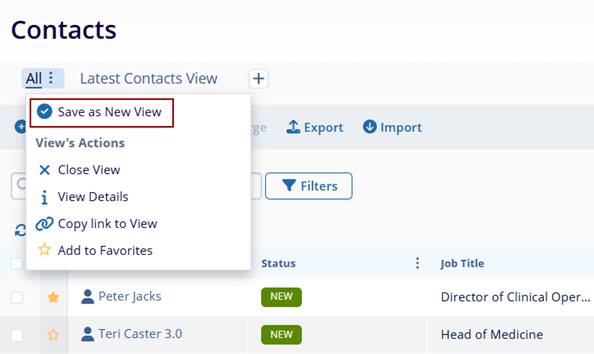
- Click on the All hamburger icon and select Save as New View.
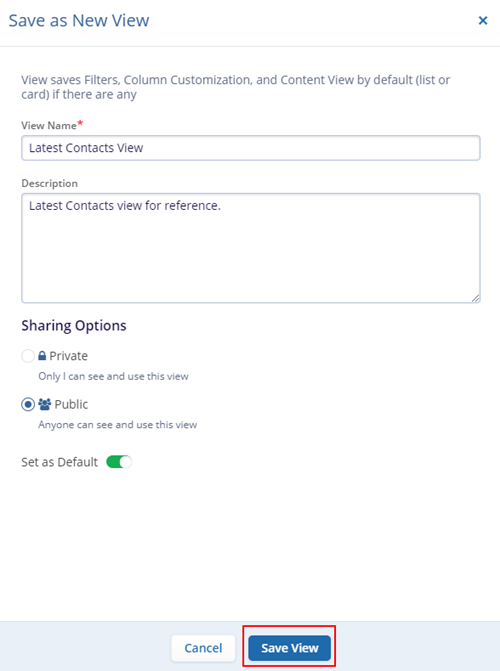
- On the Save as New View screen, specify View Name, Description, and Sharing Options-Private or Public.
- For the Public option, set the view as a default by enabling the Set as Default toggle button.
- Once all the details are entered and configured, click on the Save View
button.
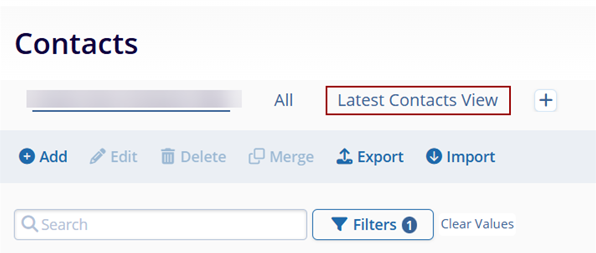
- Once successfully saved, it appears on the Contacts home screen.
Access View’s Actions
The View’s Actions allow performing the following actions with the newly created contacts view as well as the default view.
- To access View’s Actions, click on the hamburger icon for either the newly created or the
default view.
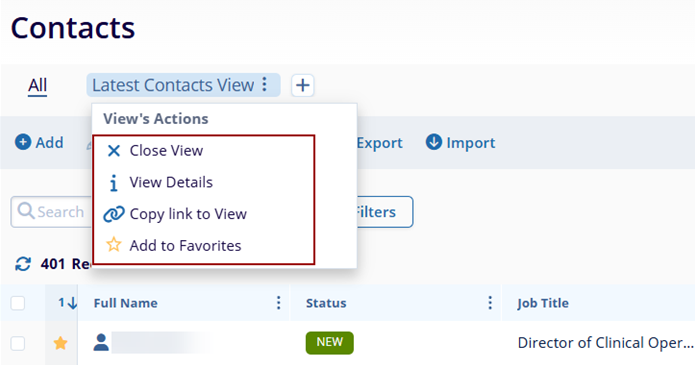
The following View’s Actions are available
-
Close View: Selecting this option will permanently delete the view
-
View Details: Selecting View Details will open a panel with all the view details. Clicking on the edit (pencil) icon will allow editing of the view details.
-
Copy link to view: This option will copy the link of this view and enable opening the same view in another tab of the browser.
- Add to Favorites: Clicking on the star icon will add the current view to favorites.
Add a View
To add a view, click on the + icon and select the view to apply from either the Favorites tab or the All views tab.

Note: Creating a contact view and accessing View Actions can also done
from Contacts > View Options.
All View’s Actions
To access All View’s Actions, from the left-hand navigation links, select Contacts > View Options dropdown.
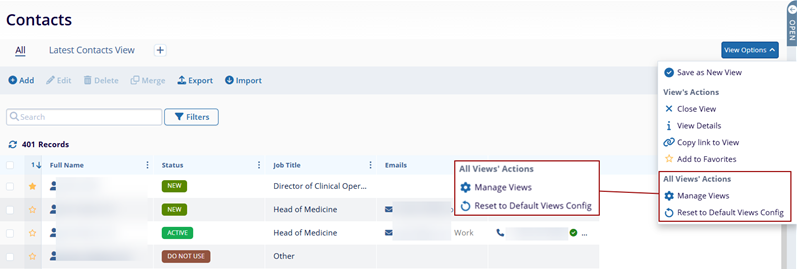
Under the All View’s Actions, the following options are available.
-
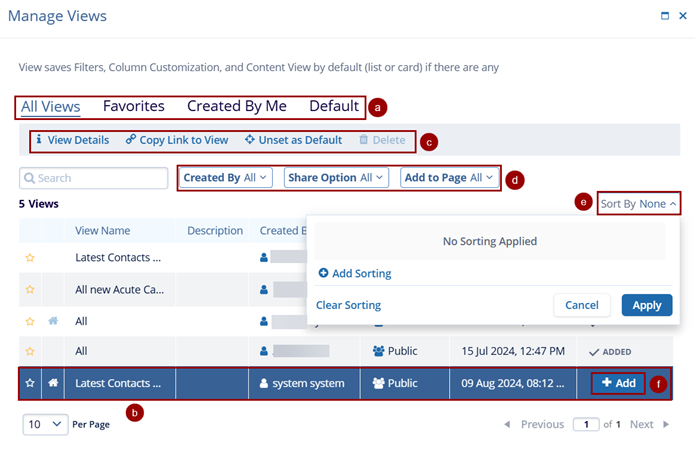
Manage Views: The Manage View screen displays views bifurcated by All Views, Favorites, Created By Me, and Default. On this screen, perform the following actions.
- Navigate between the All Views, Favorites, Created by Me, and Default tabs to select the desired view.
- Select an individual view.
- Navigate to the top menu bar to access ‘View Details,’ Copy Link to View, Set/Unset as Default and Delete, etc.
- Filter the records by applying the Created By, Share Options, and Add to Page filters.
- Sort the data in Ascending and Descending order by applying different sorting criteria.
- Click on +Add to add the view on the Contacts home page.
- Set as Default View: Selecting this option will set the selected view as a default view.
Once this option is selected, click on Set as Default on the confirmation popup.

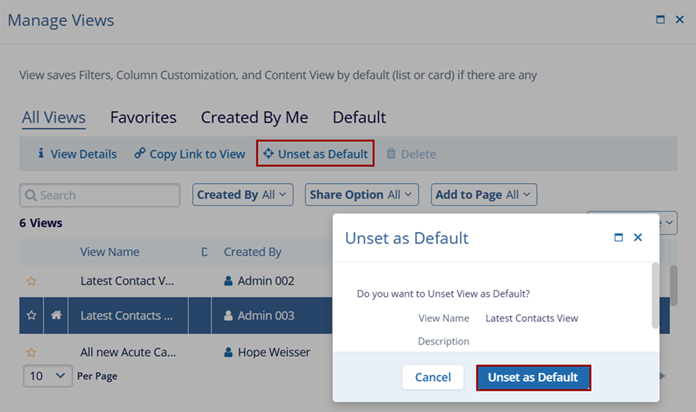
- Unset as Default View: Selecting this option will unset the initially selected view as a
default. Once this option is selected, click on Unset as default on the confirmation
popup.
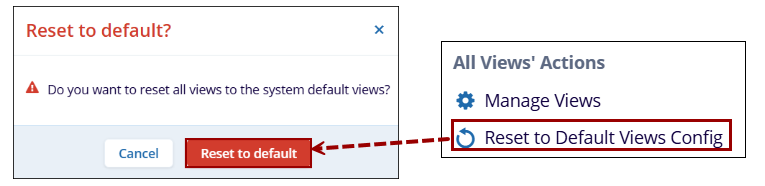
- Reset to Default Views Config: Selecting this option will reset all
views to the system default views.
TransPerfect’s Trial Interactive is an industry leader in practical, global eClinical innovation
PRODUCTS
 Linkedin
 X
X
Didn’t find what you need?
Our dedicated Project Management and Client Services team will be available to meet your needs
24 hours a day, 7 days a week.
Toll Free:
(888) 391-5111
help@trialinteractive.com
© 2025 Trial Interactive. All Rights Reserved
