Sort and Filter Columns
Filters
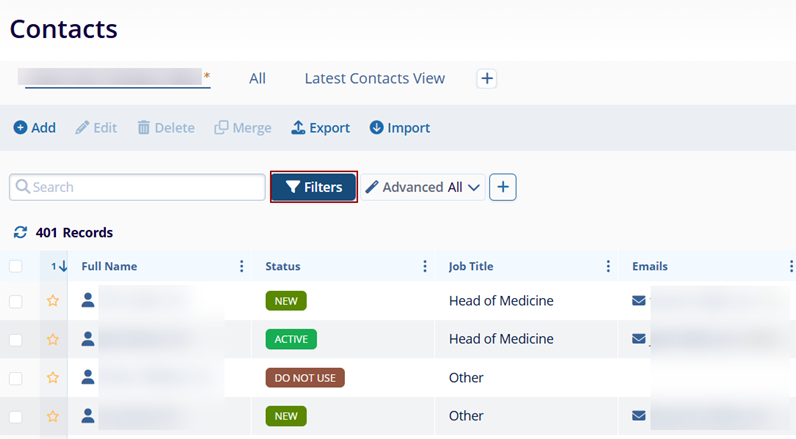
To apply filters to the Contacts view, click on the Filters button to add the Standard and Advanced filters.
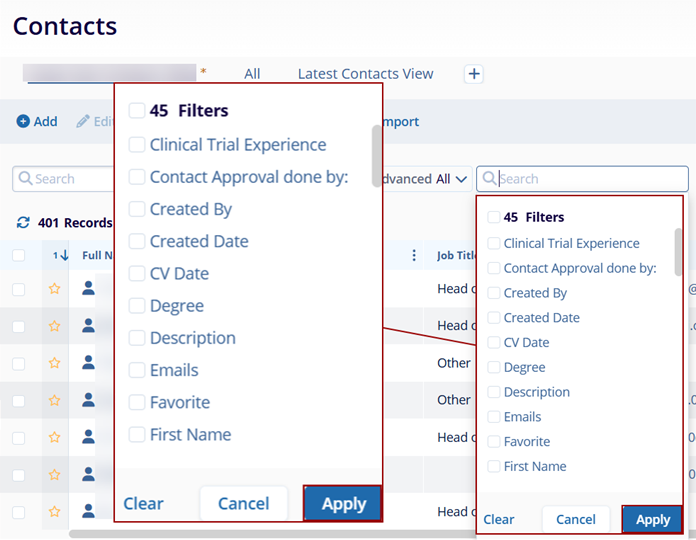
- Standard Filters
To add the Standard filters, click on +, select the required criteria, and click on Apply.
- Advanced Filters
To add advanced filters, click on Advanced All dropdown > + Add Filter Rule > Add Filter Rule or Add Filter Group.
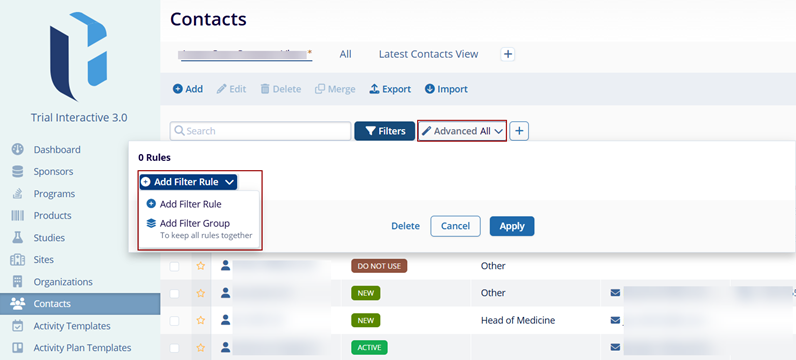
The Advanced filters allow to filtering of the data by applying certain logical operators.
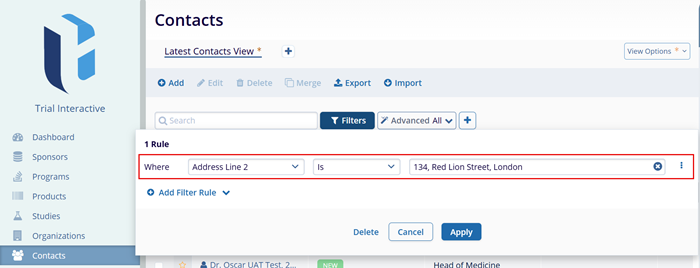
- For the +Add Filter Rule, select the required option from the Select Field dropdown.
- Select any one of the logical operators.
Important
-
For the Active field, the following logical operators can be applied.
Logical operator Description Is The address is either active or inactive. Select either Yes or No. Is blank The address is blank irrespective of whether it is active or inactive Is not blank The address is not blank irrespective of whether it is active or inactive. - For other fields, the following logical operators can be applied.
Logical Operator Description Is The content in the selected field matches to one entered in the text field beside the operator field. Is not The content in the selected field does not match the one entered in the text field. Contains The content in the selected field contains the following words mentioned in the text field. Does not contain The content in the selected field does not contain the words mentioned in the text field. Starts with The content in the selected field starts with the words mentioned in the text field. Ends with The content in the selected field ends with the words mentioned in the text field. Is blank The selected field is blank and does not contain any details. Is not blank The selected field is not blank and has some details entered. In the example below, the applied filter will display all the records where:
- Addresses: Address Line 2 is 134, Red Lion Street, London
- Selected Field: Addresses: Address Line 2
- Operator: Is
- Text: 134, Red Lion Street, London
- Furthermore, it is possible to add the And/Or conditions to the filters.
- Referring to the above example, an additional filter with a different address line is added.
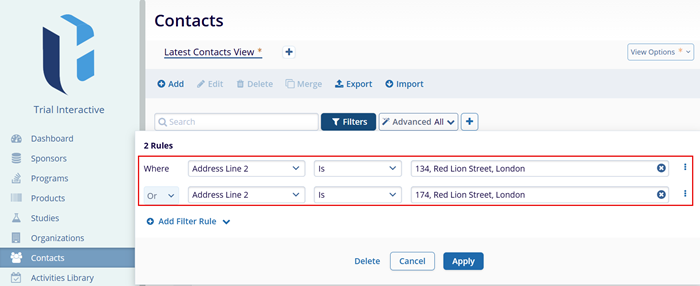
- Now, if the And condition is applied, the system will display records that have both address lines i.e., 134, Red Lion Street, London, and 174, Red Lion Street, London
- When the Or condition is applied, 134, Red Lion Street, London will be displayed by the system, as the initially configured filter takes precedence over the others.
- Once all the criteria and conditions are configured, click on Apply.
Note: The same conditions apply to the Add Filter Group.
Sorting Columns
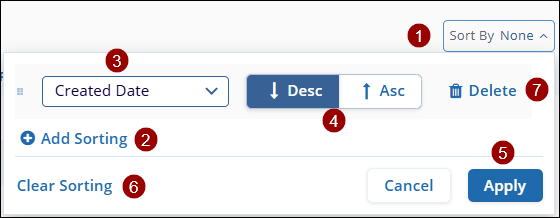
To sort columns on the main Contacts screen, follow the steps below.
- Click on the Sort By button situated on the right side of the screen.
- Click on the +Add Sorting button to add multiple sorting criteria.
- Select a sorting criterion from the available dropdown options.
- Select either Descending or Ascending.
- Click on Apply and the columns will display records based on the sorting criteria applied.
- Click on the Clear Sorting button to remove all the sort criteria.
- Click on the Delete button to delete a specific sort criterion.
Important
Only when the sorting criteria are applied to a particular column, the ellipses (three vertical dots) icon will display Ascending and Descending options.
.PNG)
Mark Contact as favorite
To mark a contact as a favorite, follow the steps below:
- Click on the mark as favorite (star) icon for a particular contact name.
- The system displays a success notification once a contact is successfully added as a favorite.
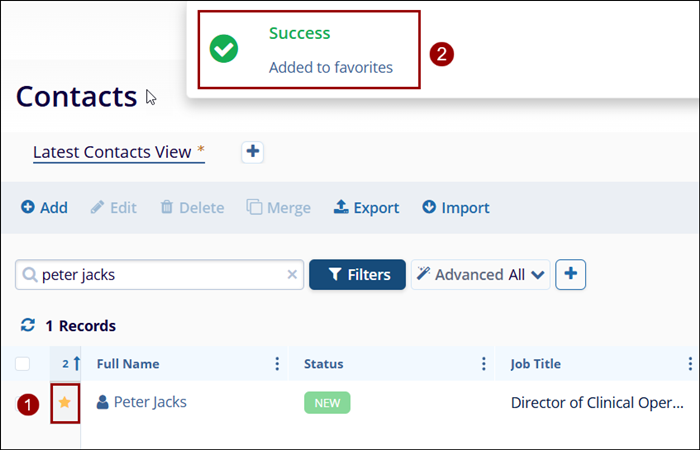
Note: Click on the same icon to remove the contact as a
favorite.
TransPerfect’s Trial Interactive is an industry leader in practical, global eClinical innovation
PRODUCTS
 Linkedin
 X
X
Didn’t find what you need?
Our dedicated Project Management and Client Services team will be available to meet your needs
24 hours a day, 7 days a week.
Toll Free:
(888) 391-5111
help@trialinteractive.com
© 2025 Trial Interactive. All Rights Reserved
