Fields
Add New Custom Field
To create a custom field, follow the steps below:
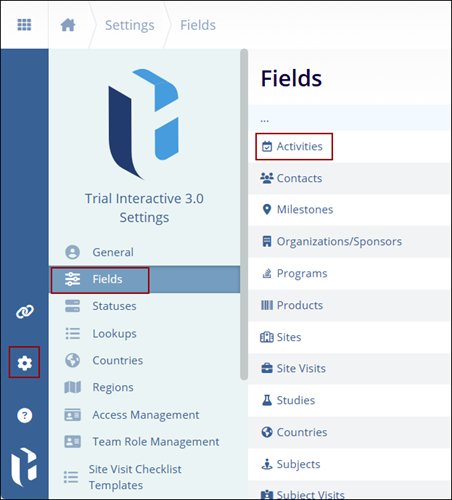
- Navigate to the Settings area and select the Fields menu.
- Select the sub-type. For example, Activities.
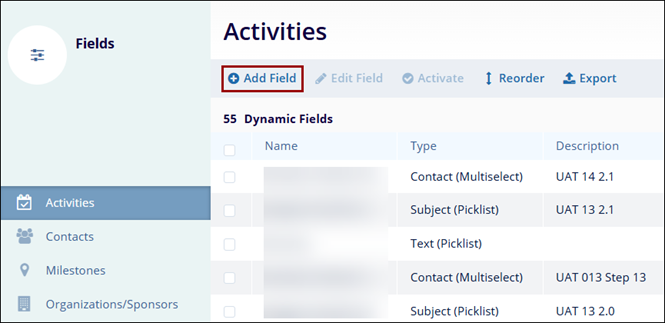
- On the Activities screen, click on the +Add
Field button.
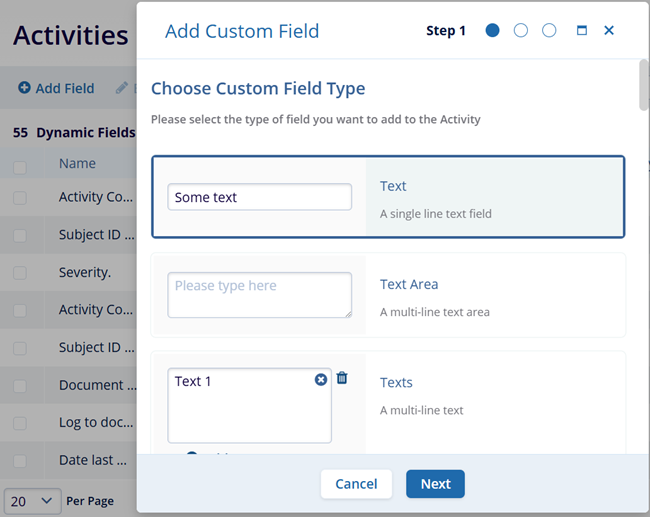
- In step 1 of Add Custom Field form, select the custom field type from the
available options and click on the Next button.
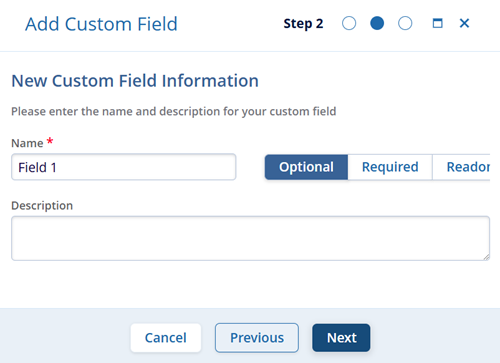
- In Step 2, mandatorily add a name for the field. Optionally add
description and select whether the field in Optional, Required, or
Read-only. Click on the Next button.
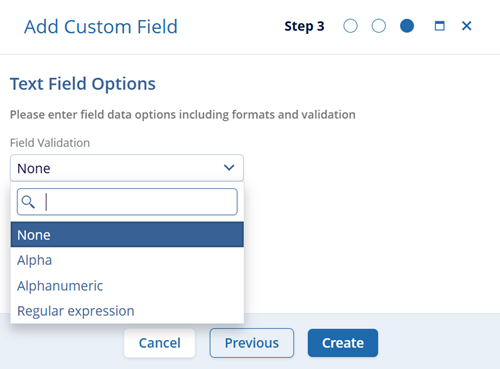
- In Step 3, add the field validation value by accessing the dropdown options and
click on the Create button.
Note:
- Follow the similar steps for other sub-types. i.e., Organizations, Milestones, and others etc.
- The steps below may vary slightly depending on the type of field chosen.
- A tooltip is displayed explaining the meaning of the 'Regular Expression' option selected as a Field Validation type which improves clarity by helping users understand the purpose of 'Regular Expression' when configuring custom text fields within a domain.
Edit Custom Field
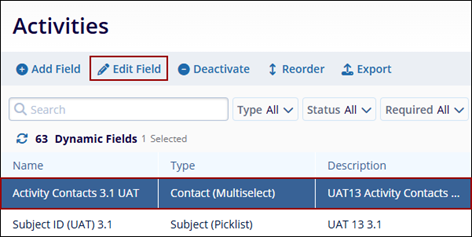
To edit a custom field, follow the steps below:
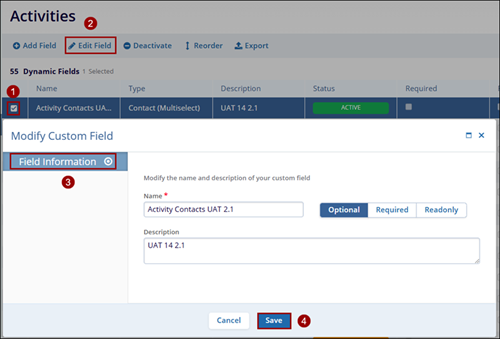
- Select a custom field by clicking on the checkbox.
- Click on the Edit Field button from the top menu bar.
- On the Modify Custom Field window, make the necessary edits within the Field Information section.
- Click on the Save button.
Activate Custom Field
To activate a custom field, follow the steps below:
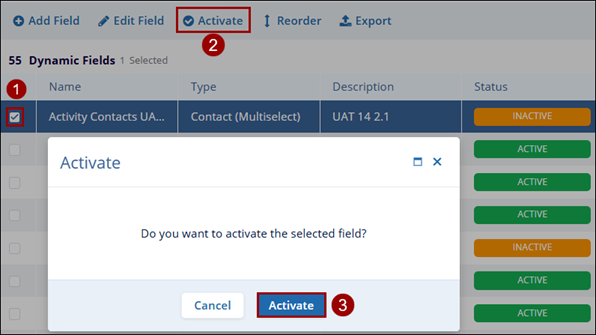
- Select a custom field by clicking on the checkbox.
- Click on the Activate button from the top menu bar.
- On the Activate confirmation popup, click on the Activate button.
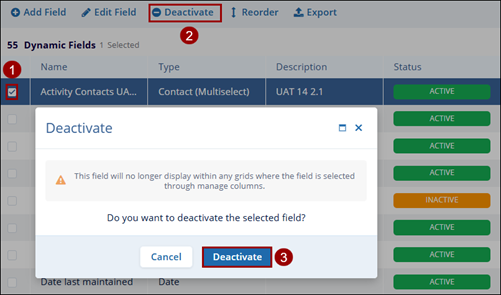
Deactivate Custom Field
To deactivate a custom field, follow the steps below:
- Select an active custom field by clicking on the checkbox.
- Click on the Deactivate button from the top menu bar.
- On the Deactivate confirmation popup, click on the Deactivate button.
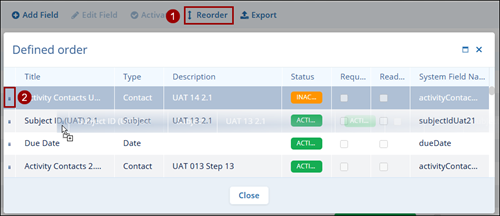
Reorder
To reorder the custom field list, follow the steps below:
- Click on the Reorder button from the top menu bar.
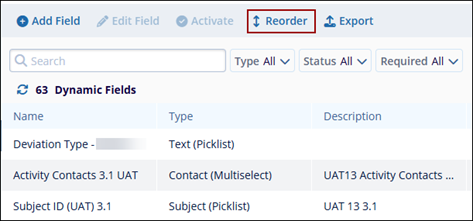
- Place the fields in the desired position using the drag &
drop functionality.
Export
To export the custom fields list, click on the Export button and follow the standard steps detailed in the Exporting Contacts section.
TransPerfect’s Trial Interactive is an industry leader in practical, global eClinical innovation
PRODUCTS
 Linkedin
 X
X
Didn’t find what you need?
Our dedicated Project Management and Client Services team will be available to meet your needs
24 hours a day, 7 days a week.
Toll Free:
(888) 391-5111
help@trialinteractive.com
© 2025 Trial Interactive. All Rights Reserved
