Organization Details
Explore Videos for more help:
Videos
The Organization Details screen enables users to view and edit the initially configured organization details.
To access the Organization Details, follow the steps below:
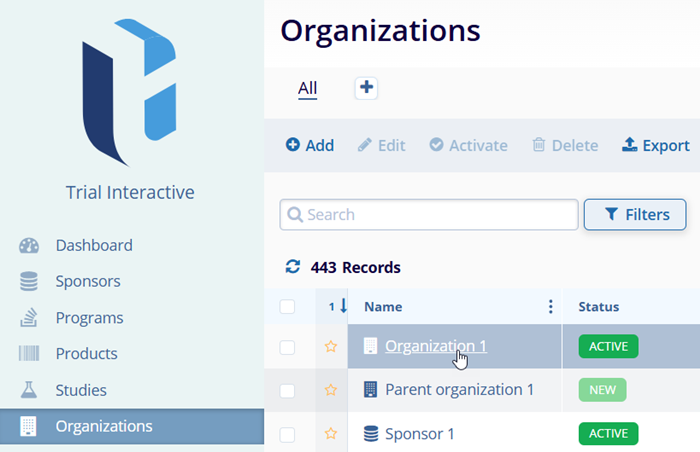
- Click on the Organizations tab located in the navigation link on the left side of the screen.
- On the organization tabs, locate the organization to associate an address with and click
on the organization’s name.
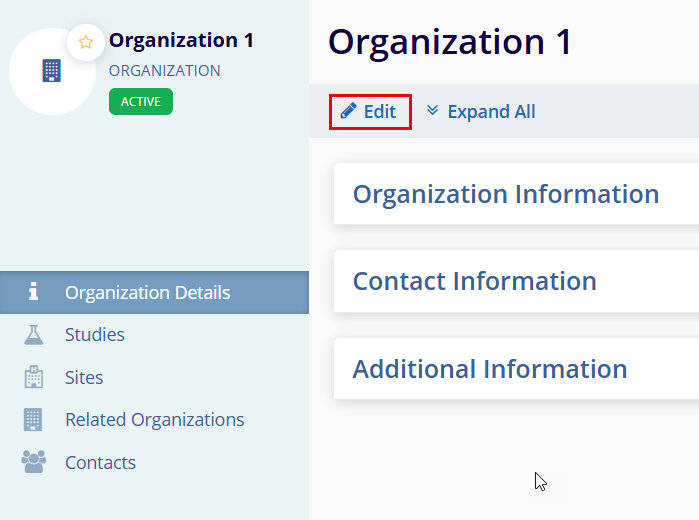
- Organization details page opens, click the Edit button to acess Contact
Information section.
Associate an Address to Organization
To associate an address with the organization, follow the steps below:
- Click on the Organizations tab located in the navigation link on the left side of the screen.
- On the organization tabs, locate the organization to associate an address with and click
on the organization’s name.
- Access the Contact Information section and click the Edit button on the
Organization detail page.
- Click on the +Add button in the Addresses section.
- Enter the mandatory metadata Address Type, Primary Address, Country, and Postal Code which has an asterisk (*) symbol next to the field title. Enter any additional information, as per the requirement.
- Access the following two options to add addresses:
- Add and Create Another: This option allows adding the current address and immediately start creating another one.
- Add Address: This option allows creating only the address you are currently working
on.
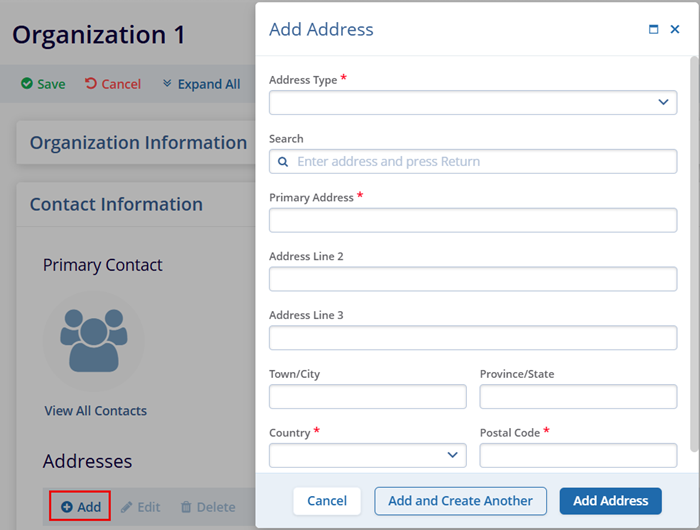
- Click Save once all changes are done.
Associate Organization to Parent Organization
To associate an organization with a parent organization, follow these steps.
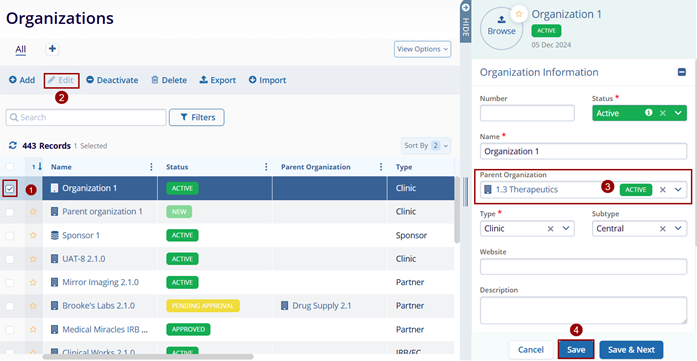
Method 1
- Click the checkbox next to the organization name. Then, click the Edit button (pencil icon).
- click the Edit button (pencil icon).
- On the Quick View panel, associate a parent organization by accessing the dropdown options and either adding an existing one or creating a new one.
- Click on the Save button.
Method 2
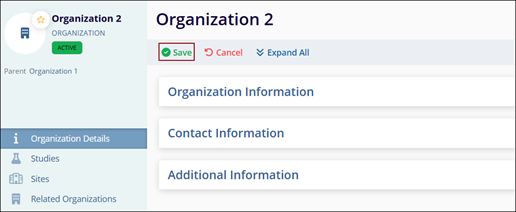
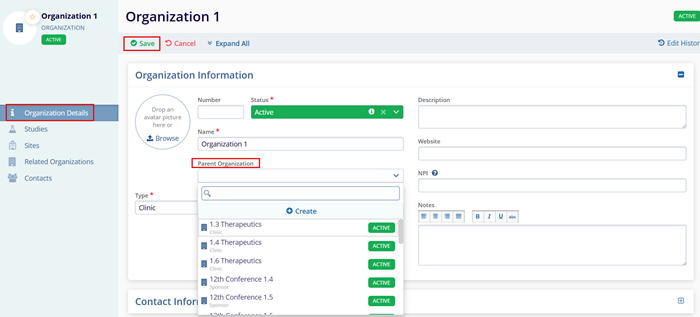
- Locate the organization to associate a parent organization with and click on the organization’s name.
- On the Organization Details screen, click on the Edit button.
- Access the Parent Organization dropdown and associate an existing or create a new parent organization.
- Click on the Save button.
Note:
- The Organization Details view contains additional fields not available within the quick-view panel i.e., NPI, Website, etc.
- Refer to the Create Organization section to understand how to create a parent organization.
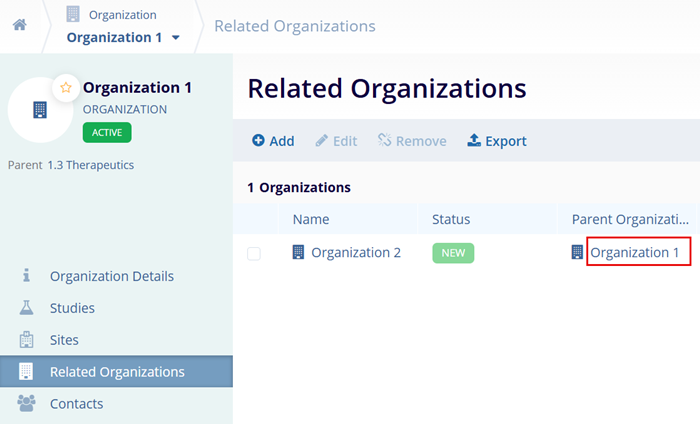
- From the Parent Organization details page, users can view associated child organizations
under the Related Organizations’ tab.
Studies and Sites Associated at the Organizational level
To review studies and sites associated with an organization, follow these steps.
- On the Organizations, tab click on the organization name.
- On the Organization Details screen, click on the Studies from the left-hand navigation links.
- This opens the Studies window which displays a list of studies associated with the organization.
- To Edit the study details, select a study and click on the Edit button from the top menu bar.
- Similarly, to export the Studies list, click on the Export button.

Note:
To review sites associated with an organization, click on the Sites link on the left side of the screen and follow the same process.
Contacts at the Organization Level
Add Contact in the Organization
To add contacts at the organization level, follow the steps below.
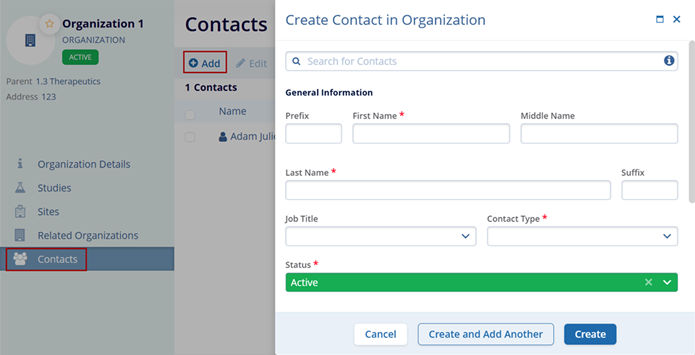
- On the Organization Details screen, click on the Contacts from the left-hand navigation links.
- On the Contacts screen, click on the +Add button.
- Add the necessary information to the mandatory fields on the Create Contact in Organization form.
- Refer to the Create
Organization section for the detailed steps.
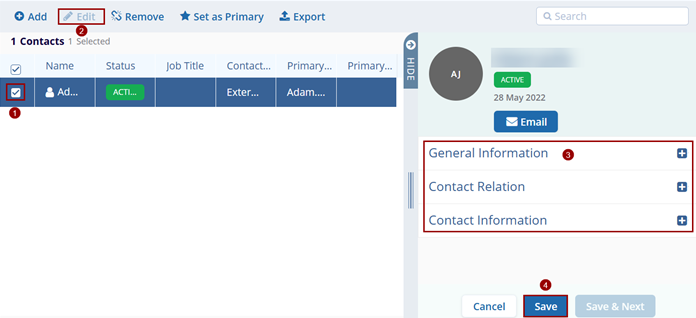
Edit Contacts in Organization
To edit contacts in an organization, follow the steps below:
- Select a contact to edit.
- Click on the Edit button from the top menu bar.
- Make changes to the General Information, Contact Relation, and Contact Information sections.
- Click on the Save button.
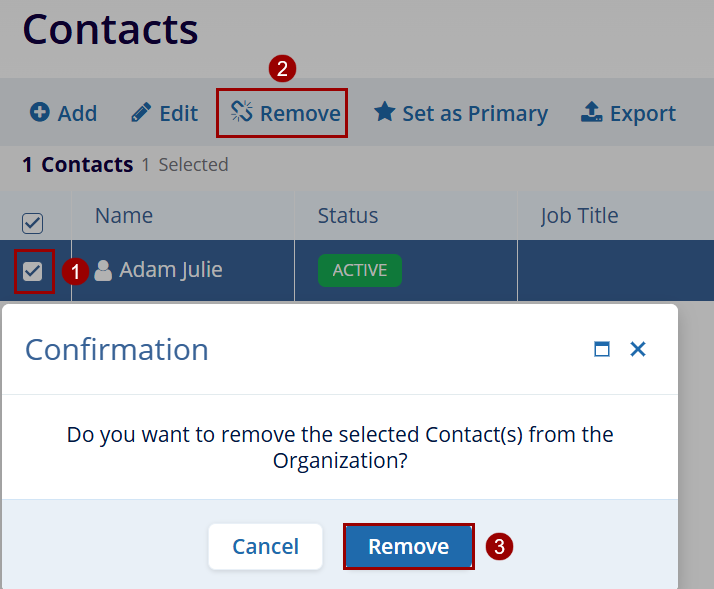
Remove Contact
To remove a contact, follow the steps below:
- Select a contact to remove.
- Click on the Remove button from the top menu bar.
- Click on the Remove button on the confirmation popup.
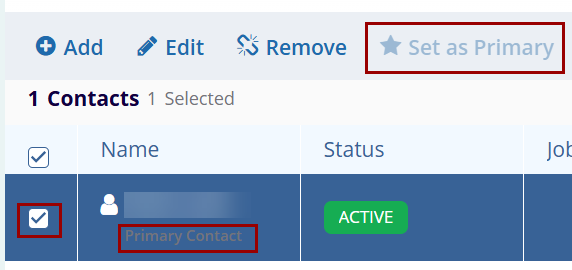
Set as Primary
To set a contact as primary, follow the steps below:
- Select a contact to set as a primary.
- Click on the Set as Primary button from the top menu bar.
- The contact name displays a primary contact.
Export
To export the Related Organizations, follow the steps below:
- On the Contacts screen, click on the Export button.
- Follow the standard steps to retrieve exports detailed in the Export Contacts section.
TransPerfect’s Trial Interactive is an industry leader in practical, global eClinical innovation
PRODUCTS
 Linkedin
 X
X
Didn’t find what you need?
Our dedicated Project Management and Client Services team will be available to meet your needs
24 hours a day, 7 days a week.
Toll Free:
(888) 391-5111
help@trialinteractive.com
© 2025 Trial Interactive. All Rights Reserved
