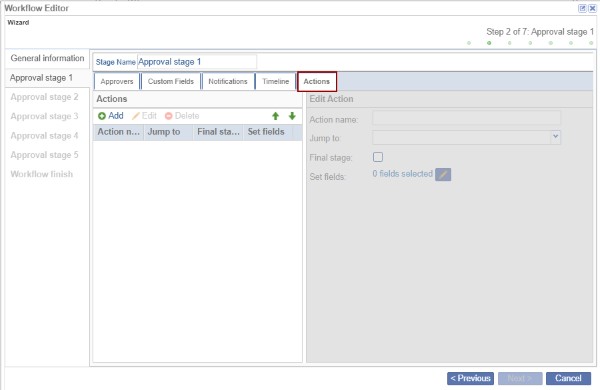
Actions
Actions is an optional tab allowing for complex workflow building. It enables a workflow to have a jump. A specific document can jump to a certain stage. For example, a Form FDA 1572 after QC1 review, can jump to a stage 3 review, where Regulatory Affairs performs a 2nd review on the document. While efficient for complex workflows, it is not required for regular workflow creation.
Add Action
To configure the Actions tab, follow the steps below:
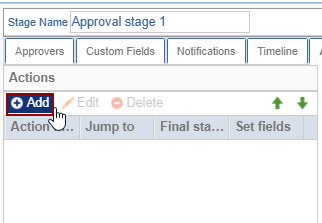
- Click Add in the Actions tab.
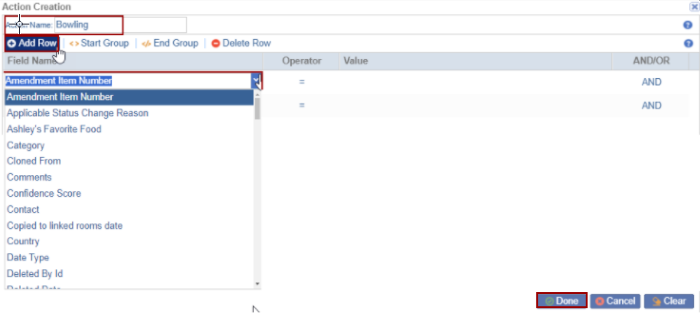
- On the Action Creation pop-up window, enter a name for the Action Creation.
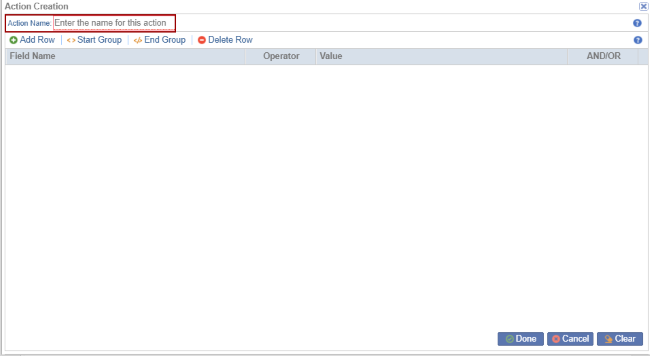
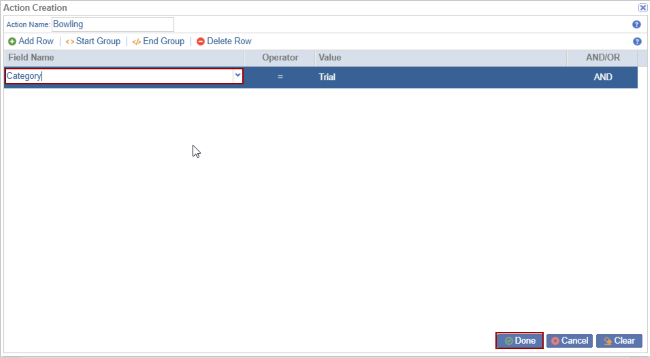
- Click the Add Row button to add a row below the Field Name with the drop-down
options. Once the row is added, click on the Done button.
- Click Start Group to start the group by adding the category by clicking the
End Group the started group gets over.
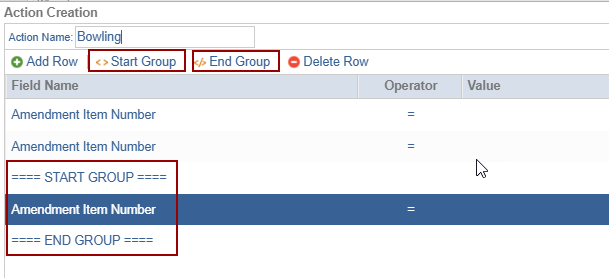
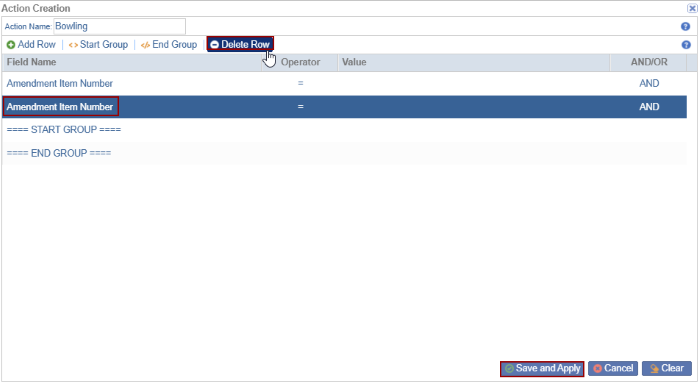
- Select the row and click the Delete button.
- Click the Save and Apply button.
Edit Action
- Select the action and click the Edit button. The Action Creation pop-up
window opens.
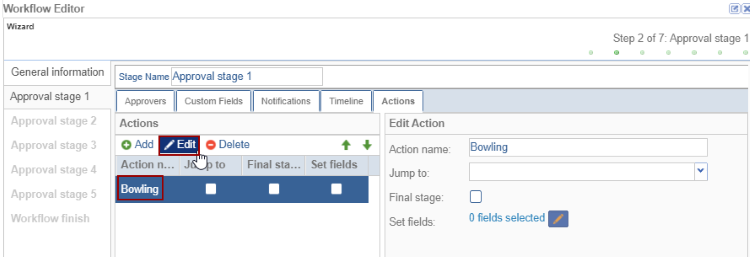
- Make edits and click on the Done button.
Delete Action
- Select the action and click on the Delete button the selected action gets
deleted.

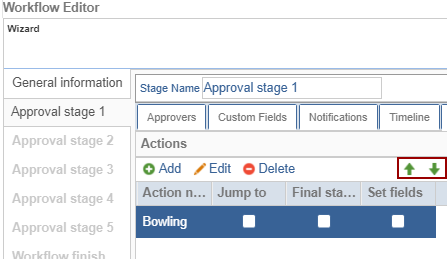
- The Move Up and Move Down arrows help the user to move the actions as per the
requirement.
Edit Action Tab
- On the right side of the Workflow Editor pop-up window within the Edit Action panel,
the user can see the following actions:
- Action name: The action name is displayed added by the user.
- Jump to: The user can select the Approval Stages that are displayed in the drop-down list
- Final stage: If the checkbox is checked the user directly moves to the Final stage of the Workflow
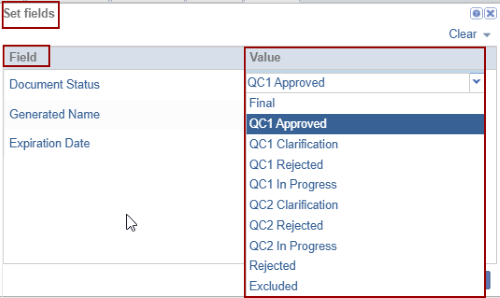
- Set fields with edit icon
- Click the edit icon and the Set fields pop-up window is displayed with the 2 columns
Field and Value. The field column has 3 fields by default:
- Document Status
- Generated Name
- Expiration Date
- Double-click on the field in the Value column. The drop-down options are displayed
select the appropriate value and click Save.
- Click Next after reviewing all tabs and repeat these steps for each approval stage. Note:
Settings, such as approvers, notifications, and timelines, may vary by stage.
- When finished, click on the Next button.
- The Workflow Finish step is the final stage.
- Any workflow errors will be displayed here and must be resolved.
- If no errors are found, click Finish to complete the process.
© 2025 Trial Interactive. All Rights Reserved
