Manage Site Roles
Explore Job Aids for more help:
Job Aids
Users with the necessary permissions can use the Manage Site Roles feature to create site roles and assign them to team members when adding them to sites.

Add Site Roles
To add a site role, follow the steps below:
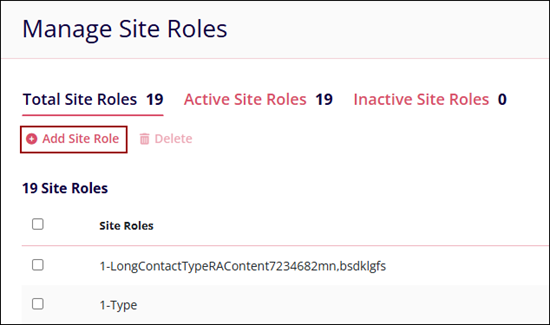
- Navigate to the Company Dashboard page and select Manage Site Roles
- Click on the +Add Site Role button on the Manage Site Roles screen.
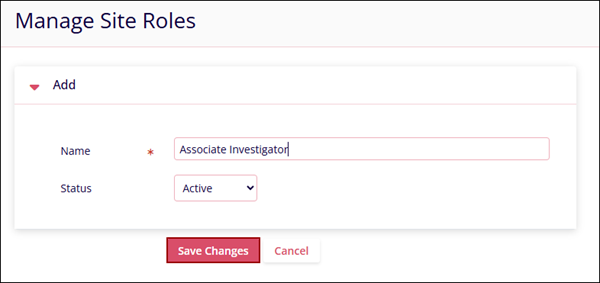
- On the Add Site Role screen, enter the following details
- Name*: A suitable name for the site role.
- Status: Select Active or Inactive from the dropdown.
- Click on the Save Changes button once all the details are added.
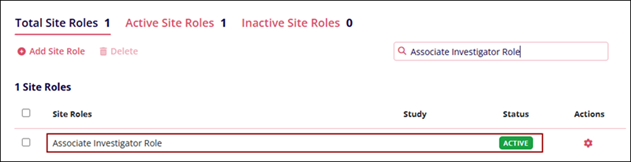
- Upon successful creation the site role is displayed on the Manage Site Roles main screen.
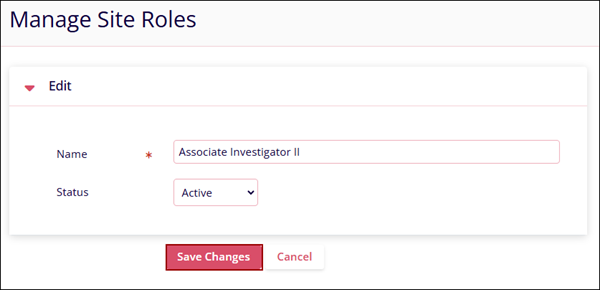
Edit Site Roles
To edit site roles, follow the steps below:
- Click on the Edit icon of the site role to edit.
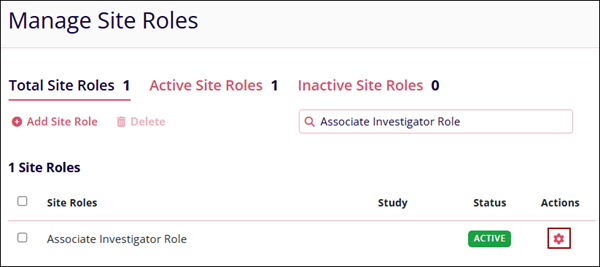
- Make changes to site role details in the General Info section and click on the Save
Changes button.
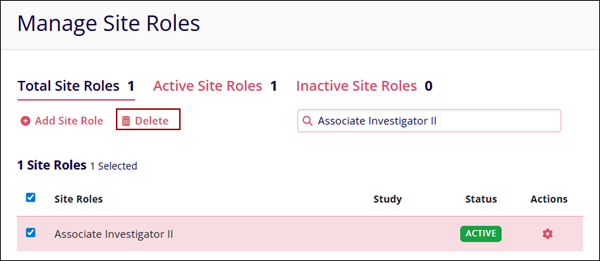
Delete Site Roles
To delete Site Roles, follow the steps below:
- Select site role(s) by checking their respective checkboxes.
- Click on the Delete button from the top menu bar to delete a site.
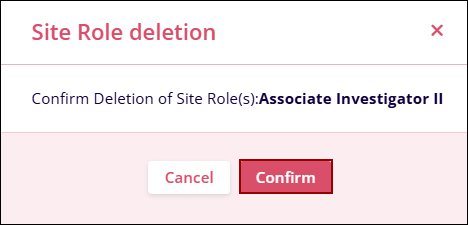
- Click on the Confirm button on the Site Role deletion confirmation popup.
TransPerfect’s Trial Interactive is an industry leader in practical, global eClinical innovation
PRODUCTS
 Linkedin
 X
X
Didn’t find what you need?
Our dedicated Project Management and Client Services team will be available to meet your needs
24 hours a day, 7 days a week.
Toll Free:
(888) 391-5111
help@trialinteractive.com
© 2025 Trial Interactive. All Rights Reserved
