Enable DocuSign
DocuSign is an application that is used for signing the CDAs.
To enable DocuSign, follow these steps:
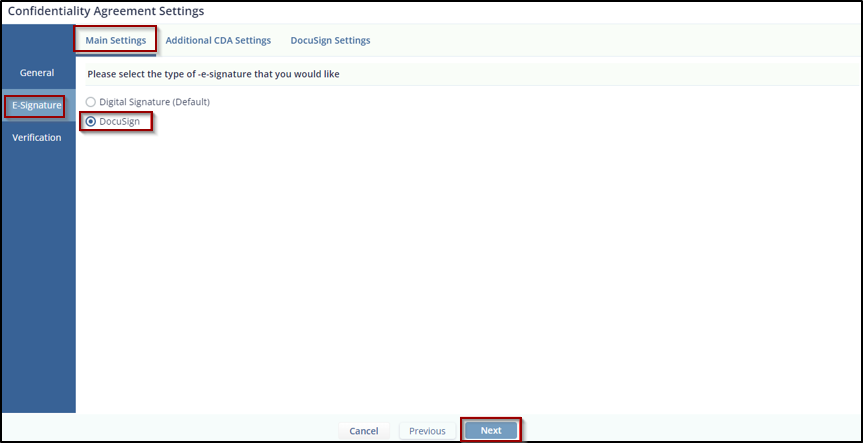
- From the Main Settings page under the E-Signature tab, select the DocuSign radio button to navigate to the DocuSign Settings page.
- When the DocuSign option is selected, all
pages previously visible under Digital Signature
in the E-Signature tab are replaced with DocuSign-specific pages.
-
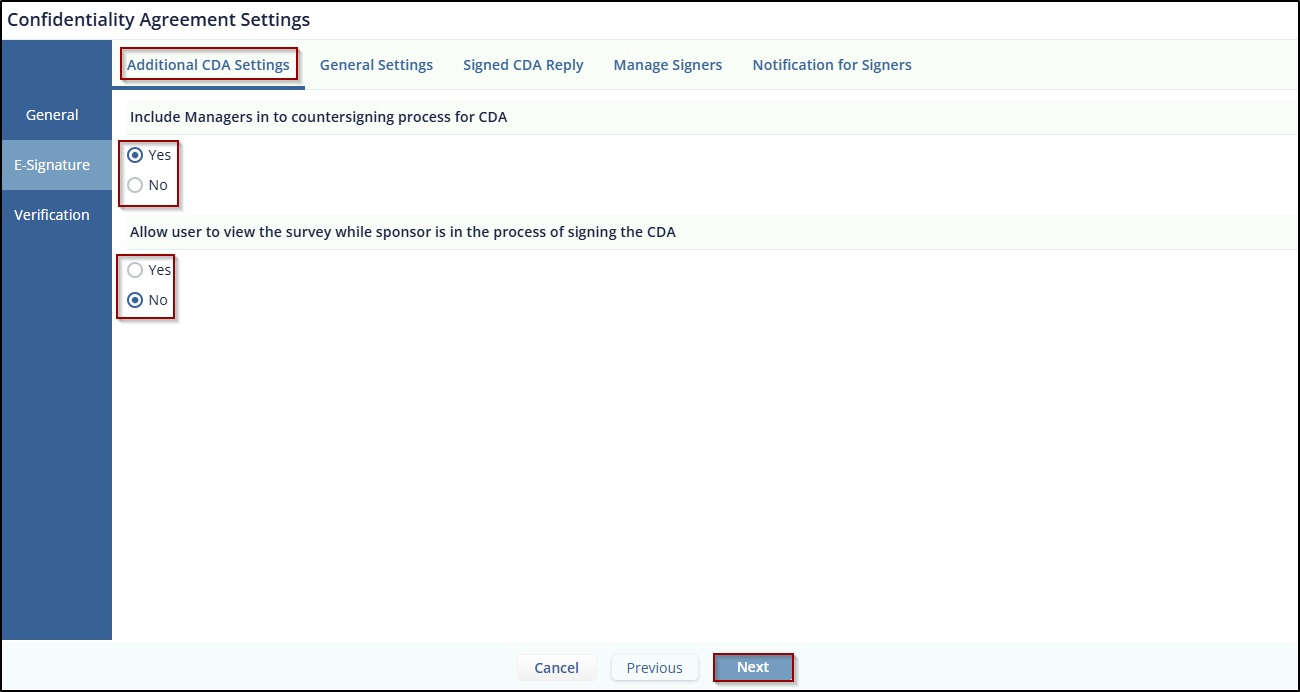
Click Next to proceed to the Additional CDA Settings page, which includes the following options:
a. Include Managers in the countersigning process for CDA – select Yes or No using the radio buttons.
b. Allow users to view the survey while the sponsor is signing the CDA – select Yes or No using the radio buttons.
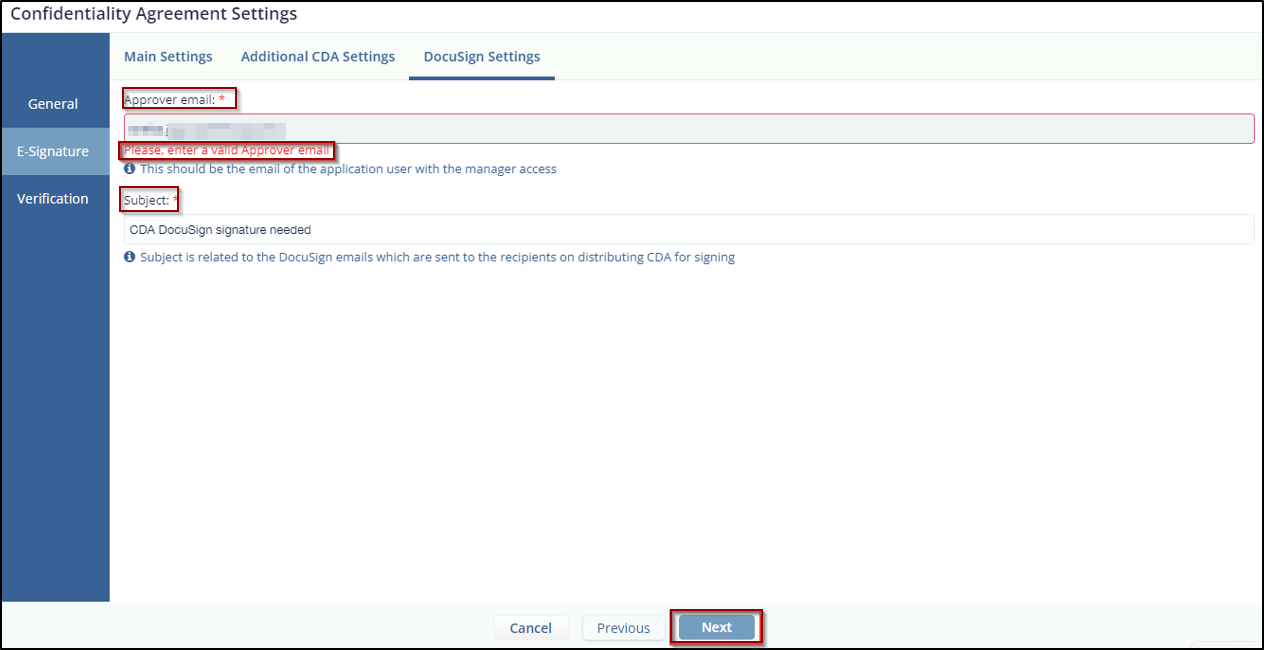
- Click Next to go to the DocuSign
Settings page, which includes:
- An Approver Email field marked with a red asterisk and a tooltip, allowing you to enter the approver's email for CDA approval.
- A Subject field, also marked with a red asterisk and a tooltip. The default subject, CDA DocuSign signature needed, is editable.
- Three action buttons – Cancel, Previous, and Next.
- Click Next to navigate to the Manual Verification page.
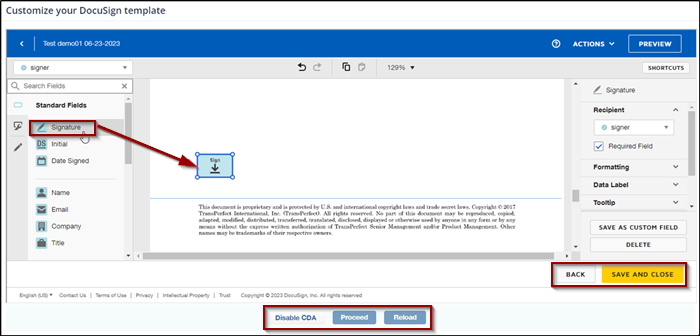
- Click Finish. You will be redirected to the Customize Your DocuSign Template page.
- Drag and drop the Signature field from the
Standard Fields section into the document's text
area, then click Proceed.
- You will be redirected to the Form Statistics page with the CDA tab displayed.
TransPerfect’s Trial Interactive is an industry leader in practical, global eClinical innovation
PRODUCTS
 Linkedin
 X
X
Didn’t find what you need?
Our dedicated Project Management and Client Services team will be available to meet your needs
24 hours a day, 7 days a week.
Toll Free:
(888) 391-5111
help@trialinteractive.com
© 2025 Trial Interactive. All Rights Reserved
