eSignature
Explore Job Aids and Videos for more help:
Job Aids
Videos
Trial Interactive provides an out-of-the-box 21 CFR Part 11–compliant electronic signature that appends a signature manifestation page to the document. While TI includes a built-in signature feature known as TI Sign, rooms can also be configured to integrate with other third-party eSignature vendors.
To send a document for signature or to sign a document, users must have the eSignature action assigned to their user profile. For additional instructions on assigning actions to user accounts, please refer to the User Management section.
Send for eSignature
To send a document for signature or sign a document, Editors and Managers must have the eSignature action assigned to their user profile in the User Management module. Administrators have this action assigned by default.
For more information on assigning actions to a user via the User Management module, click here.
To send a document for eSignature, follow the steps below:
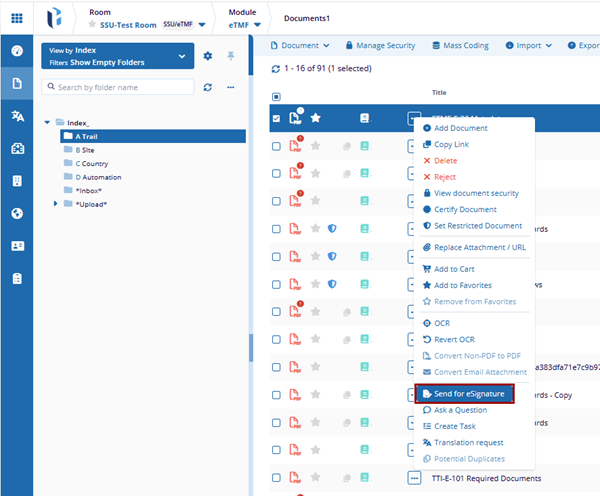
- Navigate to the documents tab within the eTMF module and select a document.
- Click the three-dot icon or right click on the document.
- Select the Send for eSignature option.
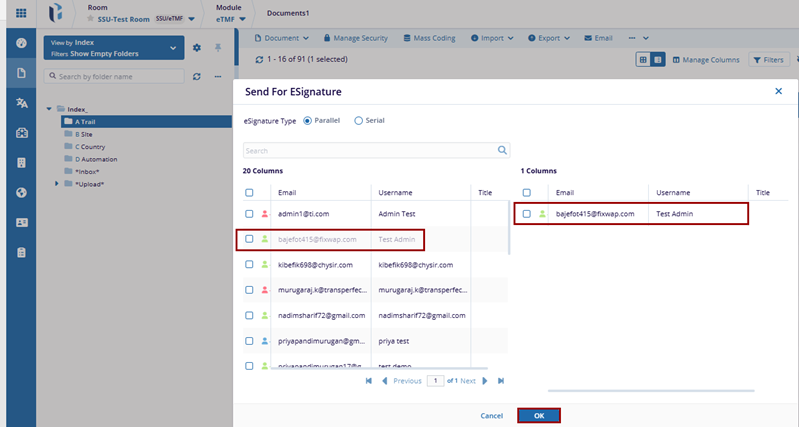
- On the Send for ESignature window, specify the eSignature type as Parallel or Serial by selecting their radio buttons.
- Select the user(s) as signers and drag & drop them to right side on the window.
- Click the blank cell under the Title field and add some value.
- Click OK.
-
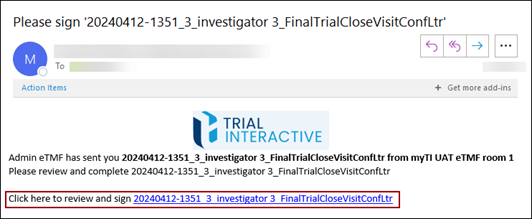
Each signatory will receive an email with a quick access link for the document to eSign.
Sign a Document
Signatories can locate documents for eSignature by accessing the Documents module, the Documents dashlet, or through the email notification they receive.
Signing a document from the Documents module
To sign a document from Documents dashlet, follow the steps below:
- Navigate to Documents dashlet on the eTMF Dashboard.
- Select the Documents to be Signed tab.
- Click the arrow next to document icon.
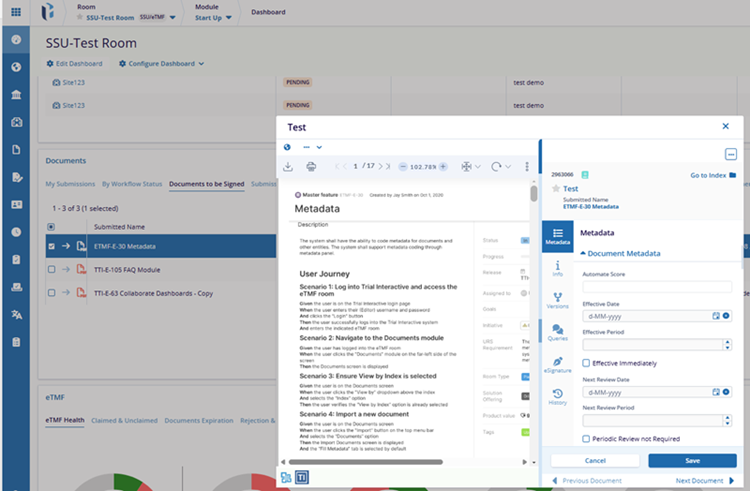
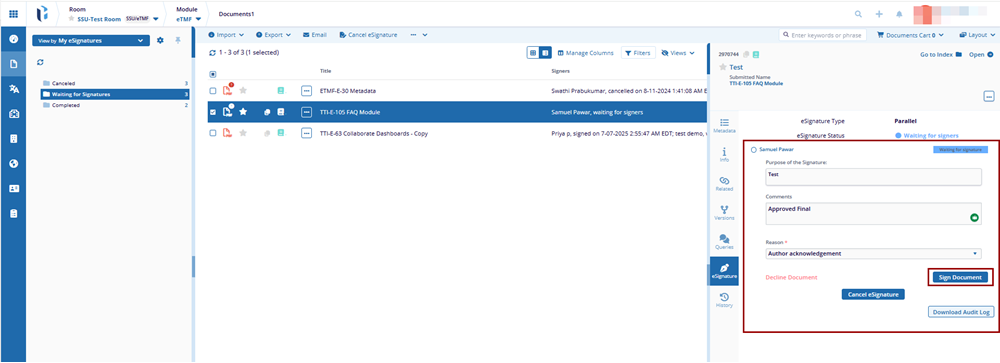
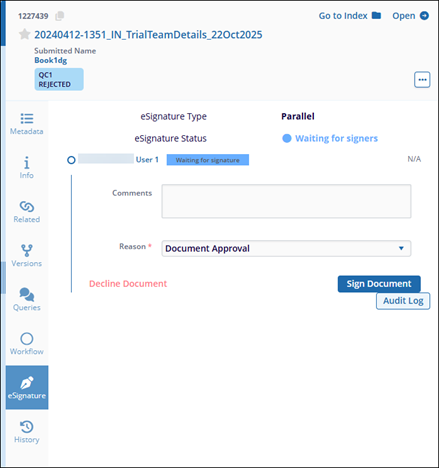
- Expand the documents metadata panel and select the eSignature tab.
- Within the eSignature tab, mandatorily select a reason from the dropdown options.
- Click Sign Document.
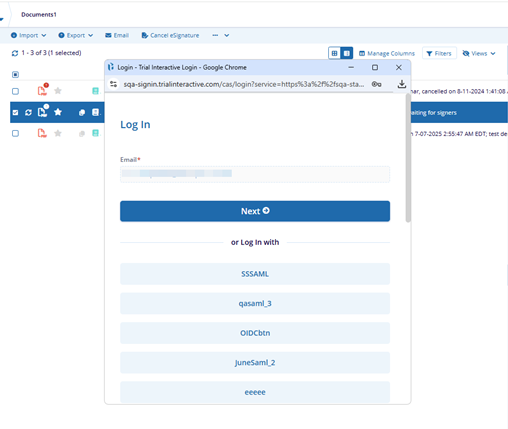
- On the Log In window where the Email field is pre-populated, click Next.
- Enter the password and click Log In.
- Once the document is successfully signed, the eSignature tab within the metadata
panel displays the Signed status.
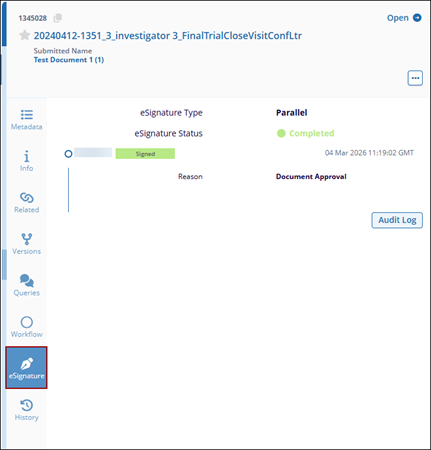
- Select the Document View and navigate to the last page where the signature page has
been appended.

Signing a document from the Documents module
To sign a document from the Documents module, follow the steps below:
- From the eTMF module, select the Documents tab.
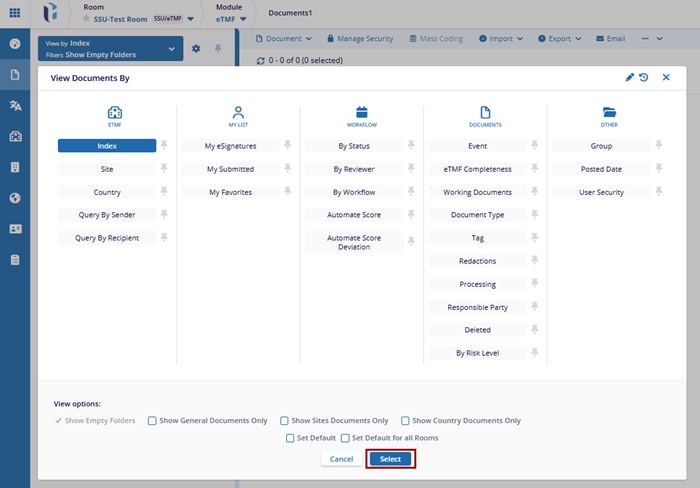
- Click the View by dropdown and choose the My eSignatures view and click
Select.
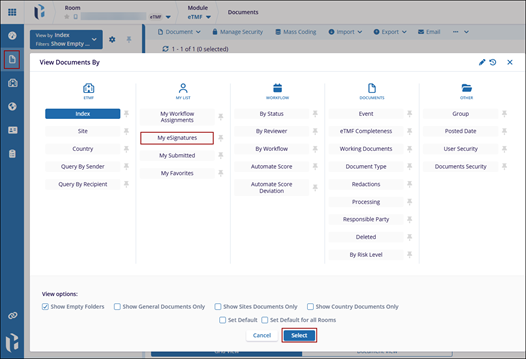
- Select the Waiting for Signatures folder.
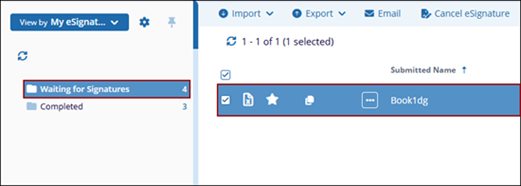
- Select the document and open the metadata panel.
-
Repeat Steps 5 to 11 from the Signing a document from the Documents module section above.
 Linkedin
 X
X
