Edit Site in Study
Explore Job Aids for more help:
Job Aids
Videos
To edit a site in a study, follow the steps below
- To access a site created with a study, follow the navigation steps detailed in the Add Sites within Study section.
- Select a site by clicking on the checkbox and click on the Edit button from the top
menu bar.

- Make the required changes in the site details window and click on the Save button
at the top-left of the screen for the changes to apply.

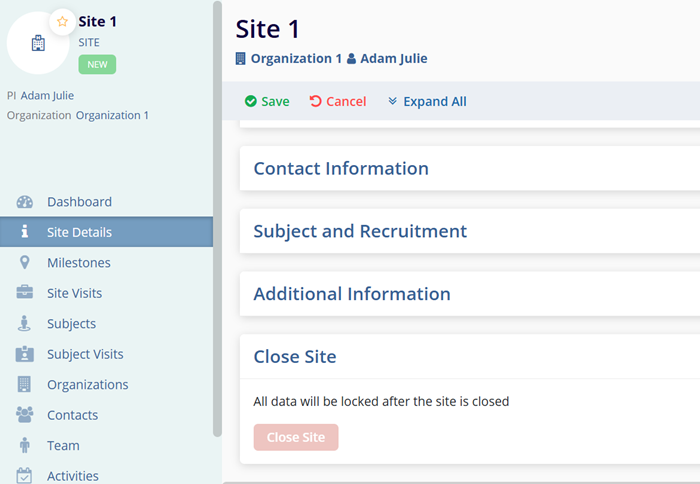
The following sections describe the site-related details users can edit.
Site Information
Within the Site Information section, make the following changes.
- Change the Principal Investigator and Site Organization by clicking on the Change button.
- Click on the Regenerate button to generate a new site name
- Enable the This is a Satellite Site toggle switch to make the site a satellite site.
- Add Regions and notes if required.
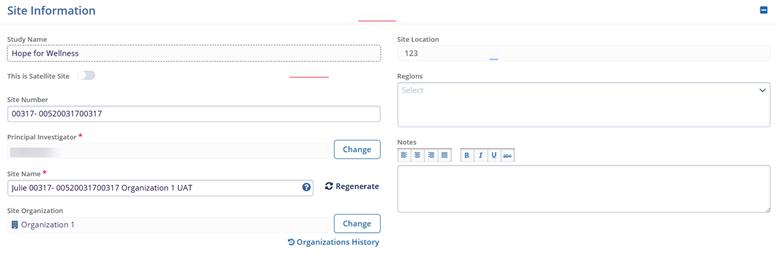
Note: Study Name and Site Location are non-editable.
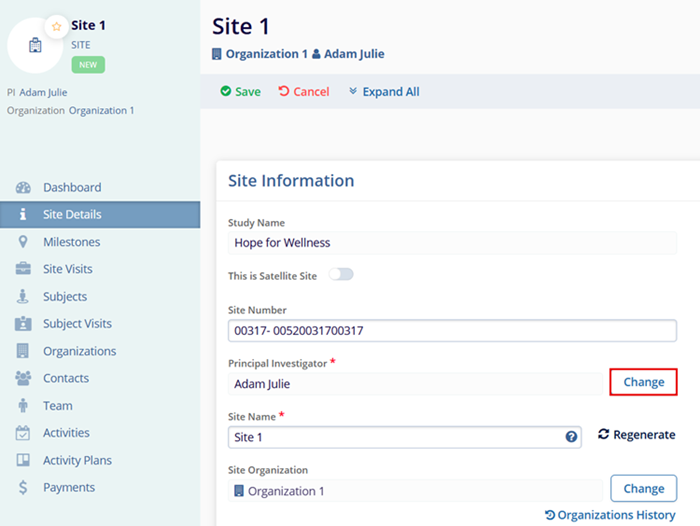
Change of Principal Investigator (PI)
To change the principal investigator, follow the steps below.
- Navigate to the Site Details screens by following the steps in the Edit Site in a Study section.
- On the Site Details screen, expand the Site information screen and click on the
Change button in front of the Principal Investigator field.
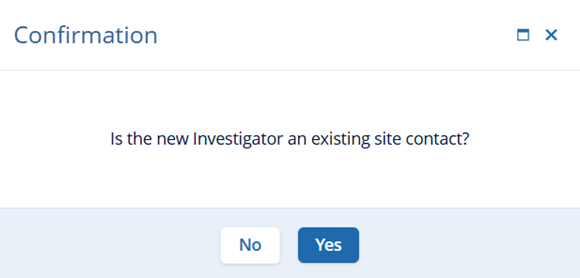
- On the Confirmation popup, click on the Yes button.
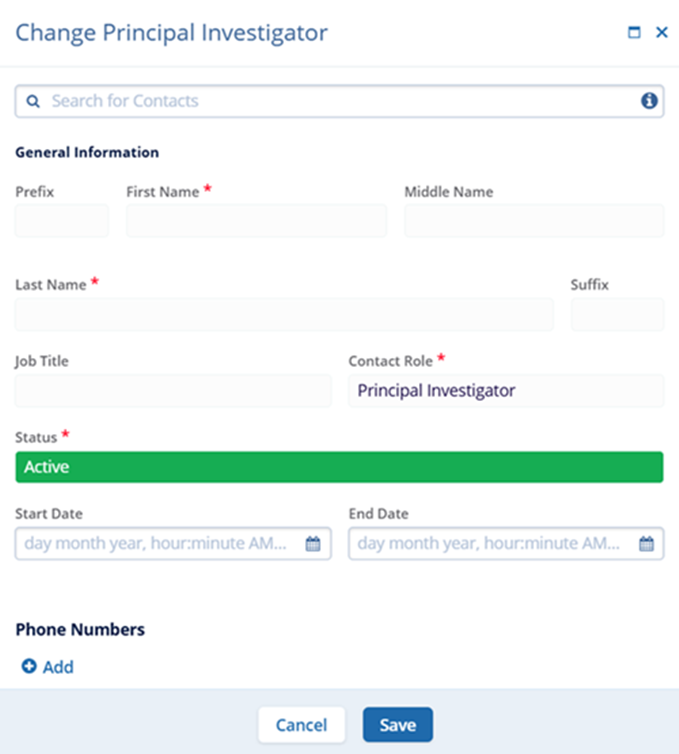
- On the Change Principal Investigator screen, make the required edits and click on the
Save button.
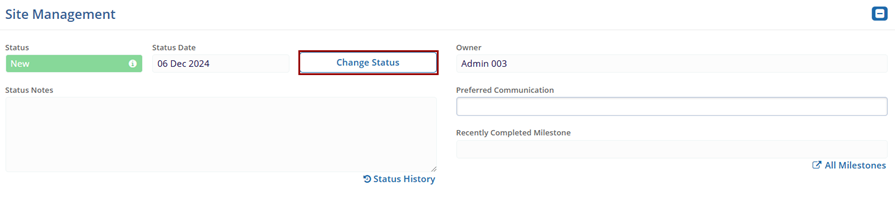
Site Management
Within the Site Information section, make the following changes.
- Click on the Change Status button to modify the Status and Status Date.
Informed Consents
In CTMS, to start tracking ICFs for a subject/participant of a study, you need to create or associate an ICF to a site. By defining site level ICFs a user can then add an ICF to a subject/participant record.
To define site level ICFs, refer to the Informed Consents section within Study Subjects.
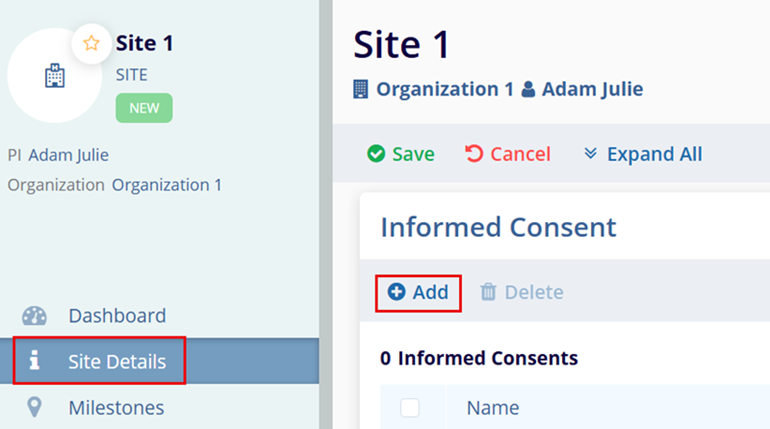
To track informed consents (ICFs) for a site, follow the steps below.
- Navigate to the Site Details screen by following the steps detailed in the Add Sites within Study section.
- Expand the Informed Consent section.
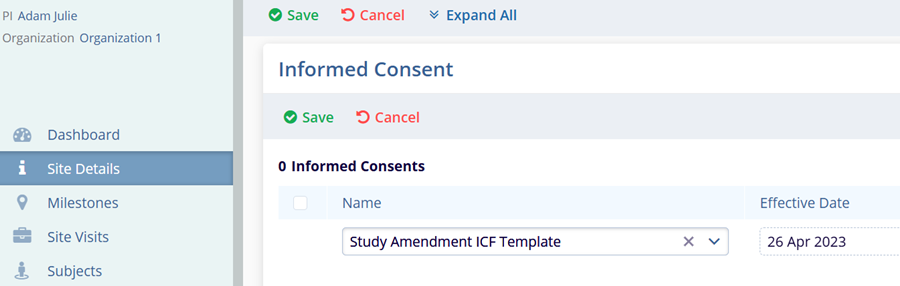
- Click on the +Add button.
- Enter the site-specific Name and Effective Date. Note: If the site is not using a site specific ICF a user can select a country or study related ICF for use at the site level.
- Click on the Save button in the informed consent section to save the record. This
creates site-level ICFs for the site.
Note:
- ICFs can only be deleted when they are not linked to any other entity (e.g., Country, Site, Subject).
- For ICFs already in use, submit a Service Desk ticket for any data corrections.
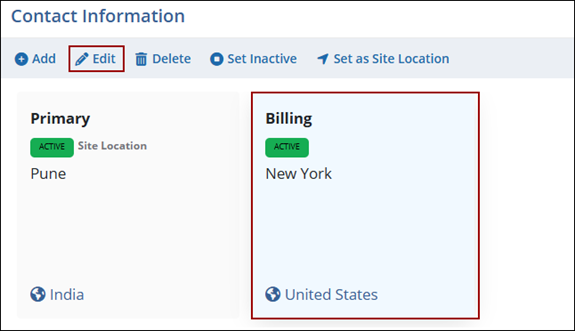
Contact Information
The Contact Information section allows configuration of organization-level addresses associated with the site.
Add Address
To add an address, follow the steps below:
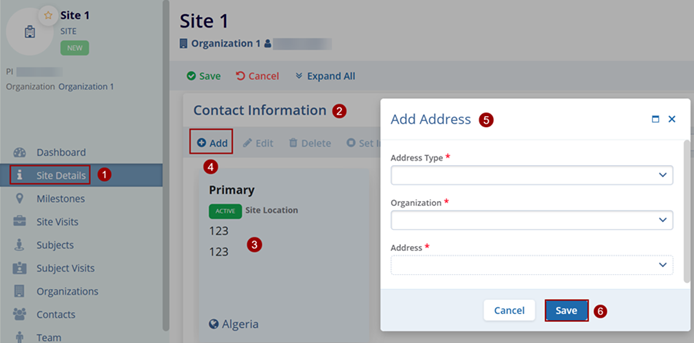
- Navigate to the Site Details screen by following the steps detailed in the Add Sites within Study section.
- Expand the Contact Information section.
- Site Location is listed as a primary address for the site.
- Click on the Add button under the Site Addresses section. This opens the Add Address window.
- Enter the mandatory metadata to create an Address i.e., Address Type, Organization, and Address as indicated by an asterisk (*) symbol next to the field title.
- Click on the Save button.
Note: Only addresses associated with the selected site organization are
available for selection.
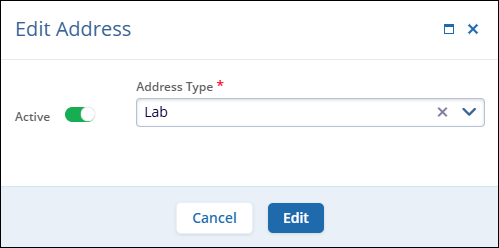
Edit Address Information
To edit the address information, follow the steps below:
- Select the address and click on the Edit button from the top menu bar.
-
On the Edit Address pop-up, change the address type.
-
Optionally enable or disable the Active toggle switch to mark the address as active or inactive, respectively.
-
Click on the Edit button at the bottom.
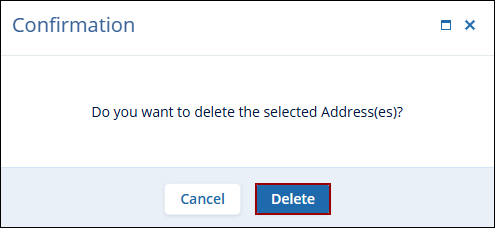
Delete Address
To delete a site contact, follow the steps below.
- Select the address and click on the Delete button from the top menu bar.

- Click on the Delete button on the confirmation pop-up.
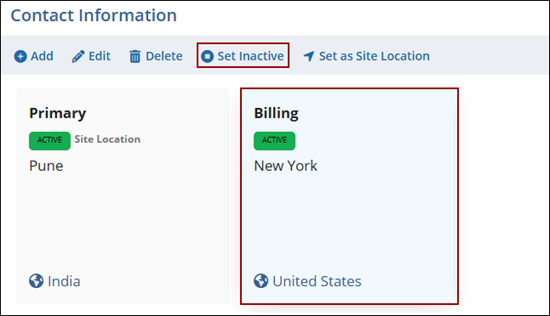
Activate or Deactivate Address
To set an address as active or inactive, follow the steps below.
- Select an active address and click the Set Inactive button from the top menu
bar.
-
Select an inactive address and click the Set Active button from the top menu bar.

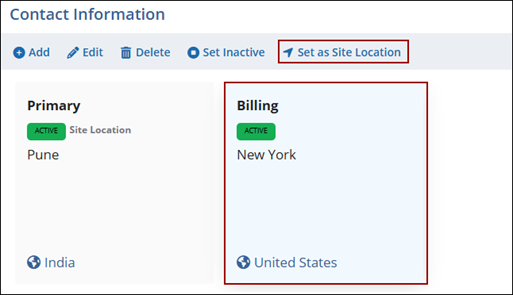
Set Address as Site Location
To set an address as a site location, follow the steps below:
- Select an active site address other than the primary address and click the Set as Site
Location button from the top menu bar.
-
On the Change Site Location pop-up, click the Yes, Change Location button.
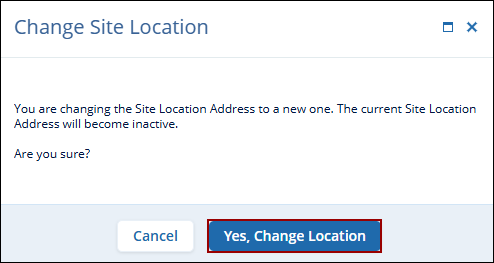
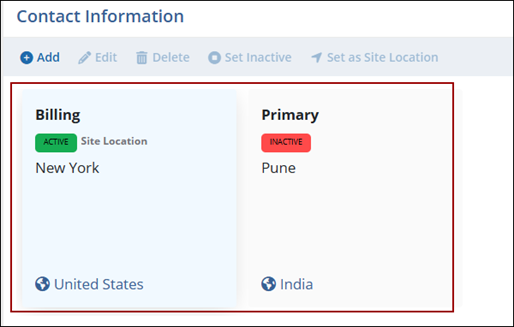
-
The newly added address is then set as the site location, and the existing primary address is automatically set to inactive.
 Note:
Note:The address must be updated at the organizational level first so it is available for selection when updating the site address.
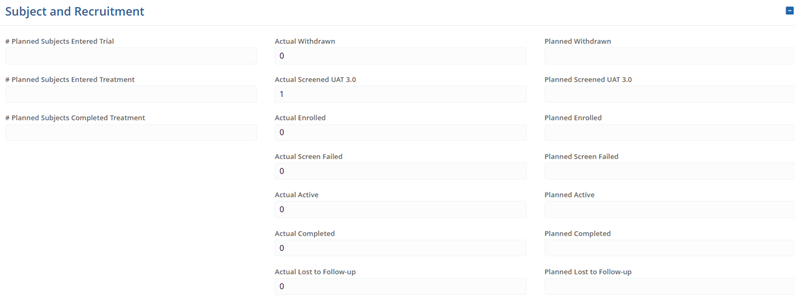
Subject and Recruitment
Update the following fields by accessing the number input icon of each field to adjust the numerical values.
- Planned Subjects Entered Trial
- Planned Subjects Entered Treatment
- Planned Subjects Completed Treatment
- Planned Withdrawn
- Planned Screened
- Planned Active
- Planned Enrolled
- Planned Screen Failed
- Planned Completed
- Planned Lost to Follow-up
- Planned Randomized
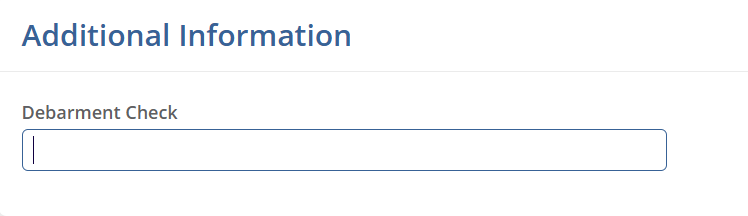
Additional Information
The Additional Information section displays active fields configured under Settings > Fields > Sites.
Close Site
To close a site, follow the steps below:
- Navigate to the Site Details screen by following the steps detailed in the Add Sites within Study section.
- Expand the Close Site section.
- Click on the Close Site button
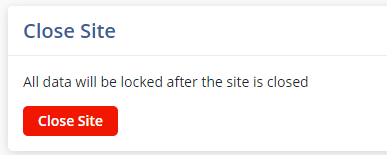
Note: Once that button is pressed, a Site Health Card window is
displayed indicating the completion status of the site-related Milestones, Site Visits,
Subjects, Activities, and Activity Plans. This gives the user a chance to locate and deal
with any unresolved items before they become locked.
TransPerfect’s Trial Interactive is an industry leader in practical, global eClinical innovation
PRODUCTS
 Linkedin
 X
X
Didn’t find what you need?
Our dedicated Project Management and Client Services team will be available to meet your needs
24 hours a day, 7 days a week.
Toll Free:
(888) 391-5111
help@trialinteractive.com
© 2025 Trial Interactive. All Rights Reserved
