Events Activities
Explore Job Aids and Videos for more help:
Job Aids
Videos
Before creating events, users must ensure that required documents are properly set up. It is recommended to make any necessary changes in the room’s Configuration Manual and coordinate with the Trial Interactive Service Desk to ensure accuracy. Advanced users can refer to the section on updating required documents for instructions on adjusting these requirements.
Users will have the option to specify whether a document type is required ‘Immediately’ or upon ‘Event Completion’. A placeholder will be automatically created for any document marked as required immediately. Documents associated with events may not be due right away; therefore, placeholders for these documents will only be generated once the associated event is created and marked as ‘Completed’. When the event is marked as completed, the placeholders will become visible in the room and will affect eTMF completeness, but they will not appear before that.
To create event, follow these steps:
- In Event Manager module, go to the Events section by clicking the calendar icon in the left pane
- Click the Create Event button in the top menu bar above the list of events.
- Using the Category field, indicate whether the event being planned is a Study, Country, or Site level event.
- Choose the Event Type from the dropdown menu.
- Give the event a name and fill out any other fields as desired.
- The planned date field will be critical to tracking the timeliness of event document submissions.
- The Due Date Period should be automatically populated based on the value entered during the creation of the event type.
- The Status field can be used to indicate whether an event is being planned
or has already been completed, most events will be created with the status
of planned.

- Press Next, the next screen allows the user to confirm whether all
required document types for this event are displayed. The list will be
populated based on the values chosen during the creation of the Event
Type.
- If another document type is required, the user can press the Add button in the menu bar above the right panel. This will open the Add Document Type to Event window.
- Use the Search bar or manually drill down in the folder structure to locate the required document type and press Add.
- Once document type is added, click the Create button to create a new event.

Delete Events
The Delete button in the Events section allows users to remove selected events from the system
To Delete Events, follow these steps:
- From the Events grid, select the event(s) you want to delete by checking the box next to the event name.
- Click the Delete button in the top menu bar, next to Create Events
- A confirmation pop-up will appear, click Yes to confirm the deletion or click No to cancel the deletion.
- A success message will appear, indicating the event(s) were successfully deleted.

Copy Events
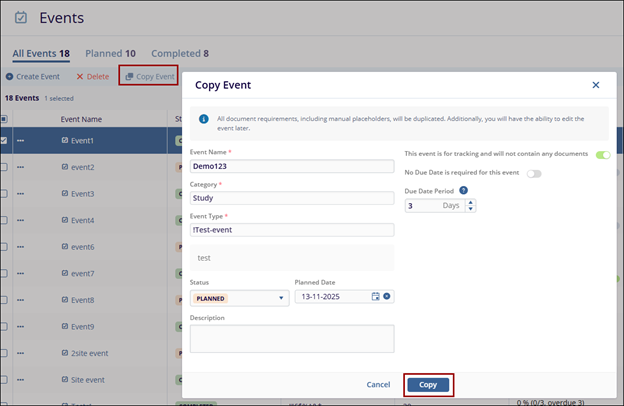
The Copy Event button in the Events module allows users to duplicate an existing event from the displayed list. This feature saves time by enabling users to create a new event that retains the metadata of the original.
- From the Events grid, select the event(s) you want to copy by checking the box next to the event name.
- Click the Copy Event button in the top menu bar, next to Delete Events.
- A Copy Event window will appear. Click the Event Name textbox and enter
the name as per your requirement.Note: In the Copy Event user can edit the Event Name, Status, Planned Date, Description, and Due date. The Category and Event Type are non-editable.
- Once the required Information is entered, click on the Copy button as shown in
the screenshot below.
A success message will appear, indicating event(s) were successfully copied.
 Linkedin
 X
X
