CRA Reconciliation Reports
Explore Job Aids for more help:
Job Aids
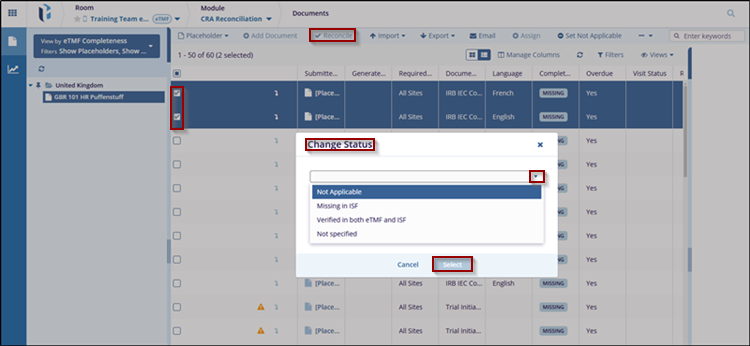
The Reports tab within CRA Reconciliation module functions as a centralized repository for reconciliation reports generated during site visits.
Within the Reports tab of the CRA Reconciliation module, users can filter and view reports by Site, Visit Type, or CRA using the dropdown menu on the left-hand panel. Users can also create new reconciliation reports by selecting a specific visit type and site, which will display the documents categorized as Verified and Not Applicable for that site. Additionally, users have the option to email either the complete report or only the list of documents identified as missing from the site binder. The generation of reports is possible only when the reconciliation activity has been performed.
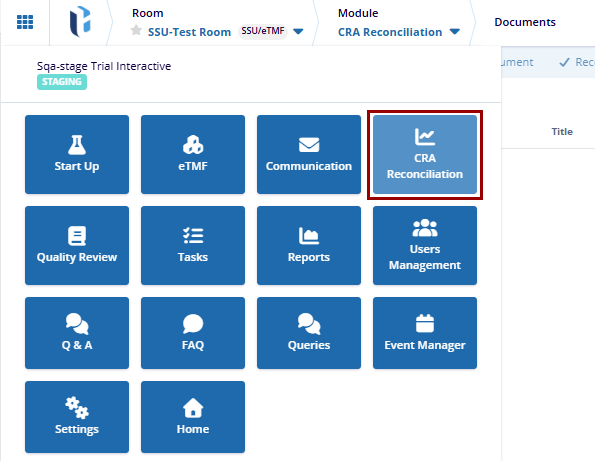
To access the Reconciliation Reports tab, navigate to the CRA Reconciliation module from the navigation grid and select the Reports tab from the left-hand navigation pane.
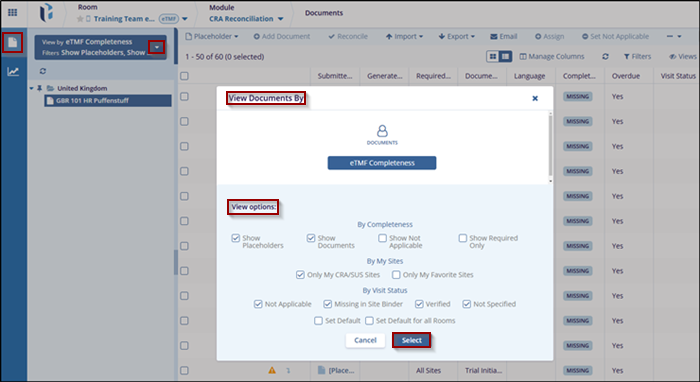
Reconciliation Reports Grid View
To configure the reconciliation reports grid view, follow the steps below:
- Navigate to the CRA Reconciliation module.
- Select the Reports tab from the left-hand navigation pane.
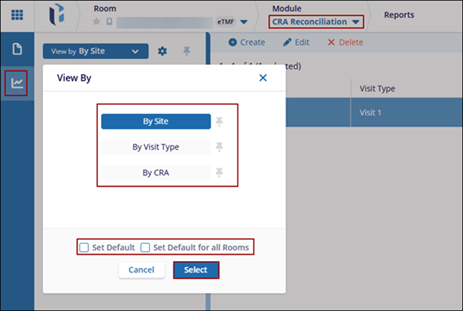
- Click the View By dropdown and choose any one of the following views
- By Site
- By Visit Type
- By CRA
- To configure the selected view as default, choose one of the following
options:
- Set Default: Applies the selected view as the default for the current session.
- Set Default for All Rooms: Applies the selected view as the default across all rooms.
- Click Select.
Create Reconciliation Report
To create a reconciliation report, follow the steps below:
- Navigate to the CRA Reconciliation module.
- Click on the Reports tab from the left-hand navigation pane.
- Click the +Create button from the top menu bar.

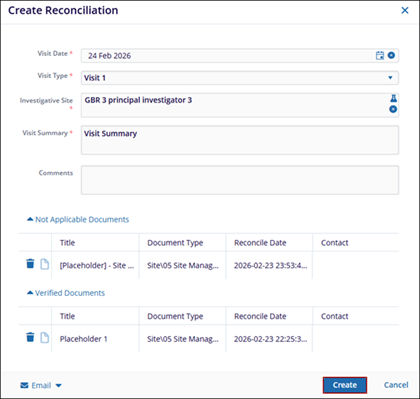
- Fill in the following mandatory fields within the Create Reconciliation form:
- Visit Date: Click the date picker icon and add a visit date.
- Visit Type: Select a visit type from the dropdown. Note: The visit types configured in the CRA Visit Types section of the Settings module will be available for selection in the dropdown list.
- Investigative Site: Click the beaker icon and select the site.
- Visit Summary: Enter the visit summary.
- Comments: Optionally enter the comments
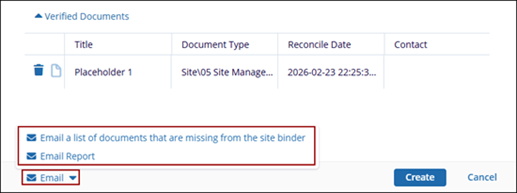
- The Not Appliable Documents and Verified Documents section will populate with
documents from the latest reconciliation actions as per the site selected.

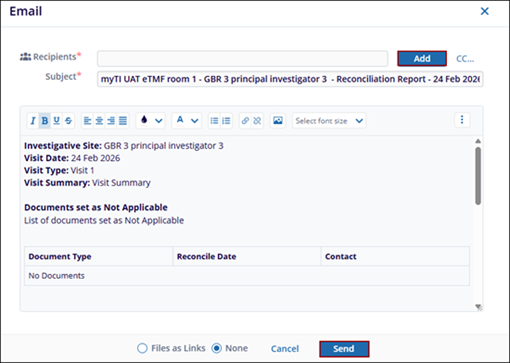
- Click the Email button at the bottom and select any one of the following
options:
- Email a list of documents that are missing from the site binder
- Email Report
- If the ‘Email a list of documents that are missing from the site binder’ option is
selected, perform the following
- On the Email window, click the Add button against the Recipients
field.
- On the Choose Email Recipients window, select either Groups, Users or Contacts tab.
- Select the groups, users or contacts and drag & drop them to the Selected members section.
- Click Save.
- On the Email window verify the list of documents missing in ISF and click
Send.

- On the Email window, click the Add button against the Recipients
field.
- If the Email option is selected, specify recipients by clicking the Add button and selected users, groups or contacts as required.
- Verify the documents within the email body and click Send.
- Once the required details are added, click Create.
Edit Reconciliation Report
To edit a reconciliation report, follow the steps below:
- Navigate to the CRA Reconciliation module and select the Reports tab.
- Select the reconciliation report from the list and click Edit from the top
menu bar.
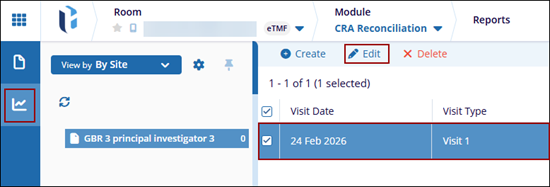
- Make the required changes on the Modify Reconciliation window.
- Click Save.
Delete Reconciliation Report
To delete a reconciliation report, follow the steps below:
- Navigate to the CRA Reconciliation module and select the Reports tab.
- Select the reconciliation report from the list and click Delete from the top menu bar.
- On the warning pop-up click the Delete button.
 Linkedin
 X
X
