Site Visit Navigation
Explore Job Aids and Videos for more help:
Job Aids
Videos
To navigate to the site visit, follow the steps below
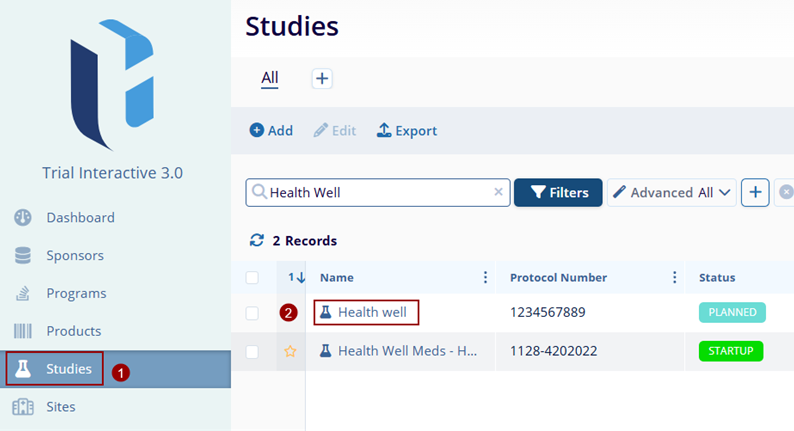
- From the left-hand navigation links, click on Studies.
- Click on the study’s name to select that particular
study.
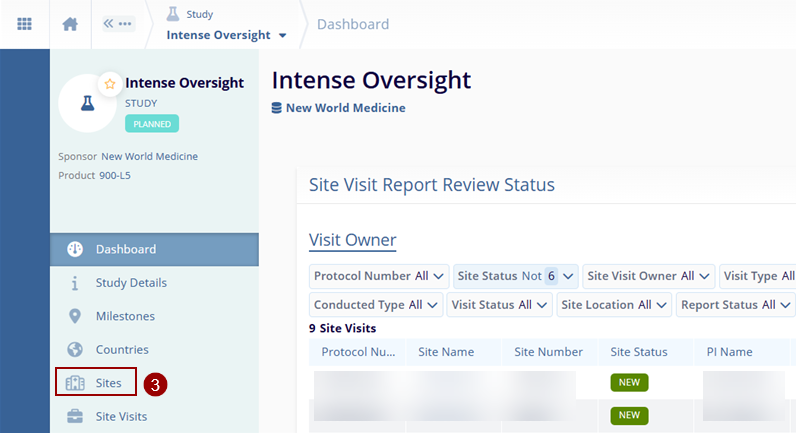
- On the Study Dashboard, navigate to the left-hand navigation
links and click on Sites.
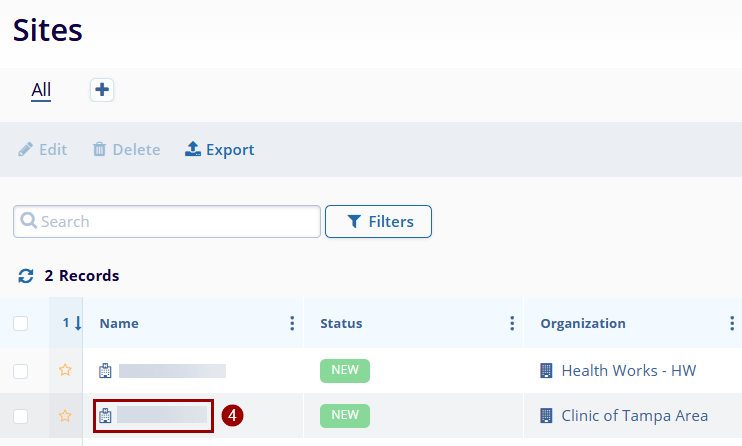
- On the Sites screen, navigate to the site
records section and select a site by clicking on the site name.
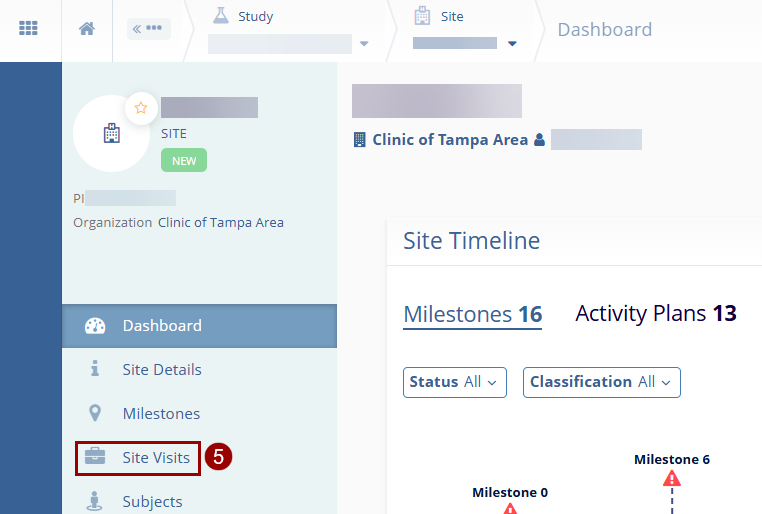
- On the selected site window, navigate to the left-hand
navigation links and select Site Visits.
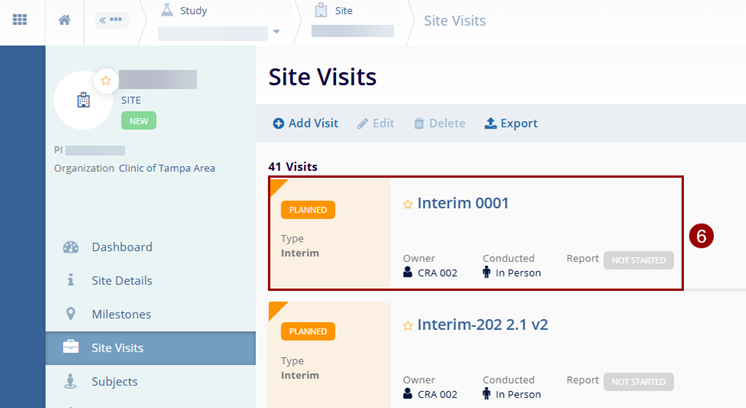
- On the Site Visits screen, select the visit to review by
clicking on the visit name.
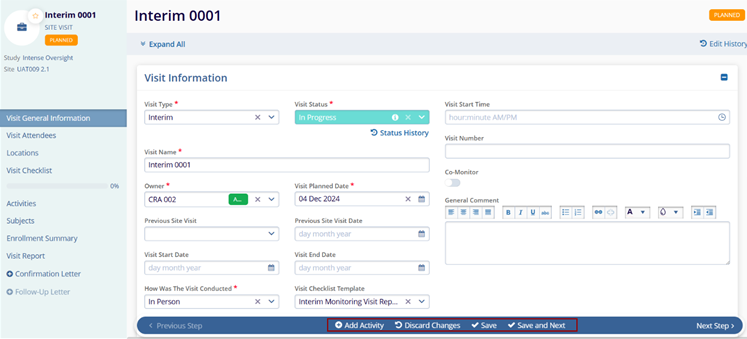
- On the Site Visit General Information window, review the visit details, and make the required changes to the Visit Information and Additional Information section.
- Click on the Save button.
TransPerfect’s Trial Interactive is an industry leader in practical, global eClinical innovation
PRODUCTS
 Linkedin
 X
X
Didn’t find what you need?
Our dedicated Project Management and Client Services team will be available to meet your needs
24 hours a day, 7 days a week.
Toll Free:
(888) 391-5111
help@trialinteractive.com
© 2025 Trial Interactive. All Rights Reserved
