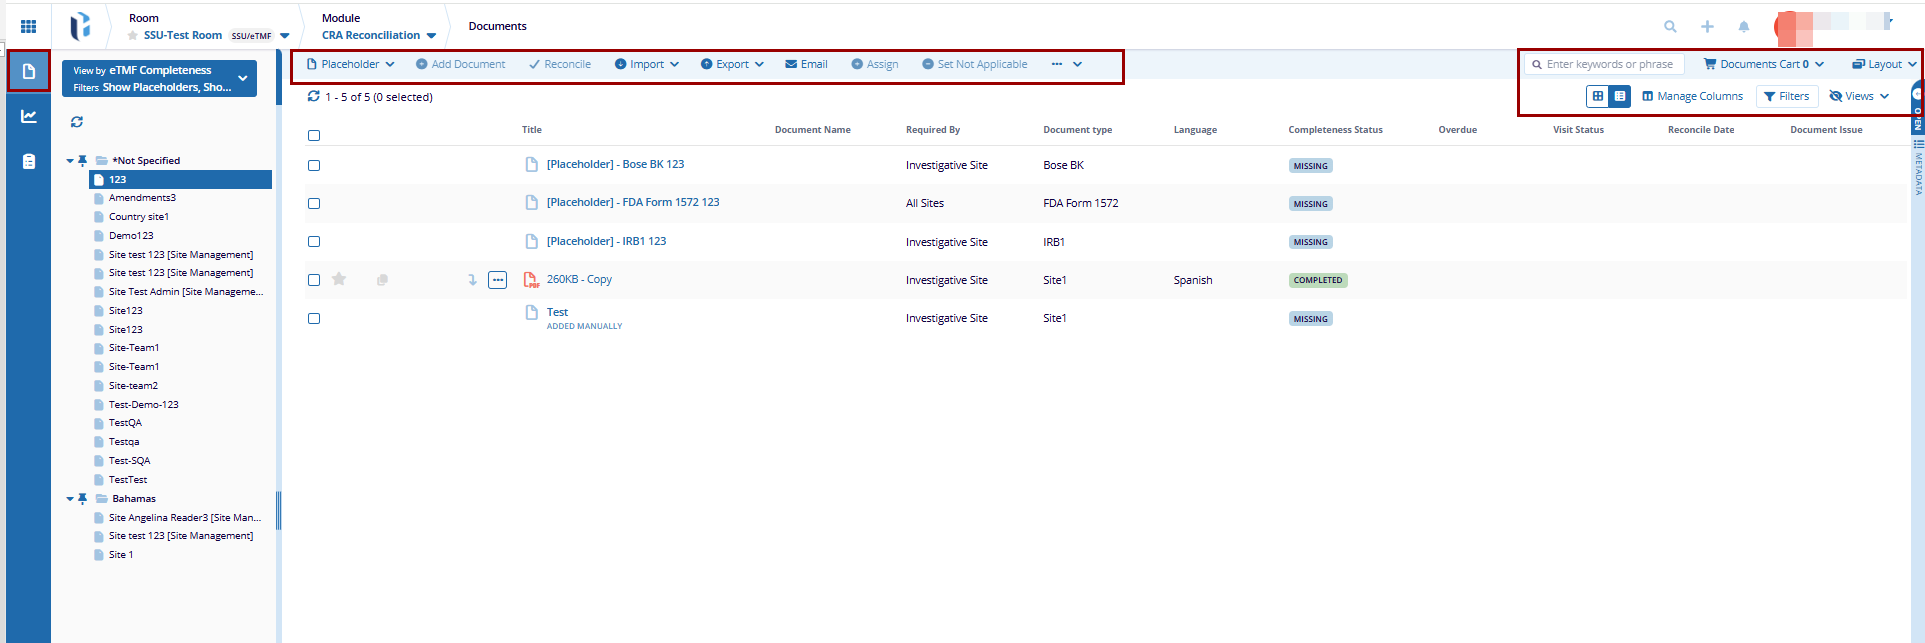
CRA Reconcilation - Top Menu Ribbon
The top menu ribbon provides quick access to tools, that include Placeholder, Add Document, Reconcile, Set Not Applicable, Export, Assign, Document Cart, Layout, etc.
Placeholder
A Placeholder is a reserved space within a document management system that indicates where a specific document needs to be added. It helps organize and track required documents by ensuring all necessary files are uploaded or linked appropriately.
This includes activities to add, edit and delete placeholders.
Add Placeholder
Adding a placeholder creates a reserved space in the system for a document that needs to be uploaded. It helps users track required documents and ensure they are added at the appropriate time.
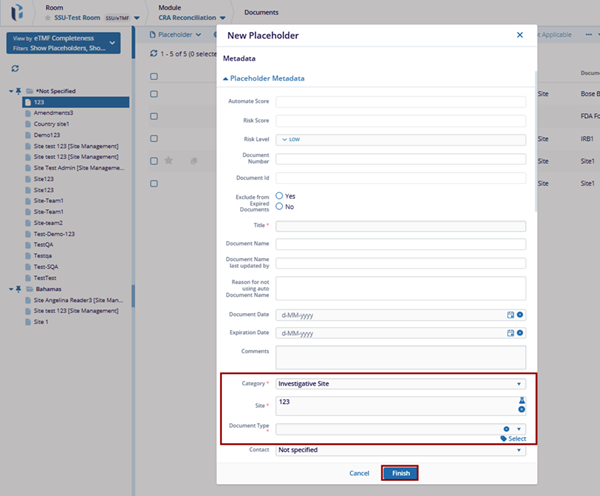
- Click the Placeholder dropdown menu and select +Add Placeholder.
- On the New Placeholder window, fill in the required metadata.
- Click the Finish button to apply the changes.
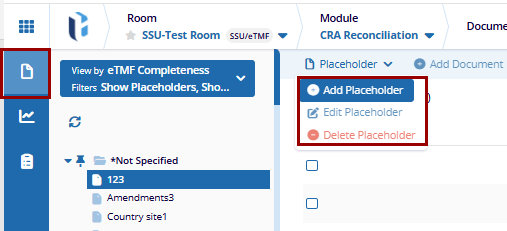
Edit Placeholder
To edit Placeholder, follow these steps:
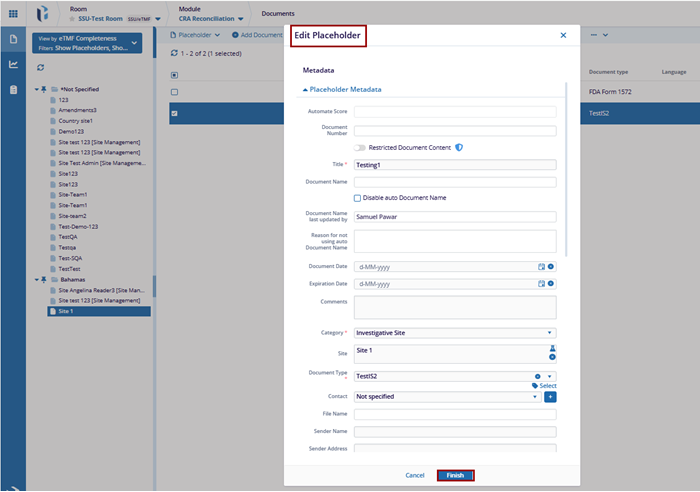
- Select a manually created placeholder from the grid.
- Click the Placeholder dropdown and select the Edit Placeholder option.
- On the Edit Placeholder window, change the required metadata fields for the placeholder.
- Click the Finish button to apply the changes.
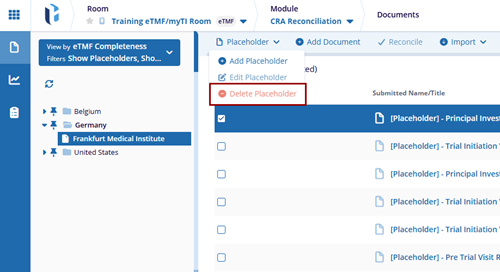
Delete Placeholder
- Select a manually added placeholder from the grid.
- Click the Placeholder dropdown and select the Delete Placeholder option.
Add Document to Placeholder
- Select a placeholder form the grid and click the Add Document button.
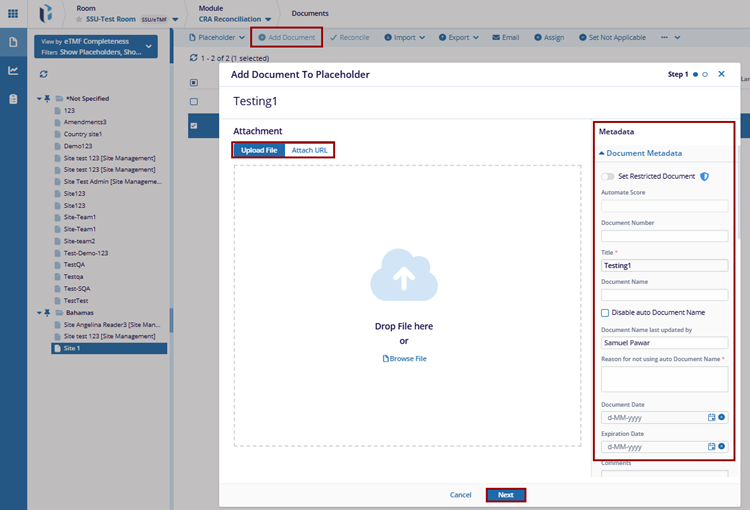
- In the Add Document to Placeholder window, upload the file by either selecting it from the device or dragging and dropping it into the designated area.
- Complete all required metadata fields as applicable.
- Click the Next button.

- Within the Step 2, click the Browse All button to set the access levels
for users or groups.
- On the Browse Groups and Users window, select either Groups or Users tab.
- Select the groups or users and click the Add (n) Members button.
- Once the users or groups are added, click the permission dropdown and choose any one of the following options.
- Click Add.
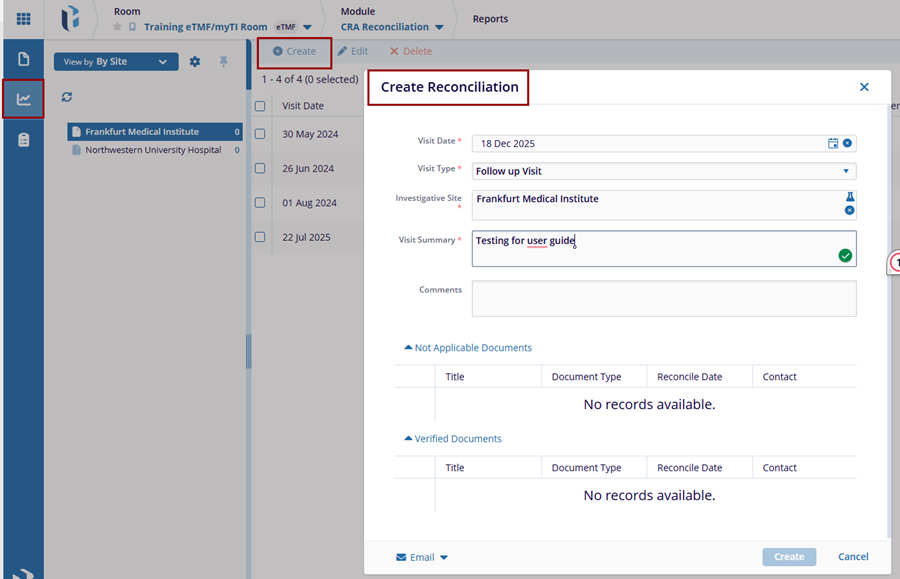
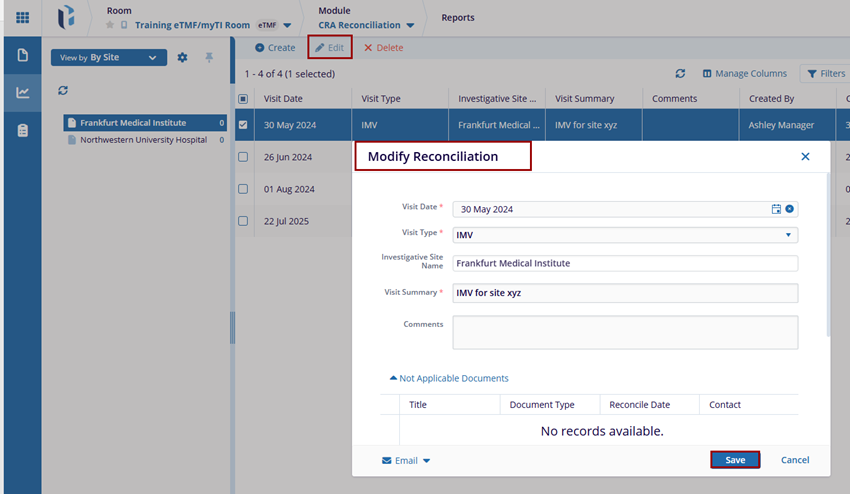
Reconcile
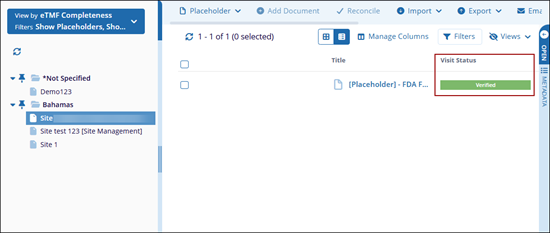
CRA users can mark documents as Verified, Not Required, or Missing in Investigator Site File (ISF) while reconciling documents. The Reconcile refers to the process of comparing and matching documents or data from different sources (e.g., eTMF and site binder) to ensure consistency and accuracy.
Editor and Reader users can accomplish this process only when their setup fulfills two conditions:
To Reconcile the document, follow the steps below:
- Select the site from the list of folders and select one or more documents.
- Click the Reconcile button from the top menu bar.
- On the Change Status pop-up, click the dropdown and chose any one of the following
statuses.
- Missing in ISF
- Verified
- Not Applicable
- Click Select on the Change Status pop-up.
- Assigned statuses are shown as labels in the Visit Status column.
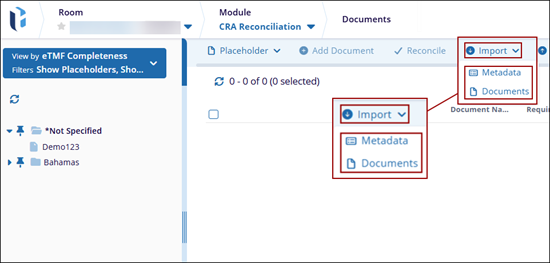
Import
Users can import documents and apply metadata either individually or in bulk. ZIP files can be uploaded with the option to extract their contents during the import process. Additionally, documents may be assigned to unfulfilled placeholders at the time of import.
To import documents and metadata, click the Import button from the top menu bar and select any one of the following options.
- Documents
- Metadata
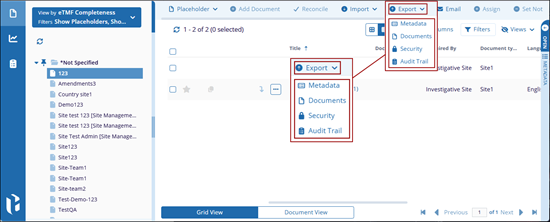
Export
The Export option enables users to export documents, metadata, security and audit trail. Users can choose to export selected records or export all records displayed in the current grid.
To retrieve an export, click the Export button from the top menu bar and select any one of the following options.
- Metadata
- Documents
- Security
- Audit Trail
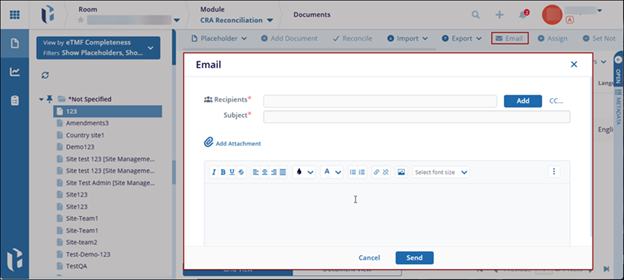
Selecting the Email option enables users to send messages to other room users, groups, or contacts. The email may be associated with a specific document or sent as a general communication.
To send an email, click Email from the top menu bar, select the intended recipients, compose the message, and attach any necessary files before sending.
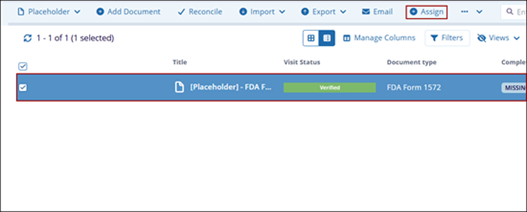
Assign Documents
To assign documents to the placeholder, follow the steps below:
- Select a placeholder from the grid
- Click the Assign button from the top menu bar.
- On the Assign Document window, select a document from the list and click
Assign.
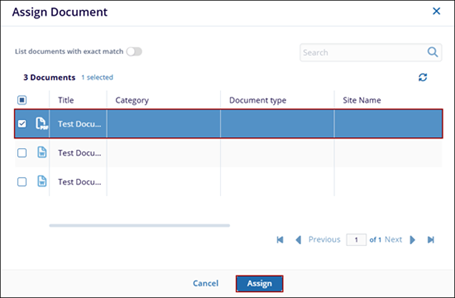
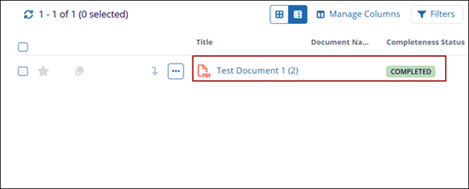
- Once the document is successfully assigned, the placeholder title is replaced
with the document title and Completeness status changes to Completed.
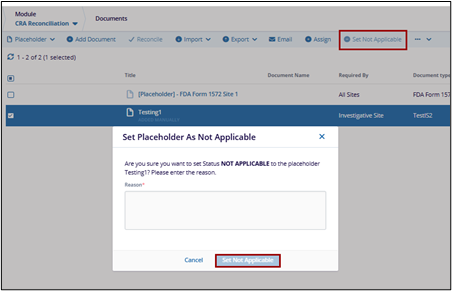
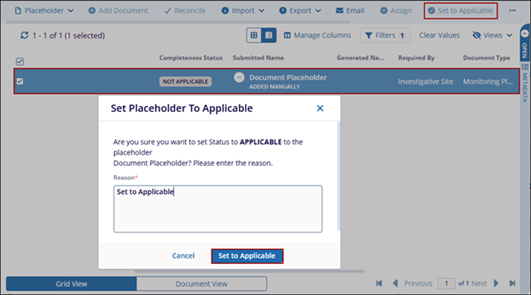
Set Not Applicable
To set a placeholder as not applicable, follow the steps below:
- Select a placeholder from the grid
- Click the Set Not Applicable button to apply the changes.
- On the Set Placeholder As Not Applicable pop-up, mandatorily specify a reason to set the status as not applicable.
- Click the Set Not Applicable button.
- To set a placeholder as applicable, select placeholder that was initially set as not applicable.
- Click the Set to Applicable button.
- Mandatorily enter a reason and click the Set to Applicable button.
 Linkedin
 X
X
