Initiate Document Query
To initiate a document query, follow the steps below:
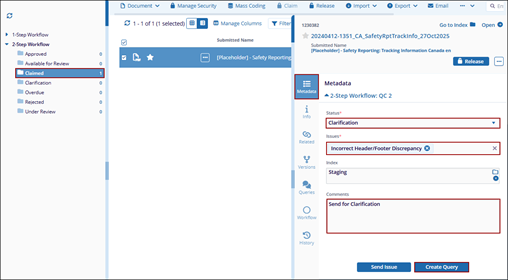
- As a reviewer in the first stage of workflow, claim a document by following steps detailed in the Claim a Document section.
- Open the documents metadata panel and navigate to the workflow step section in the metadata tab.
- Click the Status dropdown and select the Clarification status.
- Click the Issues dropdown and select the one or multiple issues.
- Enter the comments.
- Click the Create Query button.
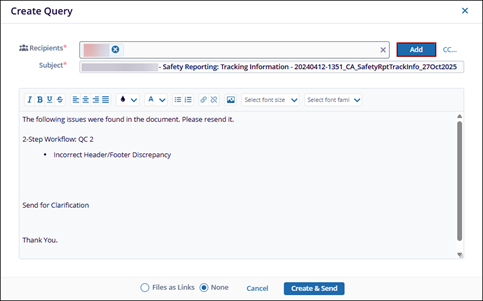
- On the Create Query window, the query text and recipient name are pre-populated.
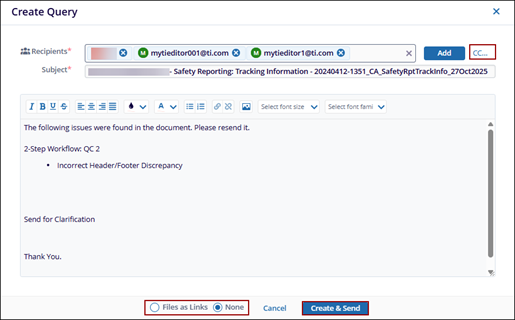
- To add additional recipients, click Add.
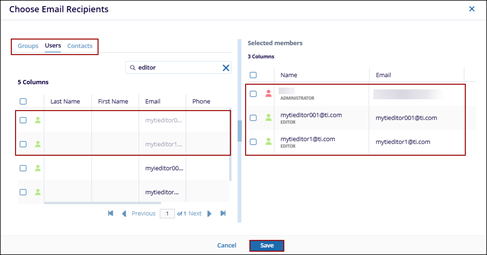
- On the Choose Email Recipients window, select either Groups, Users, or Contacts tab.
- Select the groups, users or contacts and drag & drop them to the Selected member’s section.
- Click Save.
- Modify the query message as needed, add additional users in the CC field, and
- Select either Files as Links or None to determine how to deliver document associated with the query.
- Click Create & Send to submit the query.
- In the documents metadata panel, click the Save button.
- The document is displayed in the Clarification folder.
Note:
- After a query is created, the recipients receive an email notification with the query details.
- An ‘?’ icon appears next to the document icon signifying that the document has an open query.
- The list of issues a reviewer can select depends on the issues configured within the approval workflow. For more information on configuring issues, click here.
