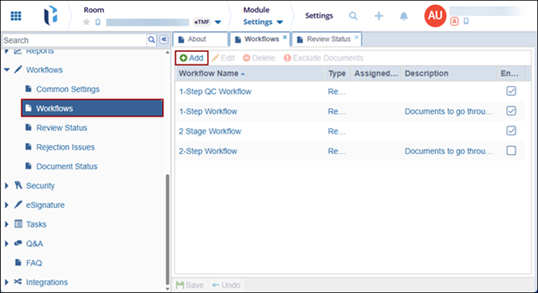
Workflows
The Workflows section enables administrators to configure (add, edit, delete) both one-step and two-step workflows for document processing within Trial Interactive rooms.
To access the Workflows page, navigate to the Settings module and select Workflows from the left-hand navigation panel.
Create New Workflow
To create a new workflow, follow the steps below:
- Navigate to the Workflows page and click +Add.
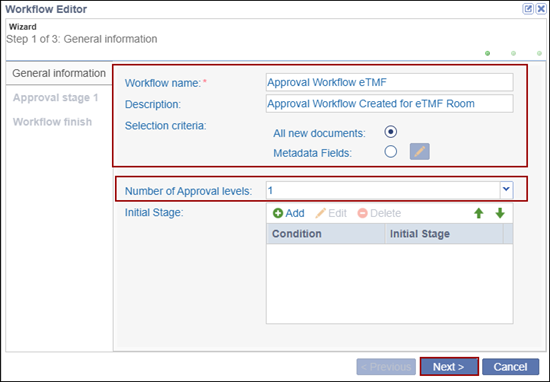
- On the Workflow Editor window, specify the following details in the General
Information section:
- Workflow Name*: Mandatorily provide a name to the workflow.
- Description: Optionally add a description for the approval
workflow.
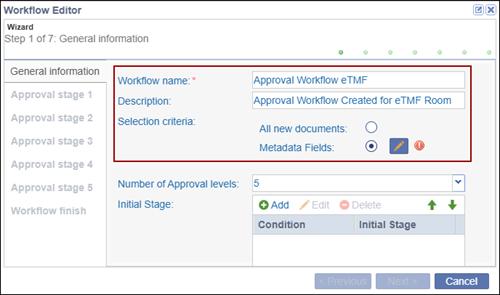
- Selection Criteria: Specify a selection criterion either as All New
documents or Metadata Fields.
- Select the All New documents radio box to include all new documents.
- To select metadata fields, select the Metadata Fields radio
button and click the pencil icon.
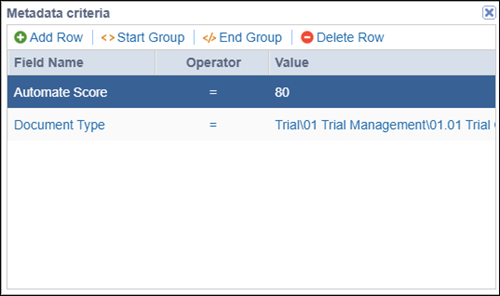
- On the Metadata criteria window, click +Add Row.
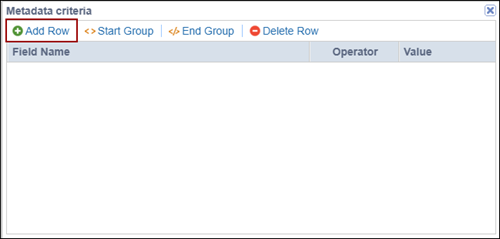
- Add the required values in the Field Name, Operator and Value fields.
- Add additional metadata criteria by clicking +Add
Row.
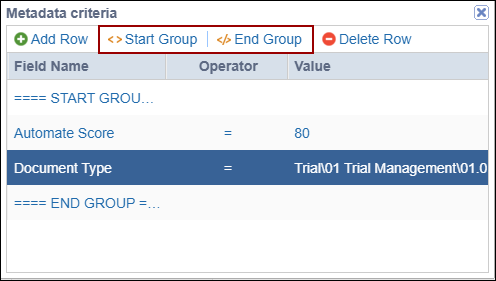
- Click Start Group and End Group before and after each
category.
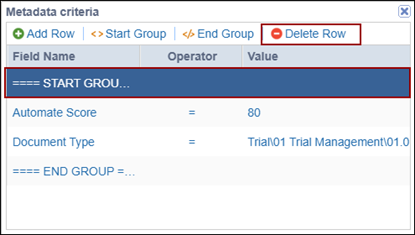
- Select a row and click Delete Row to remove a condition from the
wizard.
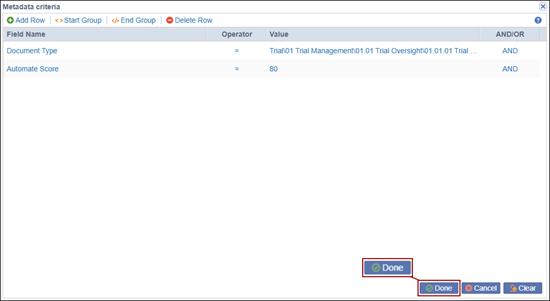
- Click done once the conditions are added.
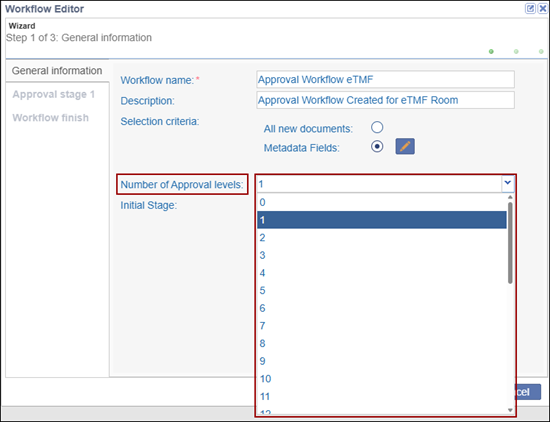
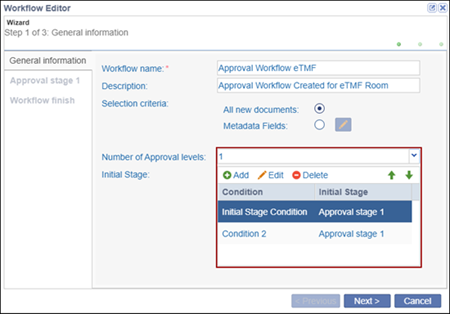
- Number of Approval levels: Click on the dropdown and select the number
of approval levels a document should go through.
- Initial Stage: Optionally configure the initial conditions by following
similar steps for metadata fields within the Selection
criteria.
- Once the General Information section is configured, click the Next >
button.
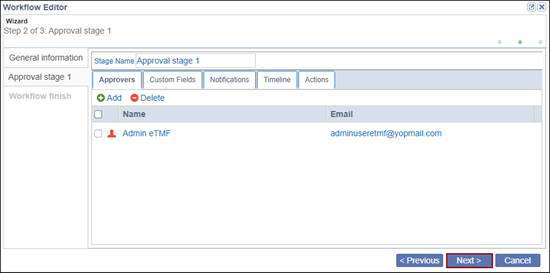
- On the Approval Stage 1 tab, rename the stage if required and click on the
+Add button.
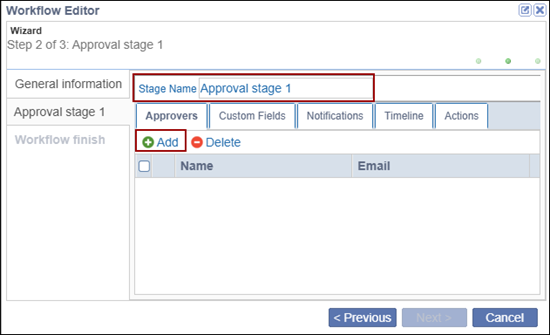
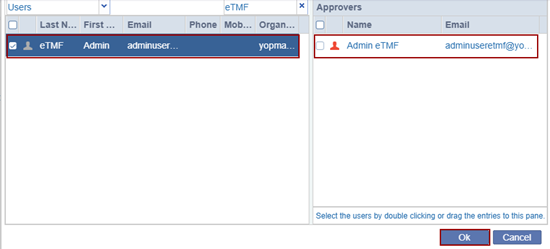
- On the Select Approvers window, click on the dropdown above and select either
Users or Groups.
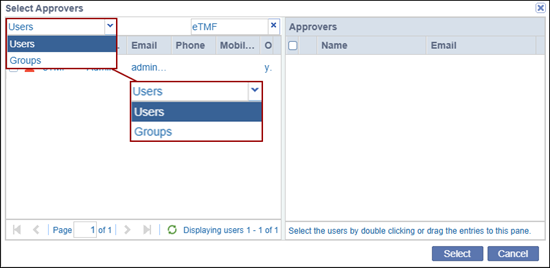
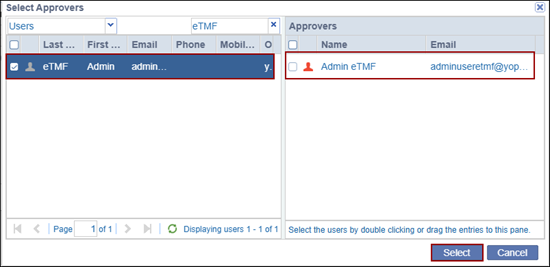
- Select the users and add them to the Approvers section on the right side of the
window and click Select.
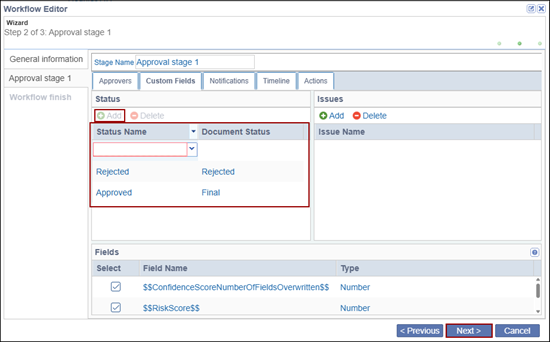
- Click on the Custom Fields tab.
- To add a status, click +Add.
- Add the Status Name and Document Status from the dropdown options.
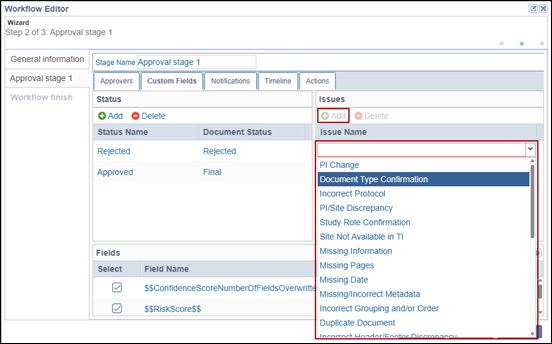
- To add rejection issues, click ‘+Add’ in the Issues section and choose an issue
from the available list.
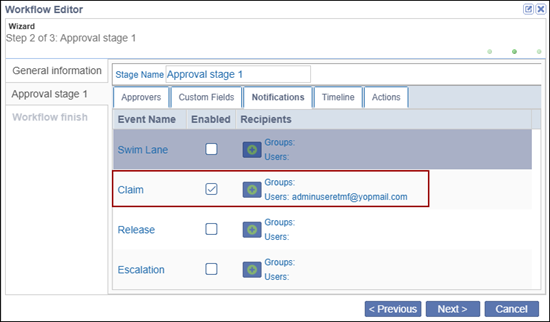
- Click on the Notifications tab.Click on either Groups or Users to add them to
the list recipients.

- Choose the required users or groups as recipients and click Ok.
- Enable or disable the notifications for the following events and to whom the
users or groups are added.
- Swim Lane
- Claim
- Release
- Escalation
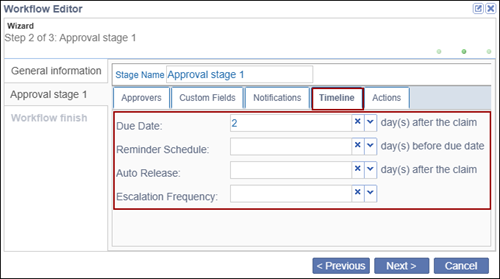
- Click on the Timeline tab and configure the timelines for the following:
- Due Date
- Reminder Schedule
- Auto Release
- Escalation Frequency
- Click on the Actions tab and perform the following to add conditions.
- Click +Add
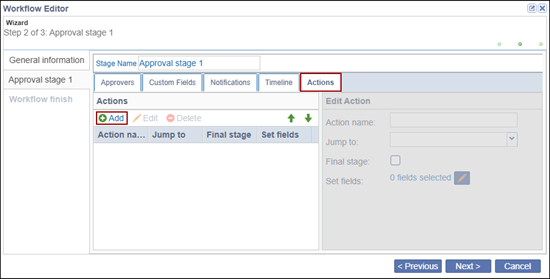
- On the Action Creation window, add the Field Name, Operator and Value.
- Click Save and Apply.
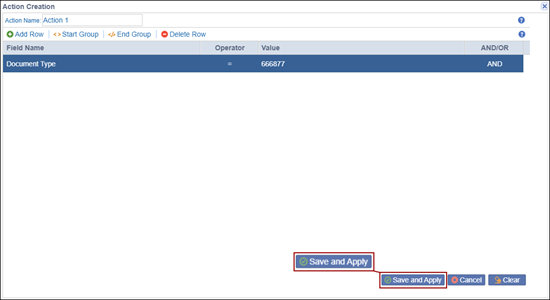
- To delete an action, select the action and click Delete.
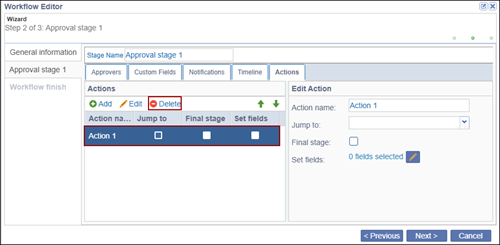
- Click +Add
- Click Next once the Approval Stage is configured.
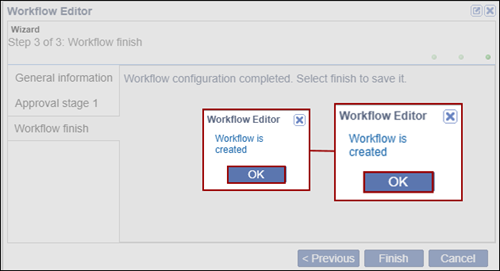
- On the Workflow finish step, click the Finish button.
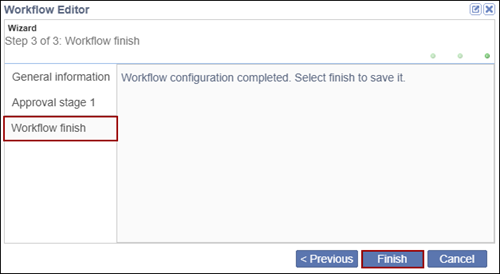
- Click OK on the Workflow Editor pop-up.
Important
- Users can define multiple approval stages and configure approvers, custom fields, notifications, timelines, and available actions for each stage.
- In the Custom Fields tab of an approval stage, the values configured for Final and Rejected statuses in the Document Settings section must be added in order to enable the Next button.
Edit a Workflow
To edit a workflow, follow the steps below.
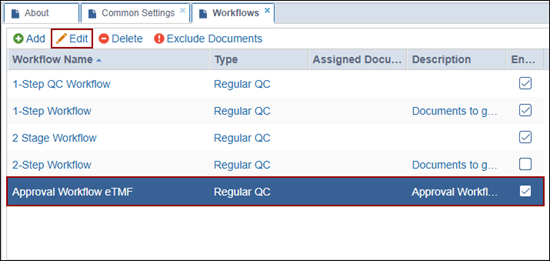
- Select a workflow to edit and click Edit from the top menu bar.
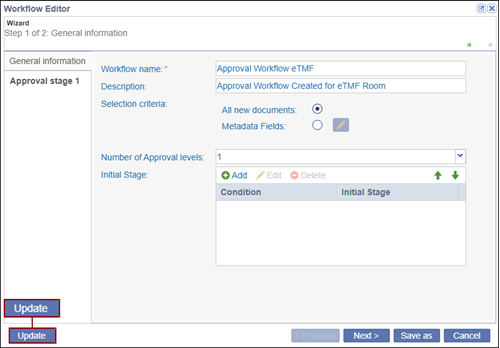
- On the Workflow Editor window, make the required changes and click Update to
modify the existing workflow.
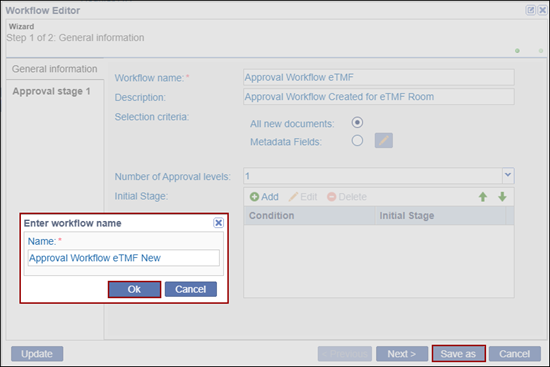
- To save the edited workflow as a new workflow, click Save as.
- Add a name to the workflow and click Ok.
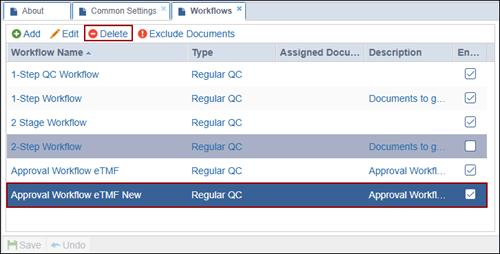
Delete Workflow
To delete a workflow, follow the steps below:
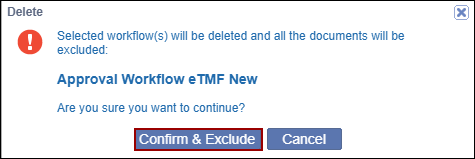
- Select a workflow from the list and click Delete from the top menu bar.
- Click Confirm & Exclude on the confirmation pop-up.
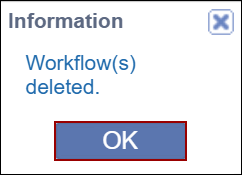
- Click OK.
 Note: Deleting an existing workflow will result in the removal of any related status from documents previously processed as a part of the deleted workflow.
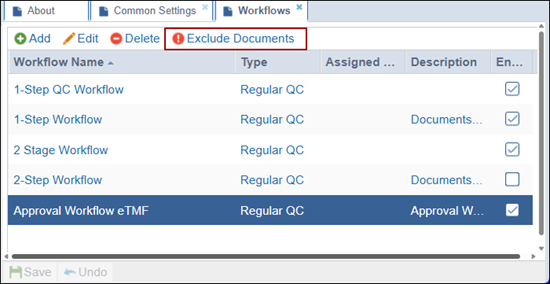
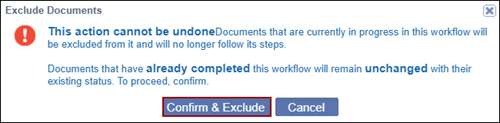
Exclude all documents
To exclude documents from the approval workflow, follow the steps below:
- Select an approval workflow and click Exclude Documents.
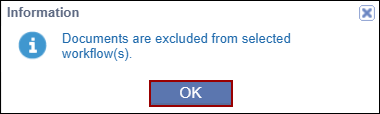
- Click Confirm & Exclude.
- Click OK on the pop-up window.
 Linkedin
 X
X
