Manage Columns
Explore Videos for more help:
Videos
Users can configure which columns are displayed in the Document Grid irrespective of the Card or Grid View selected. This function is not limited to the Documents module and any grid in the system can be configured to the users’ preferences.
Manage Columns – Card View
To manage columns within the Card View, follow the steps below:
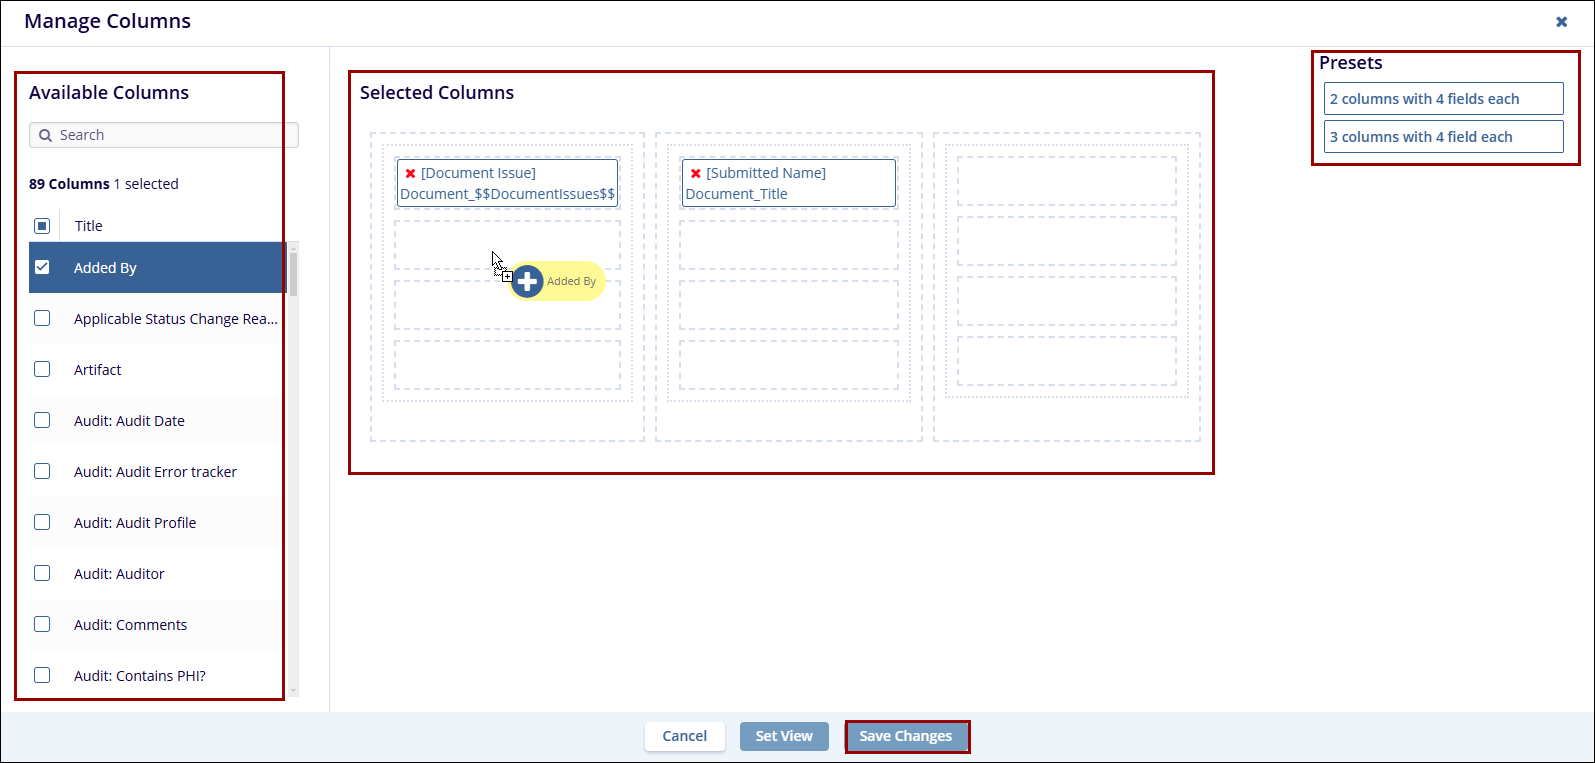
- Click the Manage Columns button from the top-right corner of the documents
grid. This opens the Manage Columns window.

- The Manage Columns window will open which displays the following panels:
- Available Columns Panel: This panel displays the list of all available columns in a room.
- Selected Columns Panel: This panel displays the list of all columns that are selected and added from the Available Columns.
- To add a column to the Selected Columns pane from the Available Columns pane, drag & drop a column within the selected preset in the Selected Columns panel.
- Alternatively, double-click on the columns in the Available Columns to add to the Selected Columns.
- To remove the columns, click on the x icon of a particular column within the Selected Columns section.
- Rearrange the columns sequence by dragging and dropping the columns into the desired order.
- Click on the Save Changes button.
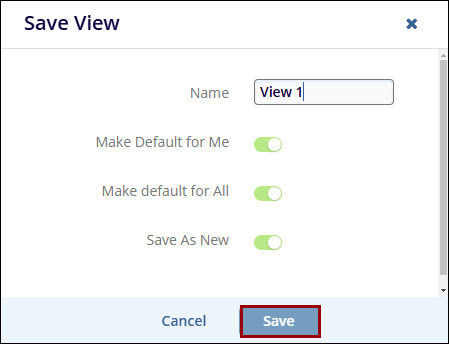
- On the Save View popup window, perform the following
- Name: If the view is new, provide a unique name. For an existing view, leave the name unchanged, if required.
- Make Default for Me: Choose whether this view shall be set as default by enabling the toggle switch.
- Make Default for All: (Admins Only) Select whether this view should be the default for all users in the room. Users can change their default view later, but this will initially set the view for all users.
- Save As New: Decide whether to save this as a new view by enabling the toggle switch. For editing an existing view, do not select the option to save it as a new view.
- Click on the Save button.
- Once saved, the view will be listed in the available views, which can be accessed
from the Views dropdown menu at the top-right of the Grid.
- Once the view(s) are configured, users can perform the following
- Save View
- Share View
- Manage Views
Manage Columns – Grid View
To manage columns within a Grid View, follow the steps below.
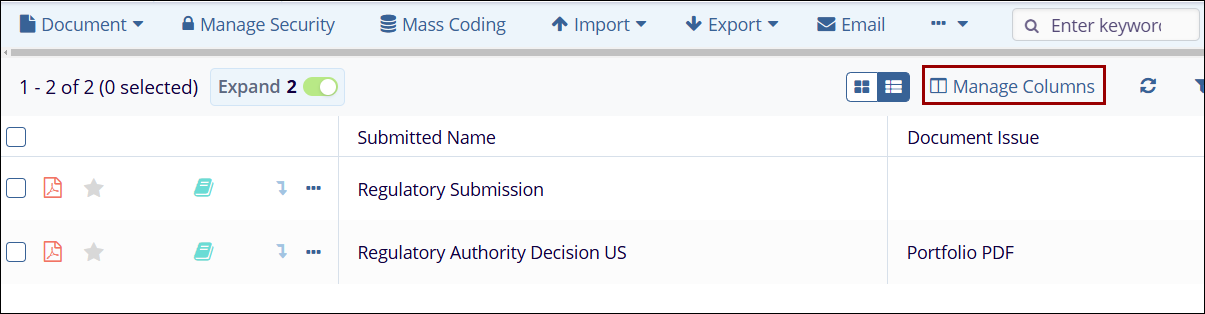
- With the Grid View selected, click on the Manage Columns button.
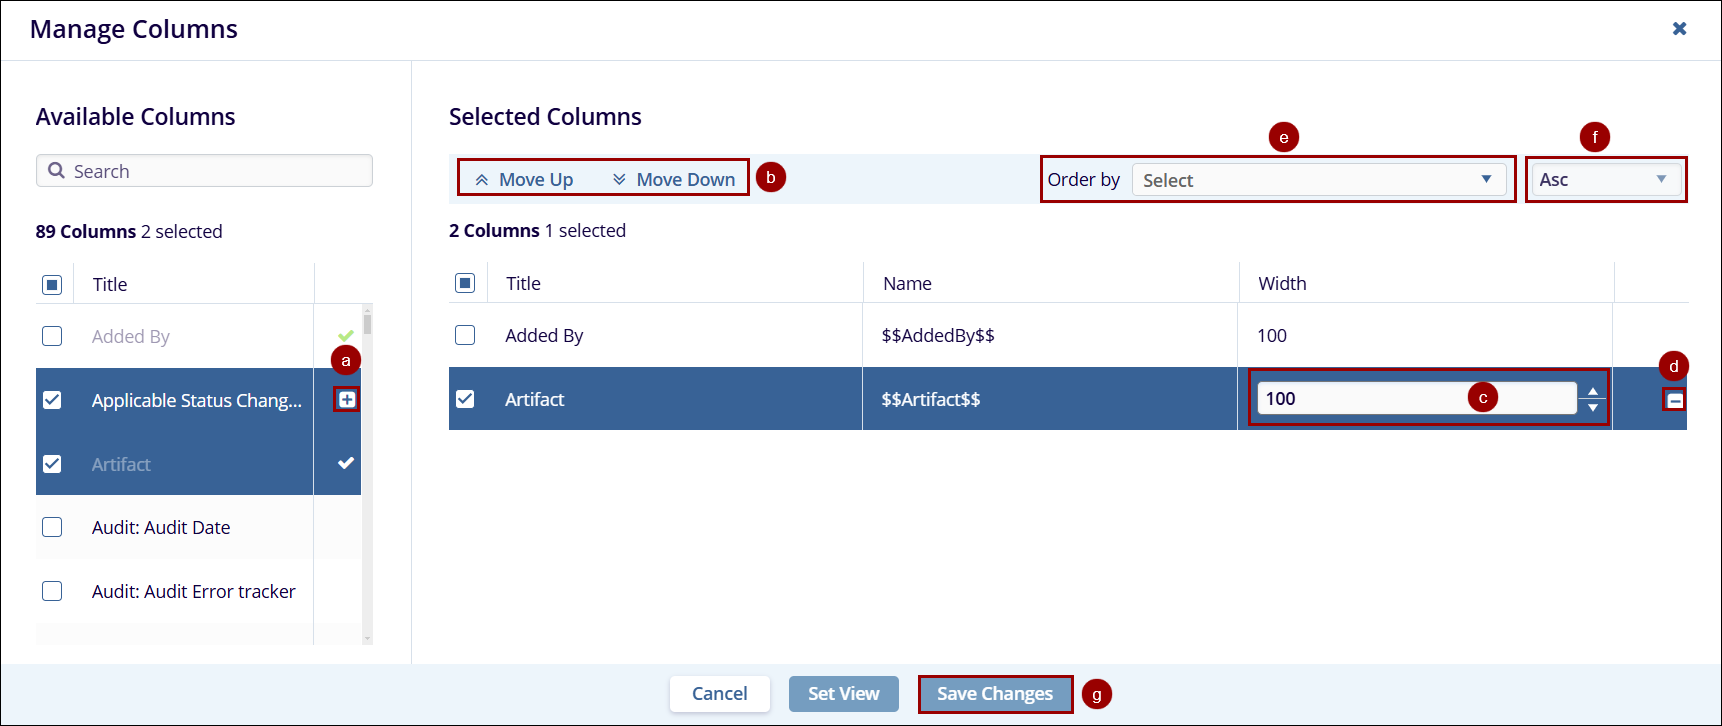
- On the Manage Columns screen, perform the following
- Select column headers from the Available Columns section and add them to the Selected Columns section.
- In the Selected Columns section, select a column and click on the Move Up and Move Down arrows to re-arrange the order of the columns.
- Adjust the width of the column by increasing or decreasing the value.
- Click on the - sign to remove the column from the Selected Columns list.
- Click on the Order by dropdown and select the criterion from the available dropdown options.
- Sort the columns in Ascending and descending order by selecting the necessary option.
- Click on the Save Changes button.
 Linkedin
 X
X
