My Queries
My Queries in the eTMF allows the users to view and manage queries related to the documents they are working on. Queries could be either sent (by the user to someone else) or received (from others to the user). This helps to track the status of queries and allows the user to take actions such as responding to or exporting query details.
Follow the steps below to use My Queries:
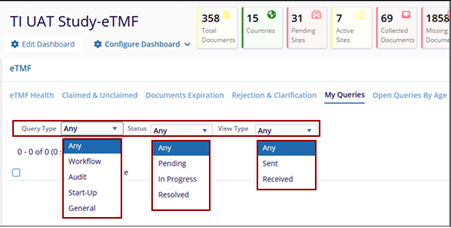
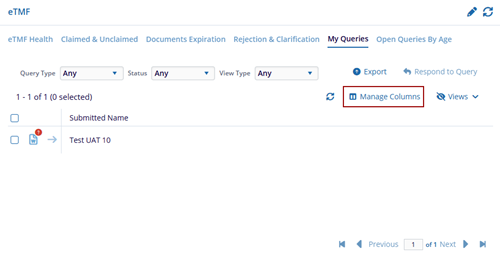
- In the eTMF dashlet, and select the My Queries tab.
- Use the dropdown filters for the following:
- Query Type:
-
Any – Displays queries from all available query types.
-
Workflow – Filters and displays queries related to workflow processes.
-
Audit – Shows queries associated with audit activities.
-
Start-Up – Displays queries related to study start-up activities.
-
General – Shows general queries that do not fall under specific categories.
-
- Status:
-
Any – Displays records with all status types.
-
Pending – Shows records that are awaiting action or review.
-
In Progress – Displays records that are currently being worked on.
-
Resolved – Shows records that have been completed or closed.
-
- View Type:
-
Any – Displays all items regardless of their communication status.
-
Sent – Shows items that have been sent to recipients.
-
Received – Displays items that have been received from senders.
-
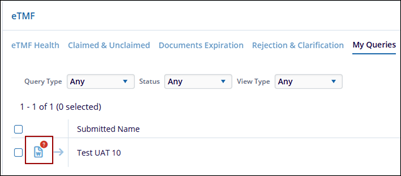
- Query Type:
- Select the required and appropriate checkboxes from the submitted name column.
-
The red color symbol indicates that the document has an open query.
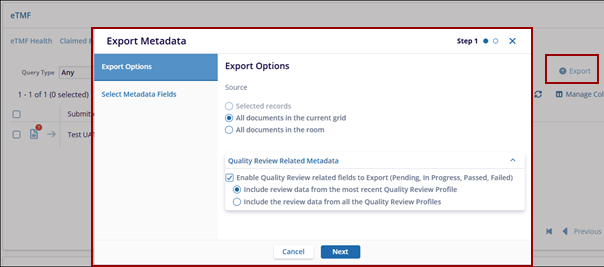
- Click the Export button to get the query data in a suitable format for further analysis or reporting.
- The Export Metadata pop-up window is displayed choose from the Source options:
- Selected records
- All documents in the current grid
- All documents in the room
- Choose whether or not the export should include Quality Review (audit) related
Metadata.
- If you choose to export Quality Review Related Metadata, indicate whether all information should be provided or only the information from the most recent Quality Review Profile.
- Press Next.
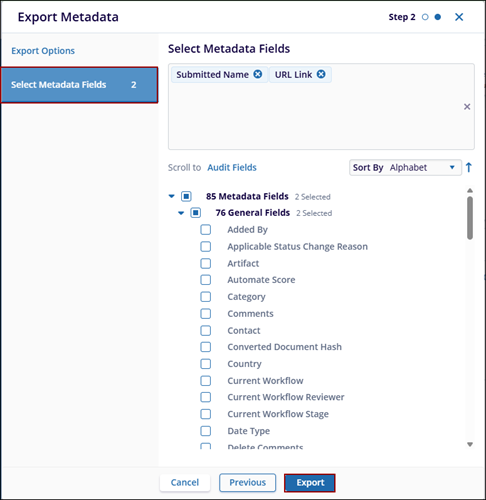
- Choose which metadata fields should be included in the export.
- Press Export.
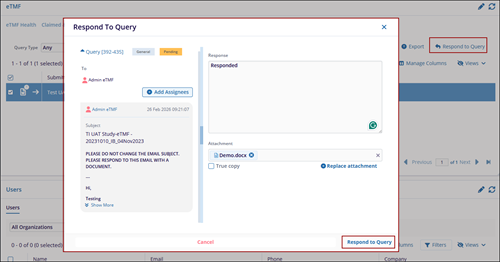
- Click on the Respond to Query option. The Respond To Query pop-up window is displayed.
- In the Respond to Query pop-up window, the user can view the raised query in Pending status. Additionally, the user can add assignees by clicking the Add Assignees button.
- Enter the response in the Response box. If the user has any additional documents or information related to the query, they can attach them by clicking the Add Attachment button.
- Click Respond to Query button.
- Click Manage Columns to adjust the visible information in the table.
- The Manage Columns window will open which displays the following panels:
- Available Columns Panel: This panel displays the list of all available columns in a room.
- Selected Columns Panel: This panel displays the list of all columns that are
selected and added from the Available Columns.
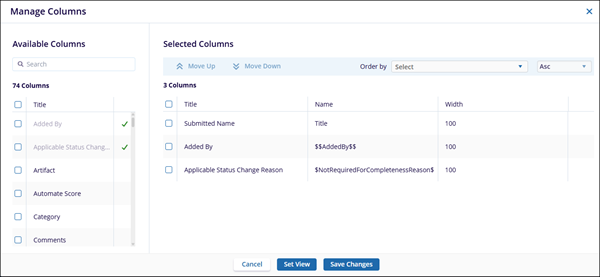
- Once, the columns are selected click Set View or Save Changes.
 Linkedin
 X
X
