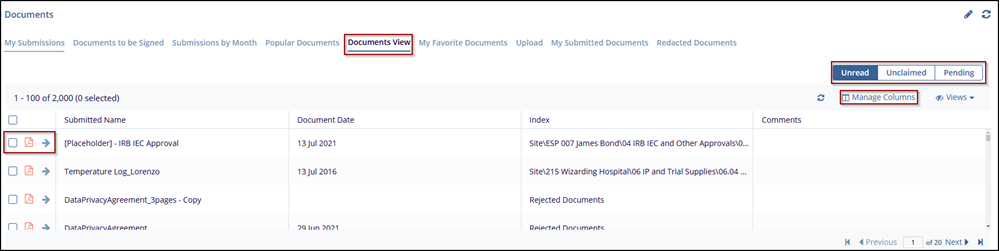
Document View and Upload
This tab displays the documents in a grid column with a selection tab for – Unread, Unclaimed, and Pending.
Steps to review documents view:
- Click on Documents Views, next to popular Documents.
- Select the required and appropriate checkboxes from the Submitted name option to select the document, next to the checkboxes, the user can click on the blue arrow (Go to the document), which will navigate to the document index.
- To view the Document, click on the PDF icon (for detailed steps, refer Document to be signed 3rd step to the 11th step).
- To customize the columns displayed in the document list, click Manage Columns
and select or deselect columns as required to view.

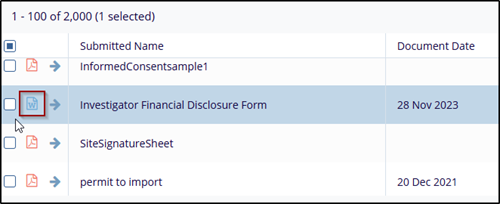
- By clicking on the Word icon, the Word file window will open with the document.

-
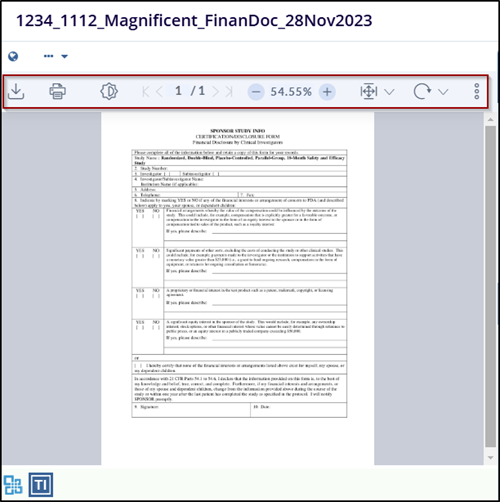
User can perform various actions, such as (Print, download, page navigation arrows, zoom options, full page, turn page, search Icon, image processing menu, show and hide)

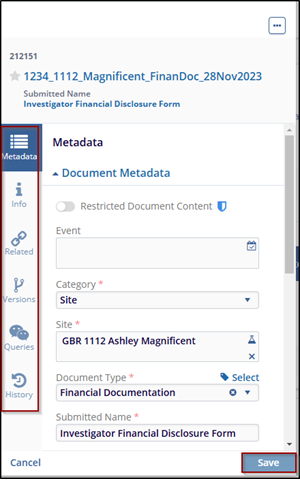
- On the right side of the word file, where the user can find the document Metadata,
Info, related, version, queries, and history section, after updating metadata or
making any necessary changes, click Save to apply the changes. (For detailed
steps refer to Documents to be signed 4th step)

Favorite Documents
The My Favorite Documents tab displays the list of documents that have been marked favorite from the Document Index and allows quick access to frequently used documents.
Steps to view and add documents to my favorite:
- Click on the My Favorite Documents tab from the Documents dashboard.
- Review the list of documents marked as favorites from the document index, displayed with their details (e.g., Submitted Name, Index, Last Updated By).
- Click on Export to Download the document to the local system.
- Click the star icon or the Remove from Favorites button to unmark the document as a favorite.
- Use the pencil icon or Edit Comments option to add or update comments.
- Delete any existing comments using the Remove Comments button.
- Click Manage Columns to adjust the visible information in the table.
- Use the navigation controls Previous and Next to switch between pages of documents.
- Click the refresh icon to update the list with any recent changes.

The Upload dashlet allows users to drop files from their desktop into the room with assistance so that documents can be quickly uploaded and indexed. The function of the dashlet is impacted by the user’s specific role in the system, and it will assist in directing the user’s document to the correct folder as appropriate.
Steps to upload the document:
- Navigate to the Documents dashboard and select the Upload tab.

- In the upload section, the user can drag and drop files directly into the designated Upload box or click on drop file and folder to Browse File or Browse Folders to locate files from the system.
- After selecting the files, the user can set them as Restricted Document Content by checking the box if necessary.
- Once files are ready, click Import All & Apply Metadata to complete the upload
process or click Cancell to discard the changes.
