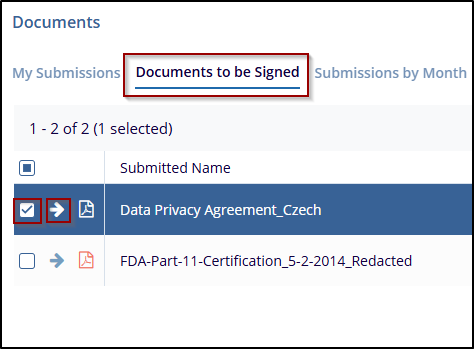
Documents to be Signed
In the Documents section, select Documents to be Signed from the options at the top. This view will display a list of documents awaiting signatures, along with details like the document’s Submitted Name and current signer status.
Steps to view and manage Documents to be signed:
- Click on Documents to be signed tabs.
- Select the required and appropriate checkboxes from the submitted name column to
select the document, the user can click on the blue arrow (Go to the document),
which will navigate to the document index.
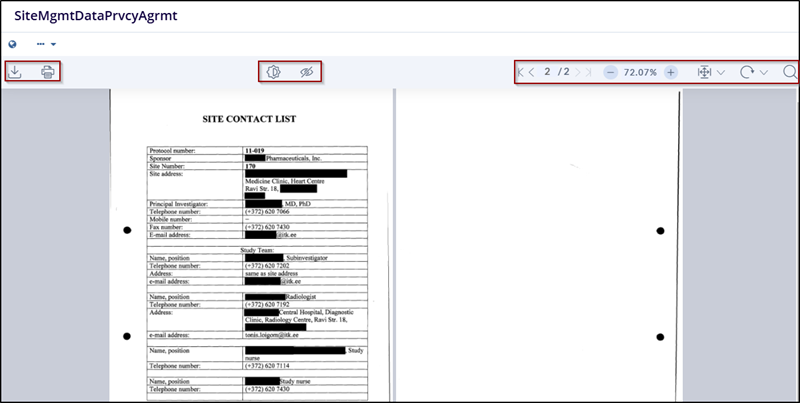
- Click on the PDF icon will open a new window, The PDF opens in the window,
allowing the user to navigate through the pages using the controls at the top (e.g.,
Print, download, page navigation arrows, zoom options, full page, turn page, search
Icon, image processing menu, show and hide).
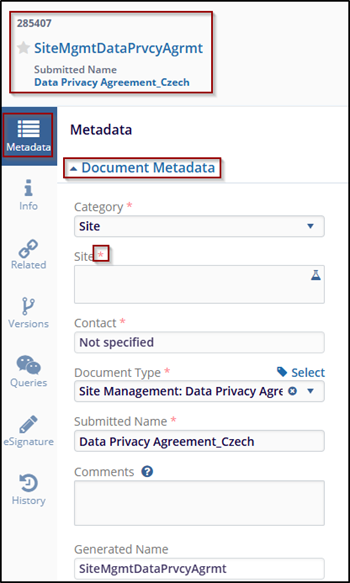
- The metadata panel on the right side of the PDF window displays a Tab that includes detailed document information, such as Document ID, Document name, submitted name, Metadata, Info, Related, Versions, Queries, signature, and History.
- Click on the Metadata Tab.
- Document Metadata holds metadata details as needed, select or modify the category, site, contact, and document type from the dropdown menus, fields marked with an asterisk (*) are mandatory
- Add or update comments related to the document.
- Save changes using the Save button or cancel to discard the changes.
- Workflow History shows the last history record.
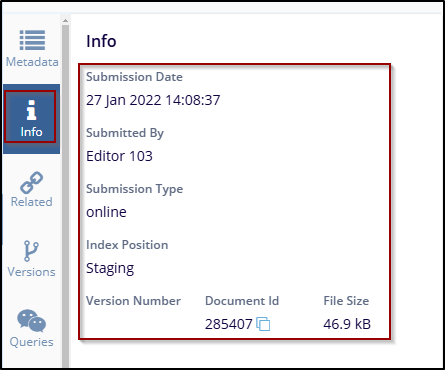
- Click on the Info Tab.
- Info field displays document Submission date, Submitted by, Submission type,
Index position, Version Number, etc.
- Info field displays document Submission date, Submitted by, Submission type,
Index position, Version Number, etc.
- Click on the Related Tab.
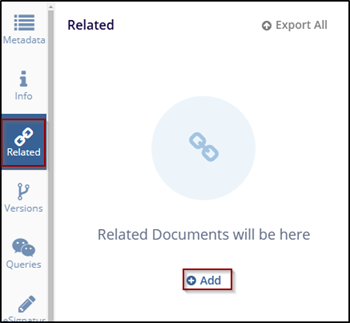
- Click the + Add button to open a new window to add related documents.
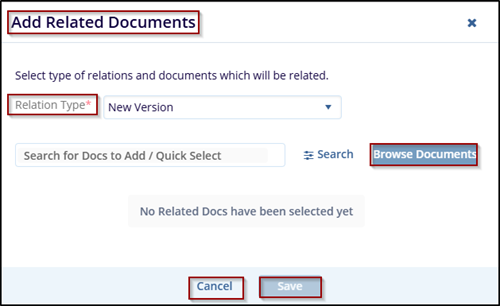
- From the pop-up window, select the relation type from the dropdown menu, and by clicking on the browser document, the document will be browsed from the document index folder and click on Save to apply the changes or click the cancel to discard the changes.
- Use the Export All option at the top-right to download all related documents
as a batch.
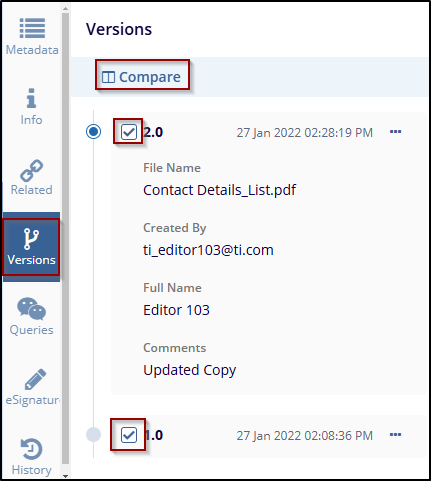
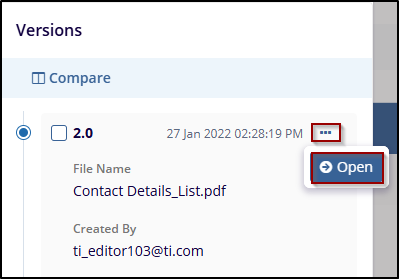
- Click on the Version Tab.
- Check both the checkbox to select the version and use the Compare
option to identify changes between both versions.
-
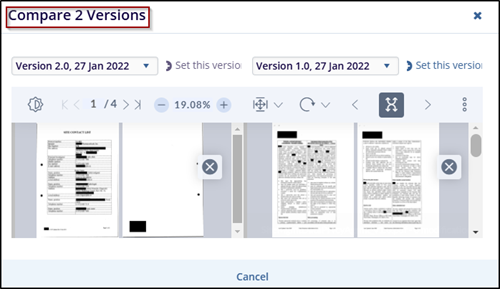
Click the compare option to open a new Compare 2 Version window.
-
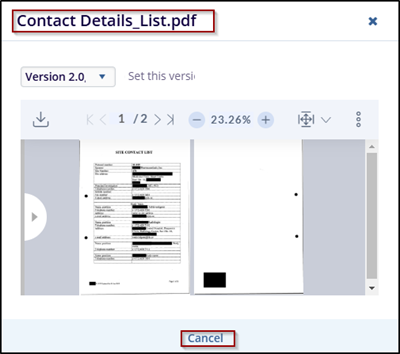
Click on three dots (…) next to the version number gives the option to open the contact details PDF, and click the Cancel to close it.
- Check both the checkbox to select the version and use the Compare
option to identify changes between both versions.
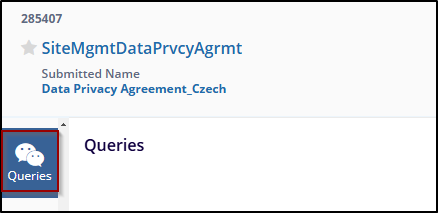
- Click on the Queries Tab.
- It will address the document-related queries in this section.
- It will address the document-related queries in this section.
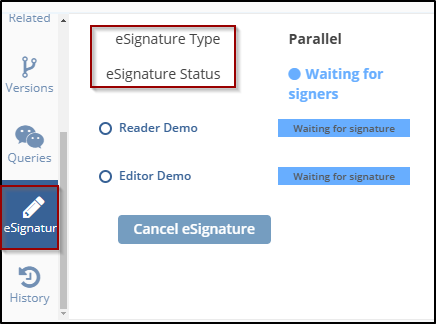
- Click on the eSignature Tab.
- The user can check and review the eSignature type workflow, and eSignature status.
-
Click the Cancel eSignature button to stop the current eSignature process, a confirmation pop-up appears with the message: "Are you sure you want to cancel the eSignature process?"

- The user can check and review the eSignature type workflow, and eSignature status.
- Click on the History Tab.
- This will display a history of the document, that is updated by and with
dates. The user can filter activities by Activity Type or specify a date
range using the From and To fields. Use the Refresh History option to update
the log with the latest actions.

- Use the Previous Document and Next Document buttons to navigate to other documents in the queue or list.
- This will display a history of the document, that is updated by and with
dates. The user can filter activities by Activity Type or specify a date
range using the From and To fields. Use the Refresh History option to update
the log with the latest actions.
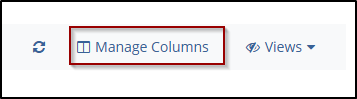
- To customize the columns displayed in the Document Dashboard, click the Manage
Columns, and a new window will pop up.
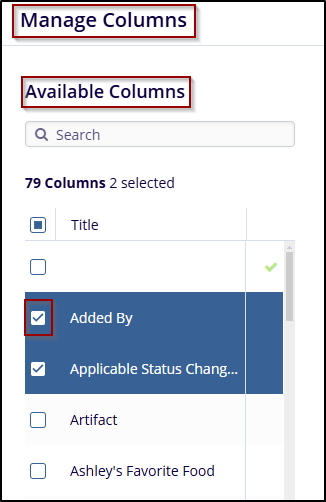
- On the left side of the manage column window, a list of Available Columns is used to add a title to the table.
- Users can use the search bar to find columns. Check the checkbox available for the
title that the user wants to add to their view.
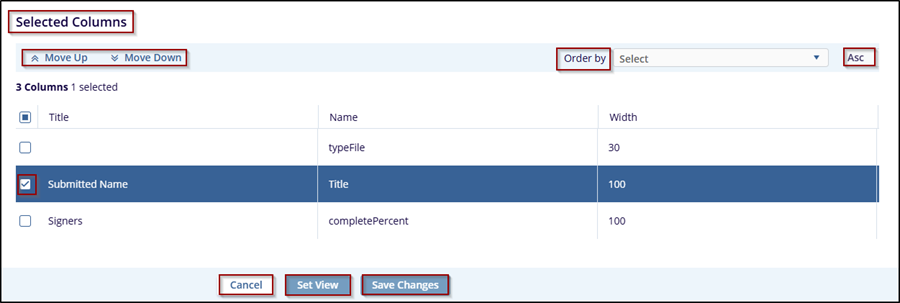
- In the Selected Columns section, the user can use the Move Up and Move Down buttons to reorder the columns in the selected list. For each selected column, the user can see its Title, Name, and Width.
- Use the Order by dropdown menu to select a column for sorting the data. Choose whether the user wants the sorting to be Ascending or Descending.
- After customizing the columns, click on Save Changes to apply the settings or the user can click Set View to apply and see the updated view. If the user wants to discard the changes, click on the Cancel button.
- To set your current selections and order as the default view, click Set View.
After finalizing your column selections and order, click Save Changes to
apply them to the document view.
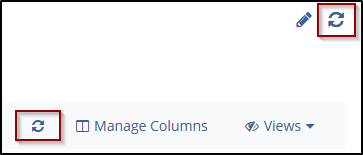
- Once the changes are applied, the user can click the Refresh icon to refresh
the Columns.
 Linkedin
 X
X
