View Document Security and Other Activities
Administrator-level users can apply specific document-level security via the Document Activities menu. Selecting View Document Security will open the Document Security window.
To view the document security, follow the steps below.
- Click on the three-dot menu and select the View Document Security option.
- The Documents Security window will display the users or groups with the access
permissions by default if the Inherit folder security is enabled.

- To add additional users or groups, disable the Inherit folder security setting and
click on the Browse All button.

- In the Browse Groups and Users window, switch between the Groups and Users tabs and select the desired groups or users.
- On the Groups tab, use the dropdown menu to filter groups by category.
- After selecting the required groups or users, click the Add (number of members) Members button.
- After adding the groups or users, click the Permissions dropdown to assign
the appropriate access level, such as Full Access, View Only, or No Access and click
on the Save button.

Certify Document
For studies in which the document certification option is in use, a user can either choose to indicate that a document is a certified copy upon upload or it can be done via the Document Activities Menu.
To certify a document, follow the steps below:
- Open the Document Activities menu by right-clicking on a document or using the three-dot icon on the grid.
- Select Certify Document.

- Read the criteria and press Finish if the document meets all expectations.

- Use the Email and Password to Login and complete the process.

Once a document has been deleted, an administrator-level user will be able to navigate to the Deleted Documents view of the Documents module and, if desired, purge the document. Most deleted documents do not need to be purged from a study room unless necessitated by an internal SOP. However, some documents, such as those that contain PHI or PII, would likely be purged out of an abundance of caution.
To purge a document, follow the steps below:
- Navigate to the Deleted Documents view.
- Locate the document that was deleted. Documents are sorted by the user who deleted them and additional column selection and filtering are available as in other areas of the system.
- Click on the Purge button.

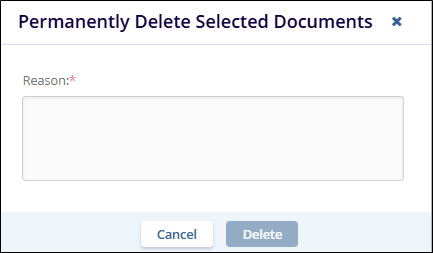
- Mandatorily provide a reason on the Permanently Delete Selected Documents popup.
- Press the Delete button on the confirmation popup.

Set as Restricted Document
The Set as Restricted Document Content option locks the un-redacted (source) documents only to users with the permissions to access the original documents. All other users will have access only to the redacted documents.
To enable this setting, follow the steps below:
- Click on the three-dot menu and select the Set as Restricted Document Content option.
- On the Set As Restricted Document Content popup, click on the Yes button.

- To remove the restricted documents content, click on the three-dot menu and select
the Remove Restricted Document Content option.

- On the Remove Restricted Document Content popup, click on the Yes button.

This option enables users to replace the current uploaded document attachment or URL link with a new one.
To replace an existing attachment or URL with a new one, follow these steps:
- Click the three-dot menu and select the Replace Attachment / URL option.
- In the Replace Attachment / URL window, choose either the File or URL option.
- If the File option is selected, upload the new document into the Attachment File* field.
- If the URL option is selected, enter the new URL in the URL* field.
- Provide a reason for replacing the attachment or URL.
- Click the Apply button after adding the new attachment or URL.
