Configure Metadata Fields
On the Forms Settings page, administrators can add, edit or delete custom metadata fields as well as configure their availability and visibility across the system.
Add
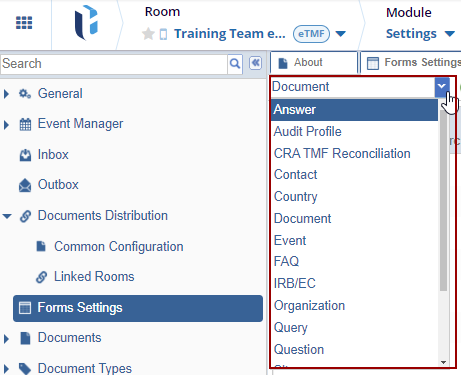
- Select a form category from the dropdown, and click +Add from the top
menu bar.
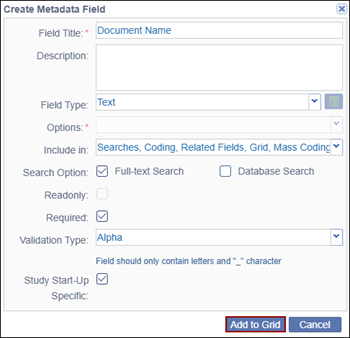
- On the Create Metadata Field pop-up window, fill in all the required fields.
- Field Title*: Mandatory enter a field title
- Description: Optionally enter a description
- Field Type: Select a field type from the dropdown options
- Options: If the Field Type is Boolean the following options can be selected
- Checkbox: Displays the values as a list, allowing users to select one or more options.
- Radio: Displays the values as a list, requiring users to select only one option.
- Combo: Provides a dropdown list from which users can select only one option.
- Include in: Click the dropdown arrow and select the appropriate option from the list.
- Search Option: This option is available when ‘Searches’ is selected in the ‘Include in’ field. Select ‘Full-text Search’ and Database Search.
- Select either ‘Read-only’ or ‘Required’ by selecting the checkbox.
- Validation Type: The options in this field are dependent on the field type selected. Select a validation type from the dropdown options.
- Study Start-Up specific: Optionally check the Study Start-Up specific checkbox.
- Click Add to Grid, and the created field gets displayed in the
grid.
Edit
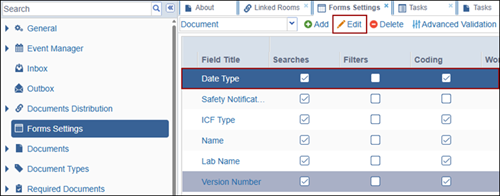
- Select a metadata field from the grid and click Edit from the top
menu bar.
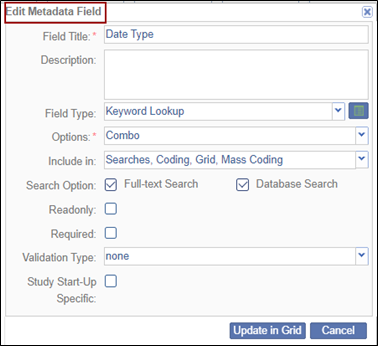
- Make the required changes in the available fields in the Edit Metadata Field pop-up window
- Click ‘Update in grid’ at the bottom of the window.
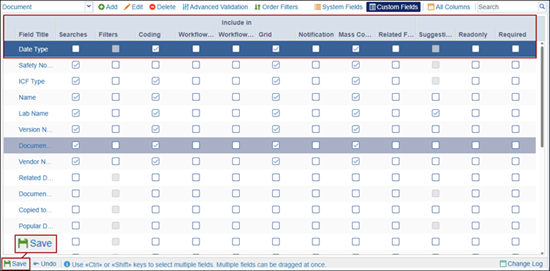
- Additionally, to configure the metadata field usage and availability, check
or uncheck the following checkboxes on the Forms Settings page.
- Searches
- Filters
- Coding
- Workflow Fields
- Include in Workflow Actions
- Grid
- Notifications
- Mass Coding
- Related Fields
- Suggestions
- Readonly
- Required
- Click save once the required changes are made.
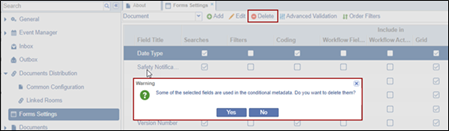
Delete
- Select the metadata field to be deleted and click Deletefrom the top menu bar.
- On the Warning pop-up, click Yes.
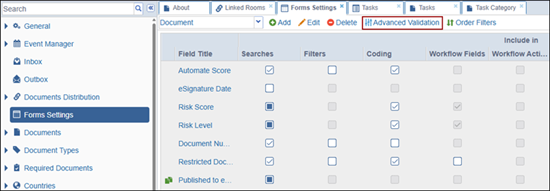
Advanced Validation
- Click Advanced Validation from the top menu bar.
- Click Add in the Advanced Fields Validation panel on the left to add
a criteria condition.
.png)
- Double-click the New Criteria field to rename the field.
.png)
- To delete criteria condition, select the added criterion and click the
Delete button.
.png)
.png)
- Click the Move Up and Move Down arrows to rearrange the order of the added
criteria conditions.
.png)
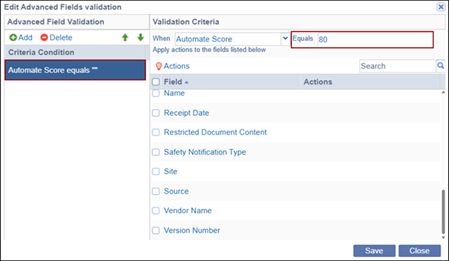
- Click the drop-down arrow next to the When field and select the
metadata field that will trigger an action in another metadata
field.
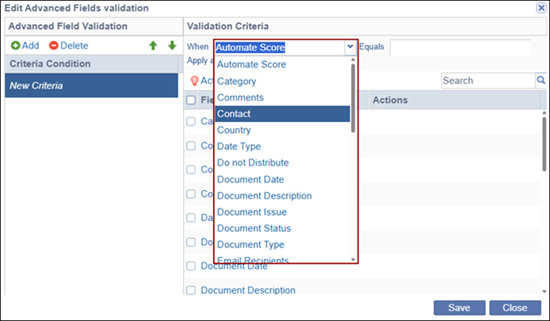
- Enter a value on the Equals field or select a value from the available
dropdown actions.
 Note:
Note:- The ‘Equals’ field dynamically adjusts based on the value selected in the ‘When’ field.
- For fields that require selecting data from a predefined list, users must choose a value from the available dropdown options.
- For example, when a date-related metadata field is set to Equal to, the Equals field displays a calendar picker; in certain scenarios, it may instead appear as a text box to allow manual entry.
- Select a one or multiple fields from the available list.

- Click the Actions button.
- Define the field behavior by selecting the following and click on the
Apply button.
- Make Required
- On
- Off
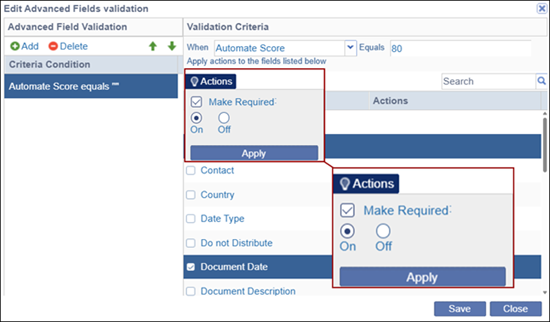
- Click Save and the selected Action will apply to the selected fields
when the validation criteria set are met in a particular document’s
metadata.

Important:
- In the above example, the validation rule is defined as: When Automate Score is set to 80, the Comments and Document Date fields becomes required.
- This means that when users upload a document and the configured Automate Score for that document type is 80, they are required to enter values in the Comments and Document Date fields before they can proceed.
Order Filters
- Click Order Filters from the top menu bar.
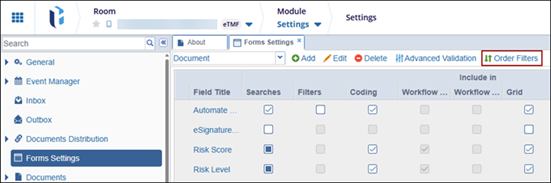
- Click Order A-Z or Order Z-A to arrange filters in ascending and descending order respectively.
- Additionally, drag & drop the fields in the desired order.
- Click Update in Grid.
.png)
System Fields
System fields are metadata fields that are predefined and managed by the system rather than created by users. Users can modify how these fields are used and whether they are available by selecting or clearing the corresponding checkboxes on the Forms Settings page. A green icon indicates that the field has an associated related field.
.png)
Custom Fields
Custom fields are user defined metadata fields which can be configured with specific data types (e.g., text, date, dropdown) and validation rules to ensure consistency and relevance to the user's workflow.
.png)
 Linkedin
 X
X
