Document Conversion & Certification
Document Conversion
To configure the document conversion settings, follow the steps below.
- Navigate to Room Settings > Documents > Document Conversion.
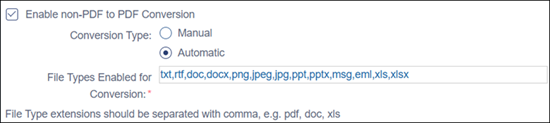
- Check the Enable Non-PDF to PDF conversion checkbox and select any one of the
conversion types options:
- Manual
- Automatic
-
Specify the file type extensions, using a comma-separated format, that should be enabled for conversion.
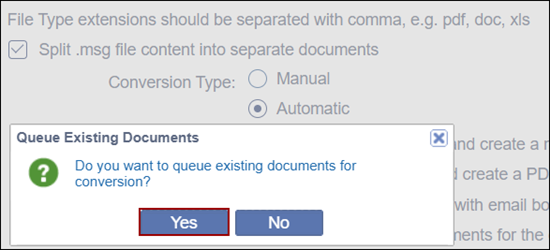
- Enable the Split .msg file content into separate documents checkbox.
- Select either Manual or Automatic as the conversion type.
- If the Automatic is selected, the Queue Existing Document pop-up is displayed. Click
Yes to queue existing documents for conversion and vice versa.
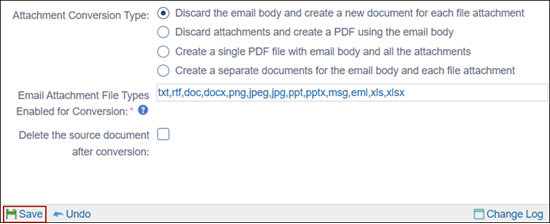
- As the ‘Attachment Conversion Type’ select any one of the options by clicking on
their radio button.
- Discard the email body and create a new document for each file attachment.
- Discard attachments and create a PDF using the email body
- Create a single PDF file with email body and all the attachments
- Create a separate document for the email body and each file
attachment

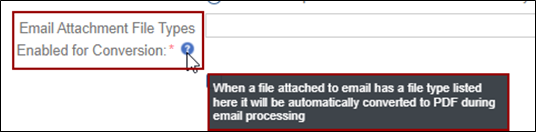
- Specify the file types in the Email Attachment File Types Enabled for Conversion
which will automatically be converted to PDF during email processing.
- Enable or disable the Delete the source document after conversion to delete the source document post conversion.
- Click Save once the settings are configured.
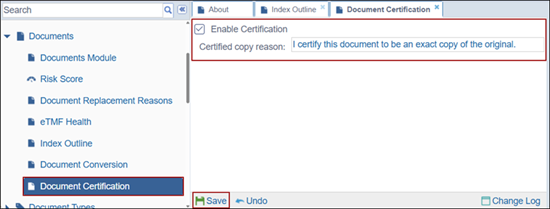
Document Certification
To configure the Document Certification reason, follow the steps below:
- Expand the Documents dropdown from the Settings page and select the Document Certification option.
- Check the Enable Certification checkbox.
- Enter a reason in the Certified copy reason and click Save.
 Linkedin
 X
X
