Index Outline
The Index Outline settings define how documents and folders are structured, displayed, and managed within the room’s index. These settings allow administrators to configure folder naming conventions, control the visibility of empty folders, enable or disable auto-indexing and document finalization, and manage how documents are added, staged, or rejected within the index.
To configure the index outline settings, follow the steps below.
- From the Settings page, expand the Documents dropdown and select Index Outline
option.
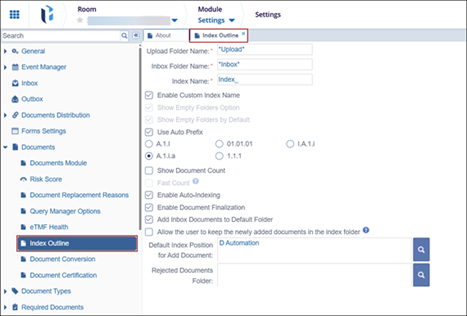
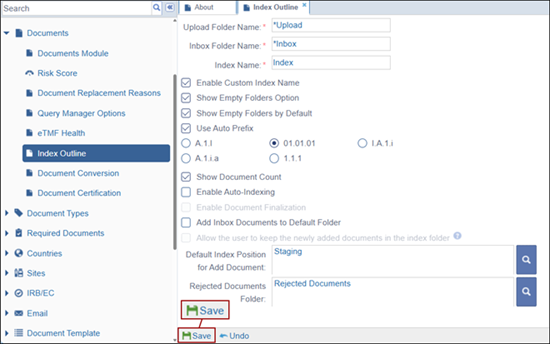
- On the Index Outline settings page, configure the following settings.
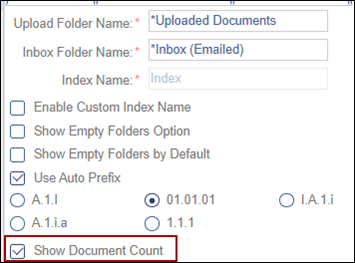
- Upload Folder Name: Mandatorily enter a name in the Upload Folder Name field.
- Inbox Folder Name: Mandatorily enter a name in the Inbox Folder Name field.
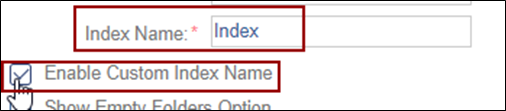
- Index Field: Mandatorily enter a name in the ‘Index Field’ name.
- Enable Custom Index Name: Select the checkbox to enable configuring the
Index Field name.
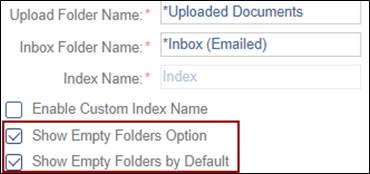
- Show Empty Folders Option: This option is enabled when the Show Document Count is checked.
- Show Empty Folders by Default: This option is enabled when the Show
Document Count is checked.
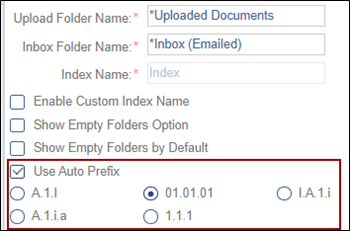
- Use Auto-Prefix: Check the Use Auto Prefix checkbox and choose a
numbering system by clicking on its radio button.
- Show Document Count: Enable the Show Document Count to display the count
of documents next to the folder name.
- Enable Auto-Indexing: Enable Auto Indexing to automatically route
documents to the appropriate index location based on the related
document-type profile.
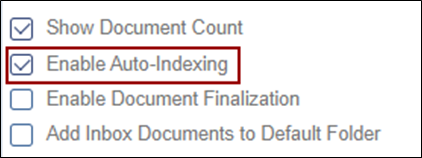
- Enable Document Finalization: Select the checkbox to enable finalizing
the documents. This setting is activated once the Enable Auto-Indexing
is enabled.

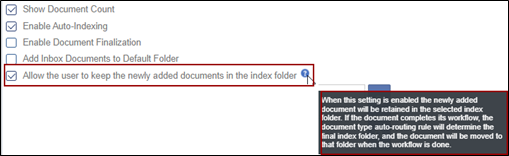
- Add Inbox Documents to Default Folder: Enable this setting to route any
document received through email inbox to the default folder.Allow the
user to keep the newly added documents in the index folder: Enable this
setting to retain the newly added document in the selected
index.
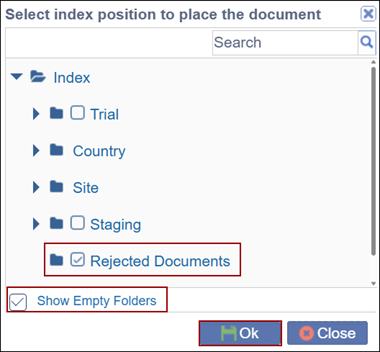
- Default Index Position for Add Document: To configure the default index
position, perform the following:
- Click on the search (magnifying glass) icon.

- Select a folder on the Select index position to place the document.
- Enable the Show Empty Folders checkbox and click Ok.

- Click on the search (magnifying glass) icon.
- Rejected Documents Folder: To configure the position for rejected
documents perform the following:
- Click on the search (magnifying glass) icon.

- Select a folder on the Select index position to place the document.
- Enable the Show Empty Folders checkbox and click Ok.
- Click on the search (magnifying glass) icon.
- Click Save at the bottom once the settings are configured.
 Linkedin
 X
X
